
Hello and welcome to the Crafty Power Blog! Here’s Birgit Koopsen with a guest post and tutorial for you today.
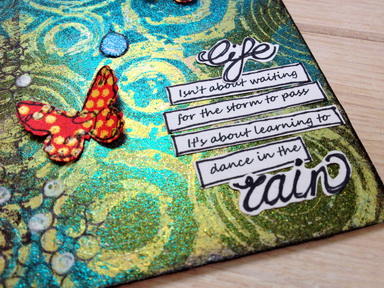
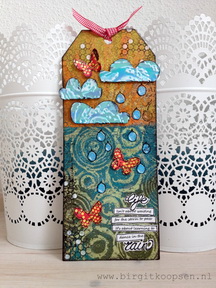 I think I can say I have a positive attitude, always trying to make the best of everything, so I guess the quote on this tag is quite appropriate. “Life isn’t about waiting for the storm to pass. It’s about learning to dance in the rain.” Maybe that’s also why I love bright colors so much. They just make me feel good.
Here’s how this tag was created:
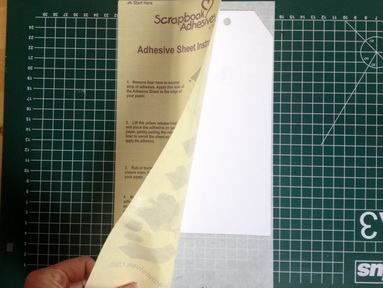
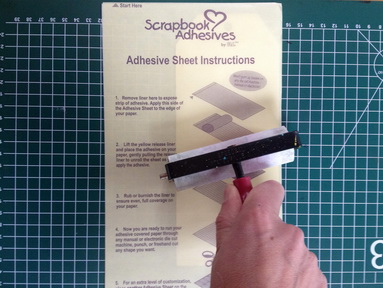
Put a large tag on a 6×12” Adhesive Sheet and replace the protective sheet on top. Use a brayer to firmly roll over the protective sheet to make sure the adhesive sticks to the tag well everywhere.
Remove the tag from the Adhesive Sheet. The tag should now be completely covered with a thin layer of adhesive.
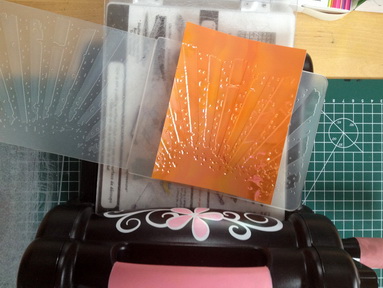 Take the desired colors of Shimmer Sheetz and emboss them using a selection embossing folders and an embossing machine.
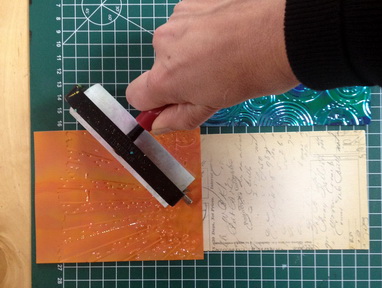

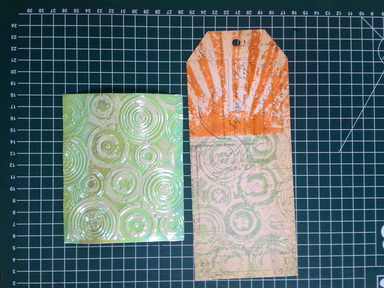 Place the embossed Shimmer Sheetz on top of the tag and roll them firmly with the brayer to transfer the top layer of the sheet to the tag. Lift up the sheet carefully to see if you’re satisfied with the transfer. If needed put it down and roll some more.
Then remove the sheet.
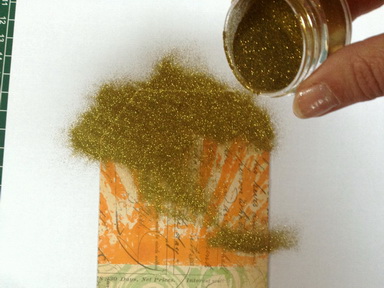
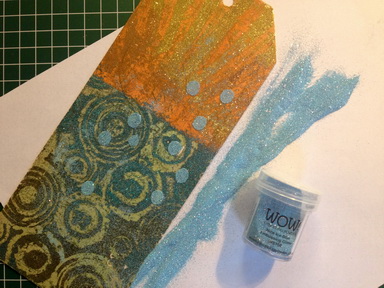
Add a color of Silk Microfine Glitter to part of the tag. Tap off the excess powder and then use a soft brush to remove any left loose glitter.
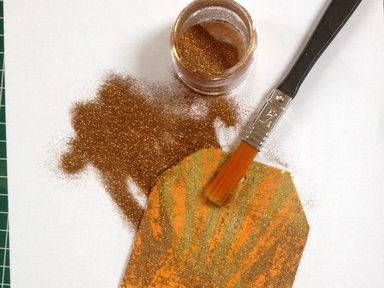 Add then next color of glitter as described above and continue until the whole tag is covered.
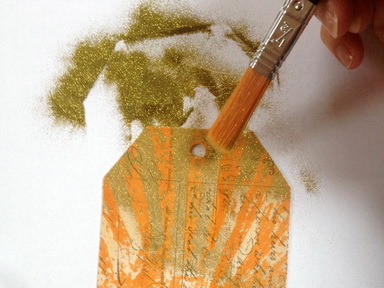
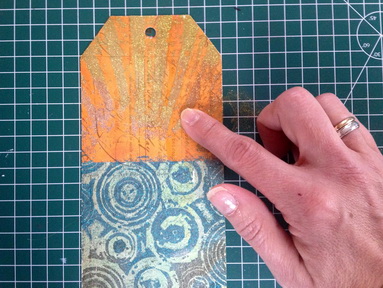 Use your finger to fixate the glitter. Moving in circles lightly rub it in. You will see that the glitter starts to shine and the colors getting more intense.
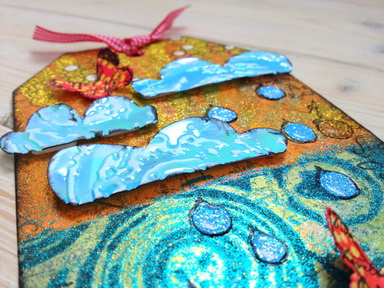
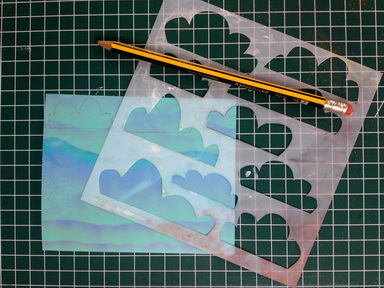 Use a stencil and a pencil to draw clouds on another piece of Shimmer Sheetz and cut them out.
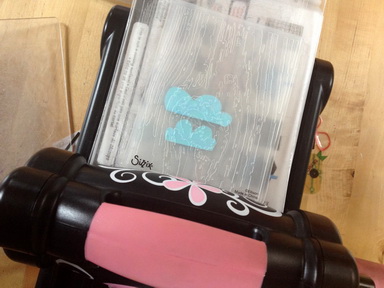 Emboss the clouds as described earlier.
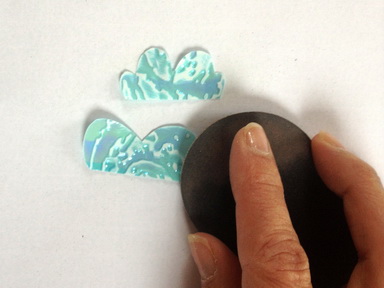 Sand off the top layer of the Shimmer Sheetz with sanding paper to reveal the white inside which will make the texture stand out more.
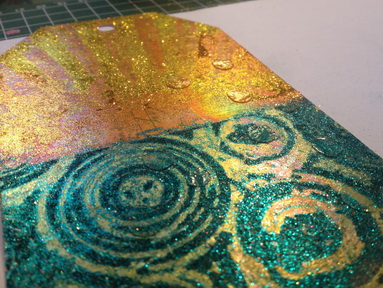
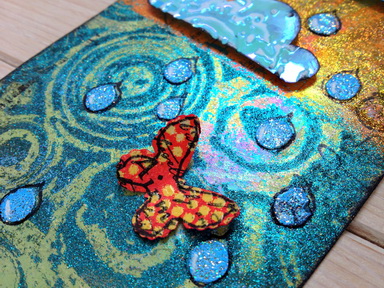
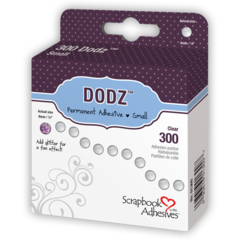
Randomly apply Dodz Adhesive Dots Small to the tag. These will become the rain drops.
 Cover the Dodz Adhesive Dots with embossing powder. Tap off the excess powder. If there is any embossing powder left in areas where you don’t want it use a soft brush to wipe it off. Then heat emboss the Dodz Adhesive Dots just long enough to make the embossing powder melt. If there are still some sticky spots after embossing (which might happen if you heat just a bit too long) simply add another layer of embossing powder and heat again.
To finish the tag:
Randomly stamp with background stamps and black ink such as Stazon. Highlight some parts with a white pen. Punch out little butterflies from scrap paper.
Use a black pen to outline the rain drops to make them stand out more. Also use Dodz Adhesive Dots to apply little die cut butterflies.
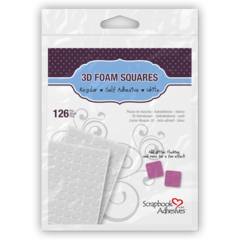
 Use 3D Foam Squares to adhere the clouds.
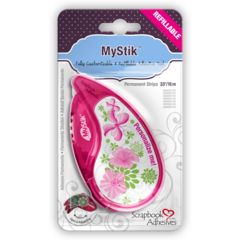
 Print and/or write your quote, cut it in strips and apply using MyStik® Permanent Strips.
 Ready!
I hope you enjoyed this tutorial! If so, please feel free to visit my blog, My Scrappin Life to see more of my work.
Wishing you a wonderful day! Happy crafting!
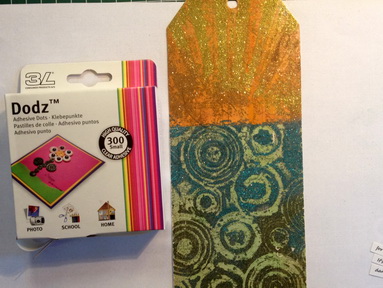
Supplies:
Scrapbook Adhesives by 3L®: Adhesive Sheets 6×12”; Dodz Adhesive Dots Small; MyStik® Permanent Strips Dispenser; 3D Foam Squares White Regular;
Shimmer Sheetz: Green Iris – Orange Iris – Blue Iris; Silk Microfine Glitter: Forest Green – Teal – Saffron – Yellow;
WOW! Embossing Powder: Nice Ice Blue Embossing Glitter
Denim Tampons (Stamps): Fond Ronds par Véro2A; Chiffres Journal par Meldon;
The Crafter’s Workshop: 6”x6” stencil Clouds
Embossing Folders – Rays & Retro Circles Set; Texture Fades Embossing Folders – Bricked and Wooden;
Other: Black Stazon ink, Black Pen, White Pen, Butterfly Punch, Brayer, Sanding Paper, Piece of Ribbon, Soft Brush, scraps of white cardstock and patterned paper;
By Vera Gieszen November 19, 2013 - 4:12 pm
Wow Birgit, looking great! I want to do this in my demonstration on our Big day with make & takes on December 21th. Thanks! Keep up the good work!! Dikke duim! Groetjes Vera