You are in our US store • Switch to Europe store

You’re So Cute Window Shaker Card

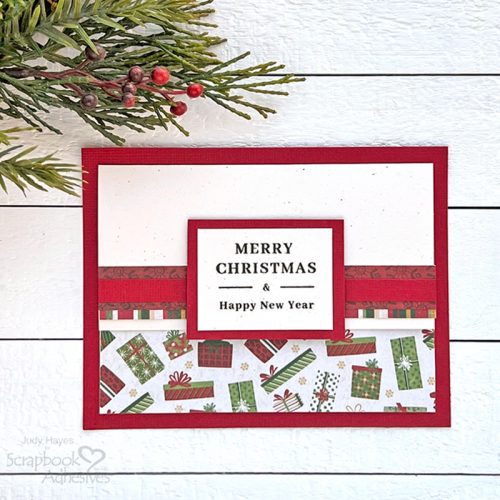
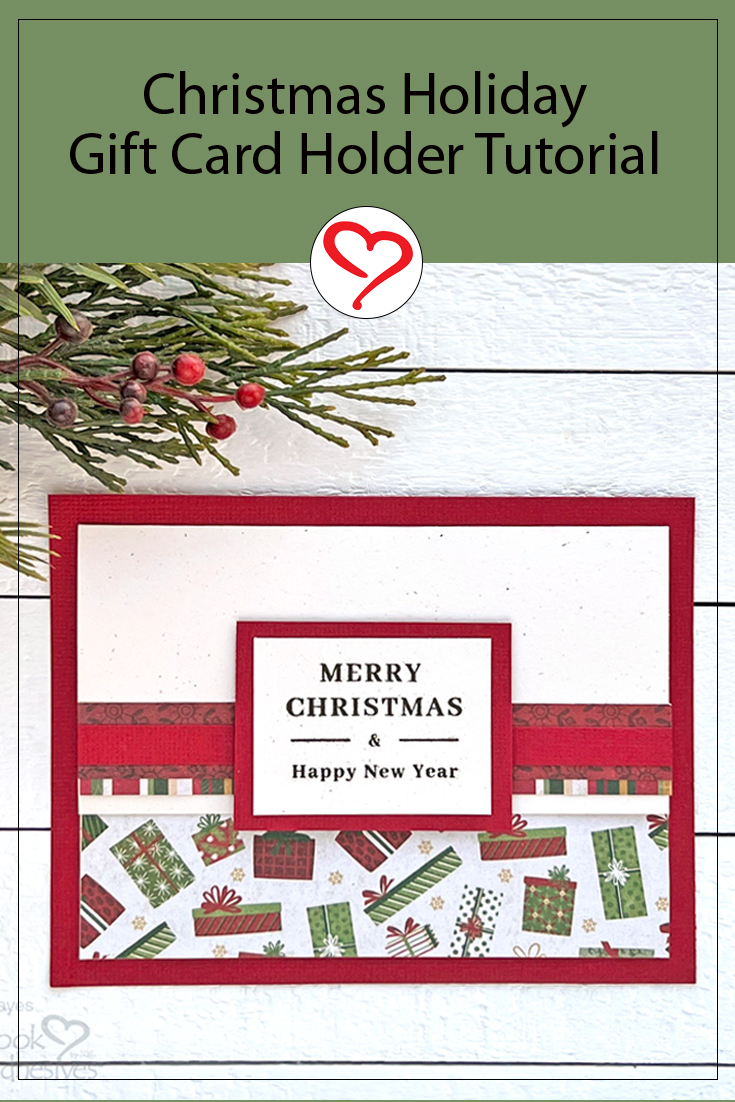
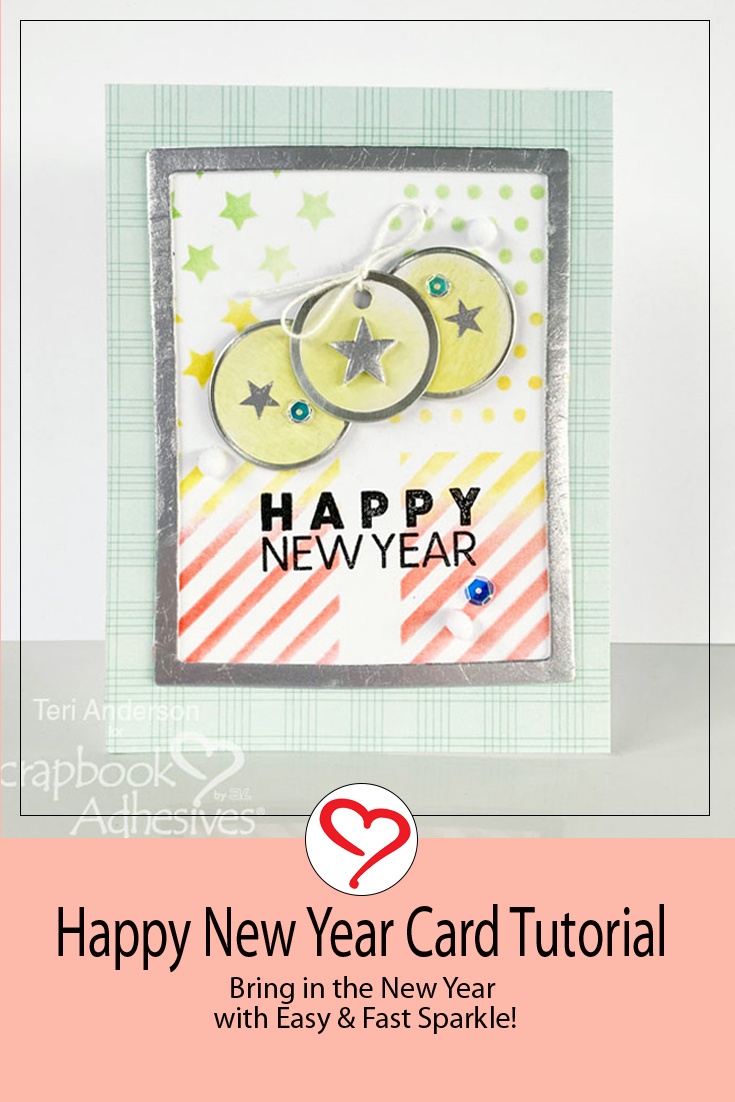
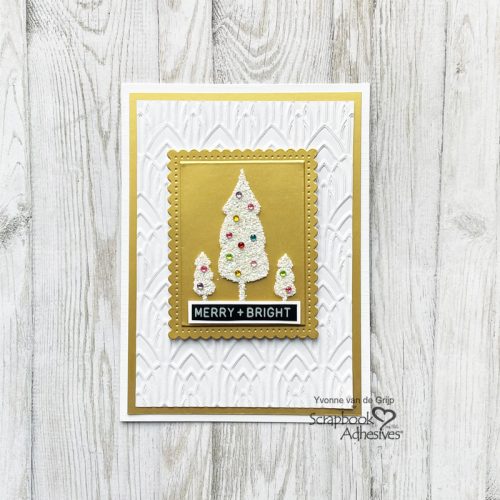
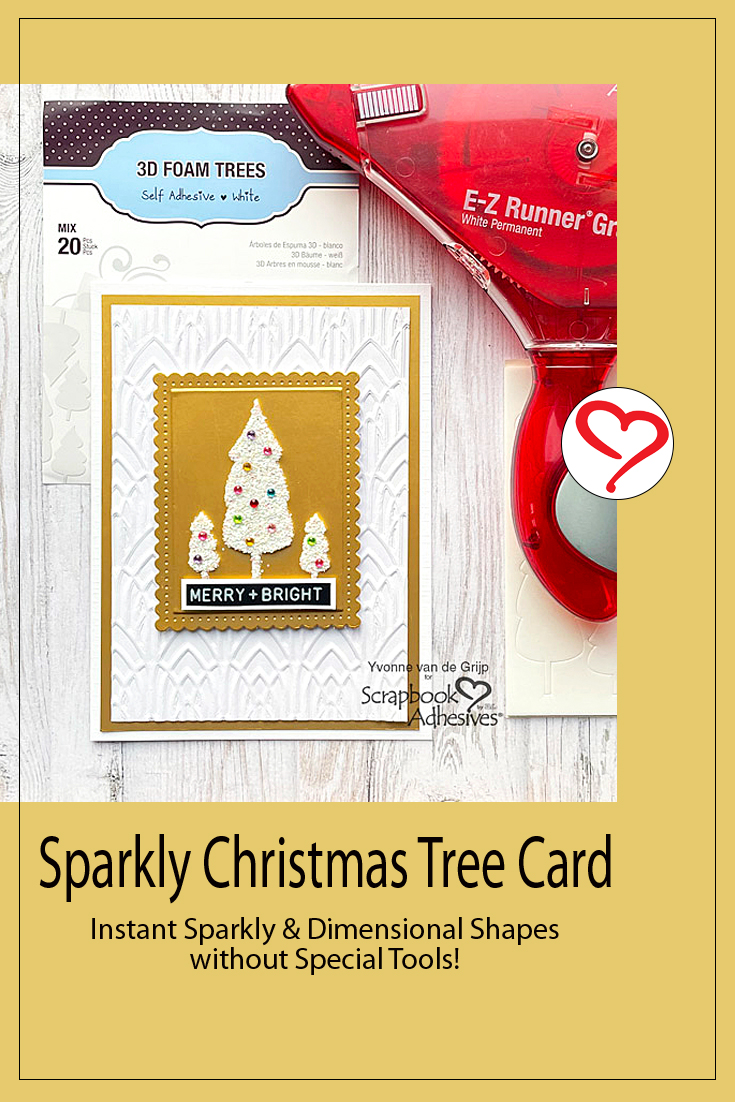
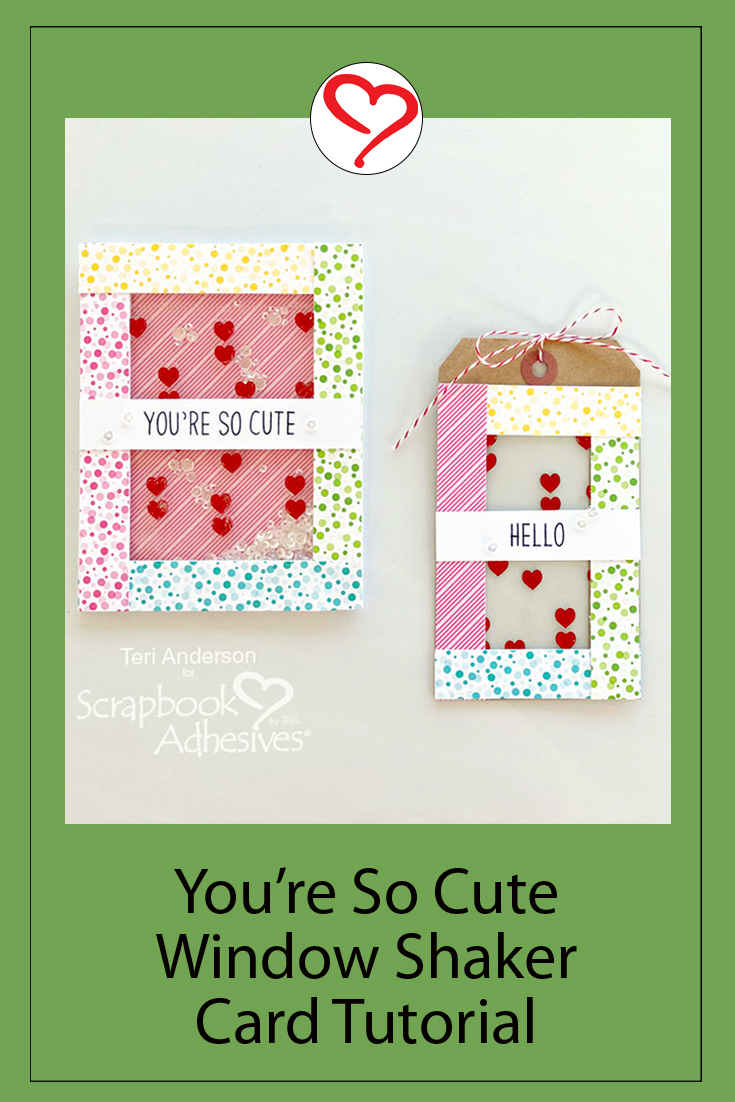
Hi, everyone! Like to make shaker cards? Teri here with a fun way to make a shaker card with a uniquely decorated window!

You're So Cute Window Shaker Card by Teri Anderson for Scrapbook Adhesives by 3L

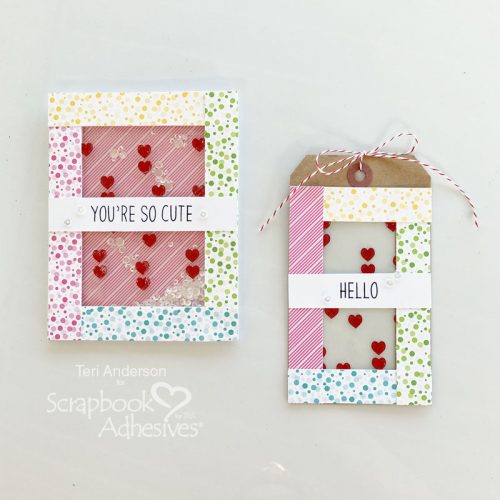
Window shaker cards are a snap to make with Self-Laminating Pouches in Medium!

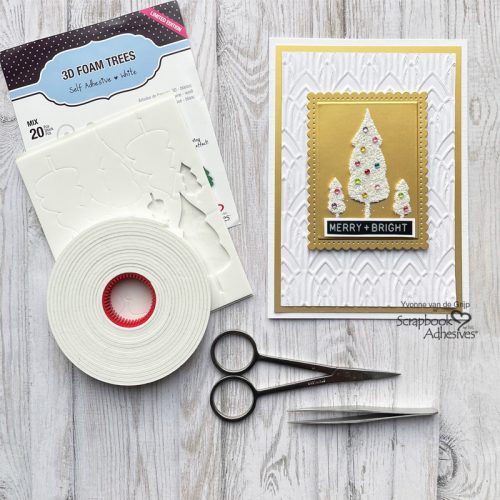
Create the Shaker Window and the Card Base

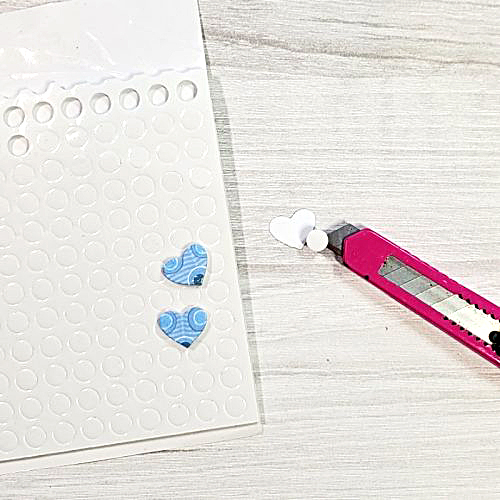
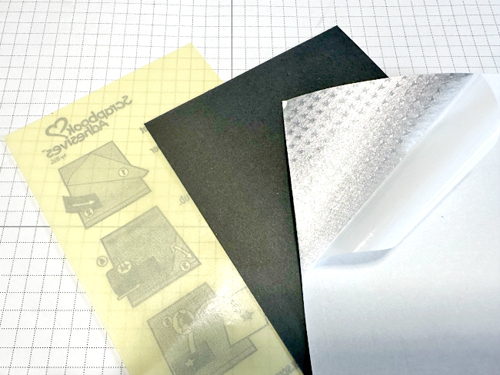
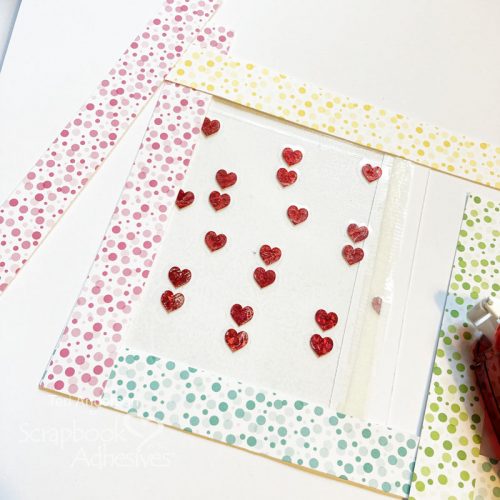
Start by opening up a self-laminating pouch, leaving the non-sticky side exposed. Randomly roll some hearts from the E-Z Runner® Hearts on it. Also, the E-Z Runner® Stars would work too!

You're So Cute Window Shaker Card by Teri Anderson for Scrapbook Adhesives by 3L

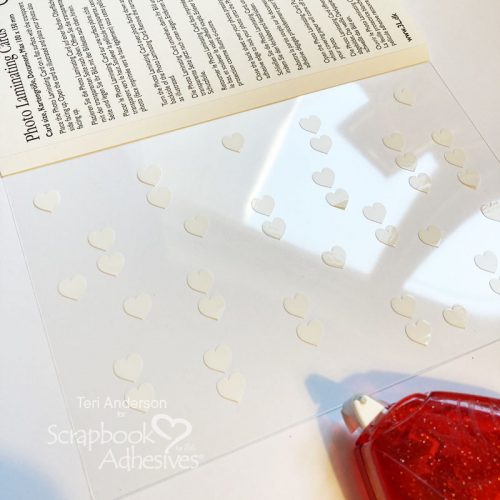
Wear Your Adhesive on the Outside with the E-Z Runner Hearts

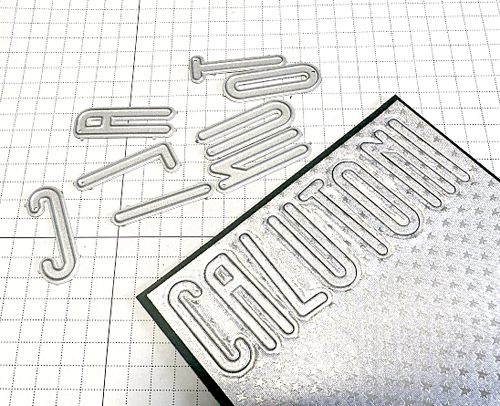
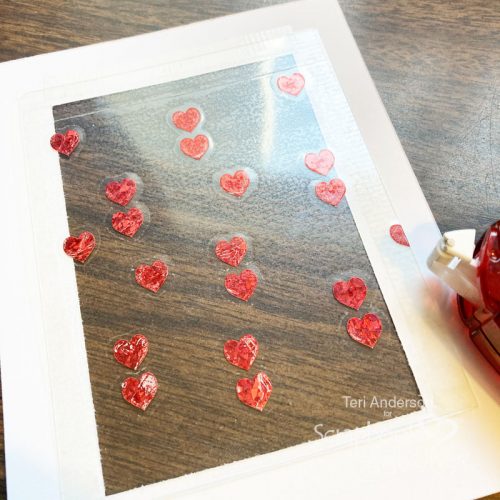
Apply red foil from the Metallic Transfer Foil Sheets Celebrate Colors pack to your hearts. With the color side facing you, rub the foil over the hearts to transfer the color. If there are missed areas, simply re-apply the foil to them. Easy, and no special tool/machine is needed!

Continue with the Window

Remove the release paper from the sticky side of the Self-Laminating Pouches in Medium and cover the foiled heart side.

You're So Cute Window Shaker Card by Teri Anderson for Scrapbook Adhesives by 3L

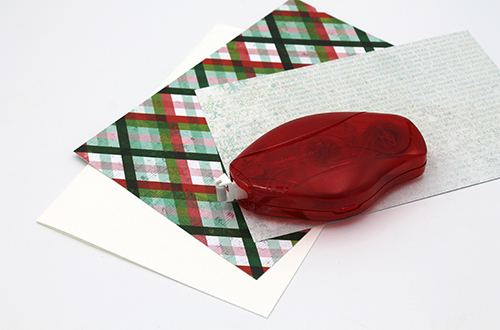
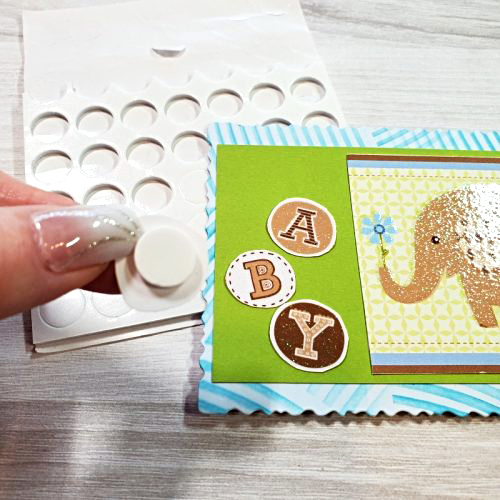
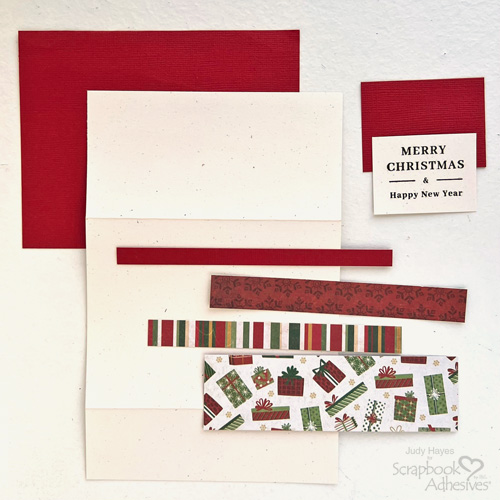
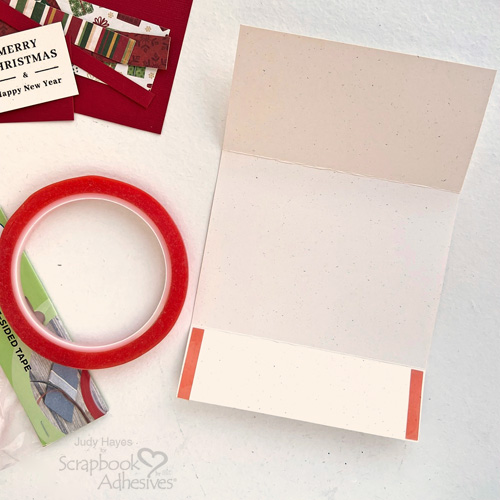
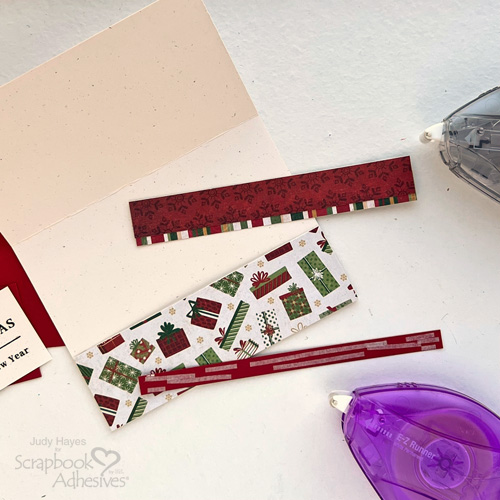
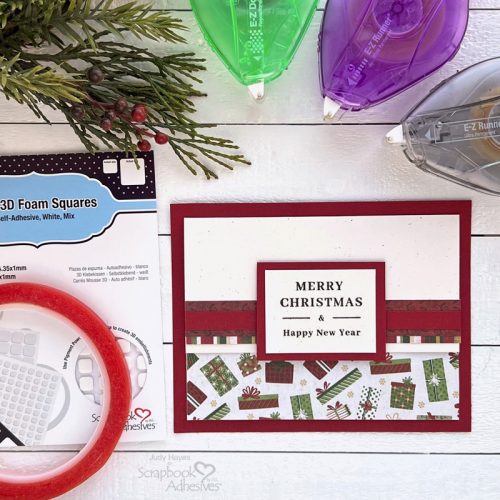
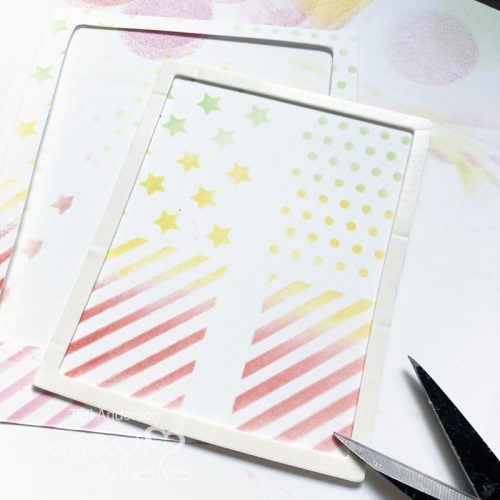
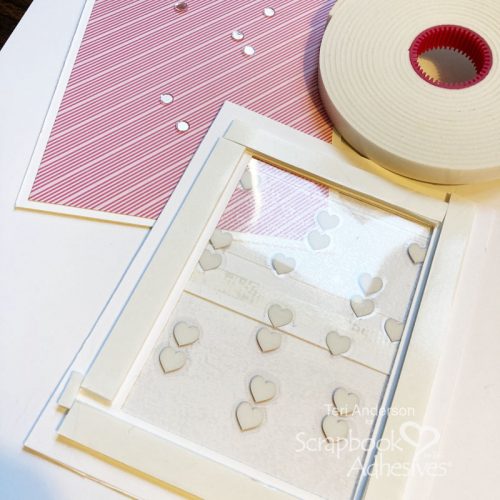
Cut a 4 1/4 x 5 1/2″ rectangle cardstock panel, and trim the window to fit on the panel. Next, adhere the two pieces together. Then add strips of patterned paper around the panel.

You're So Cute Window Shaker Card by Teri Anderson for Scrapbook Adhesives by 3L

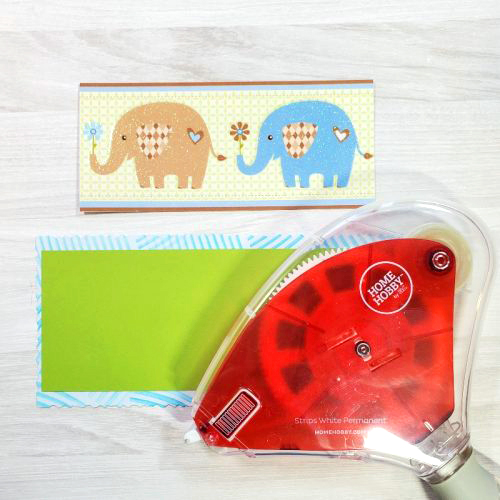
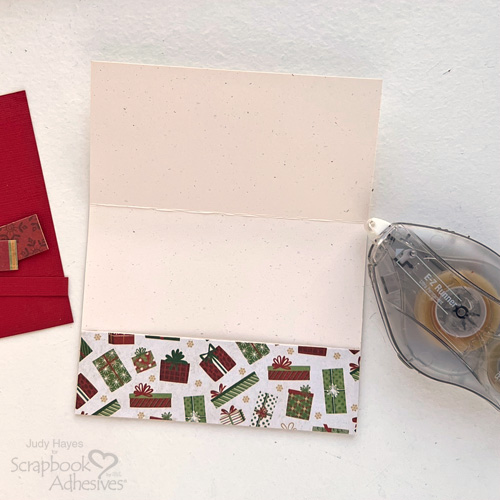
Affix a panel of patterned paper onto a 4 1/4″ x 5 1/2″ card. Set the card aside.

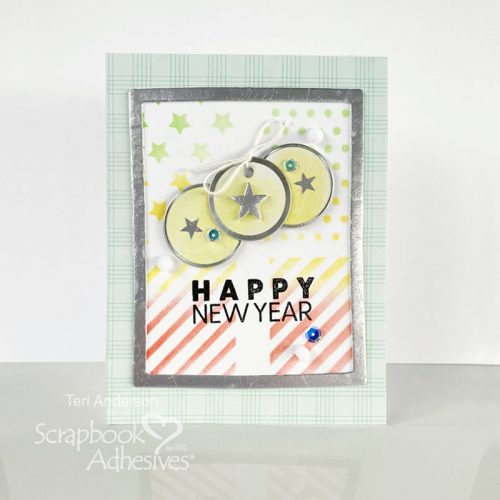
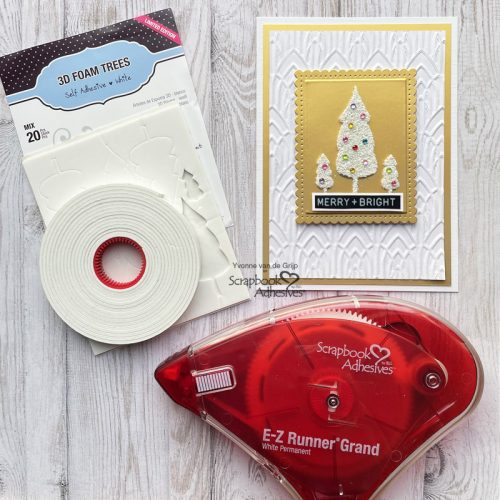
Complete the Shaker Card

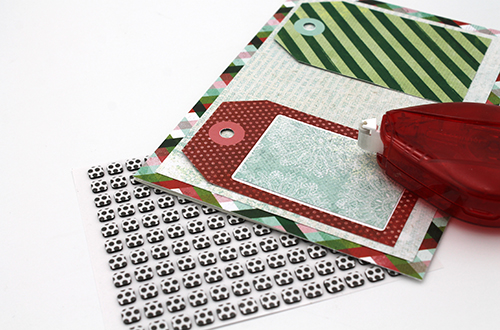
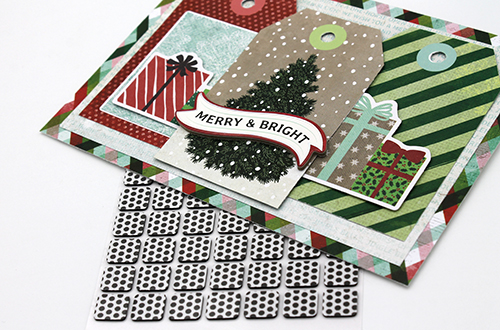
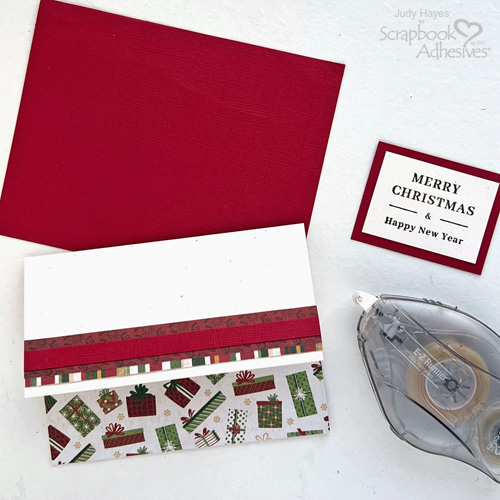
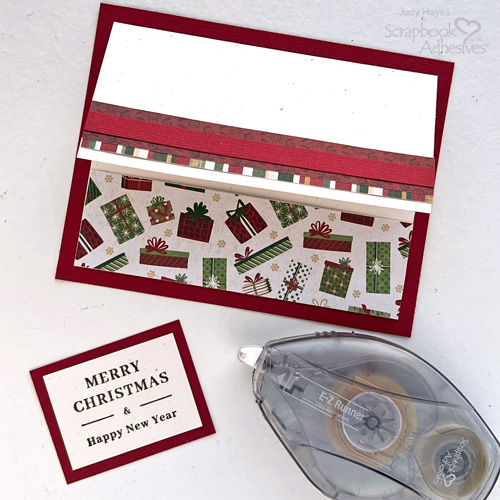
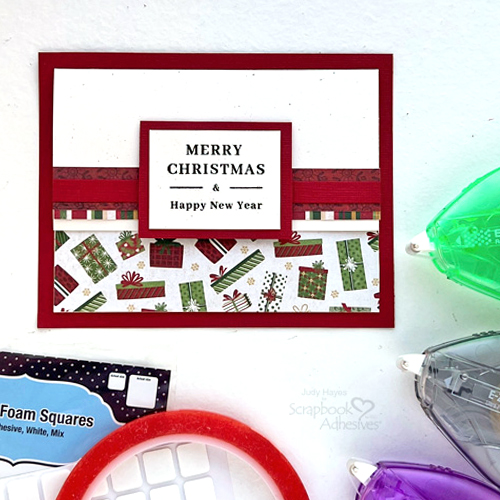
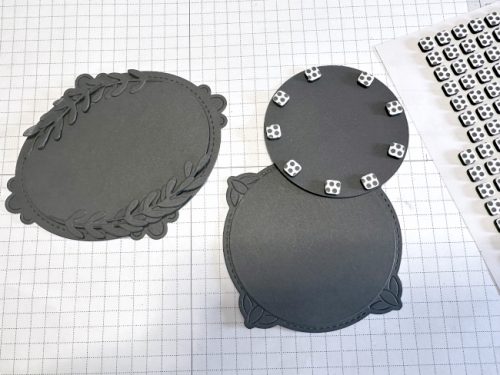
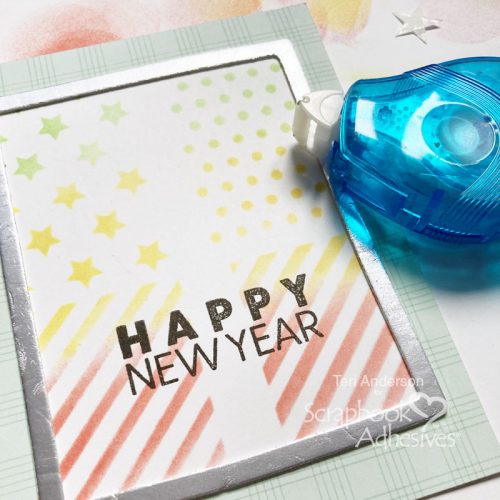
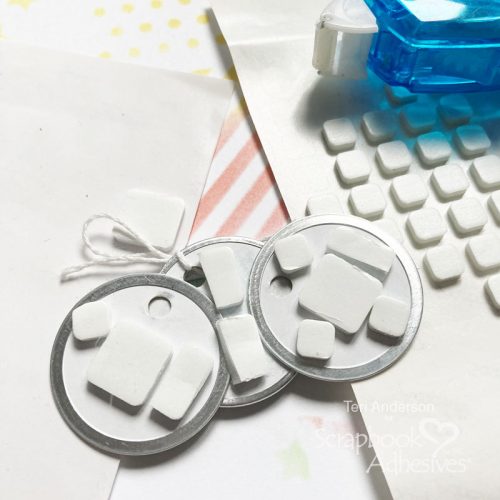
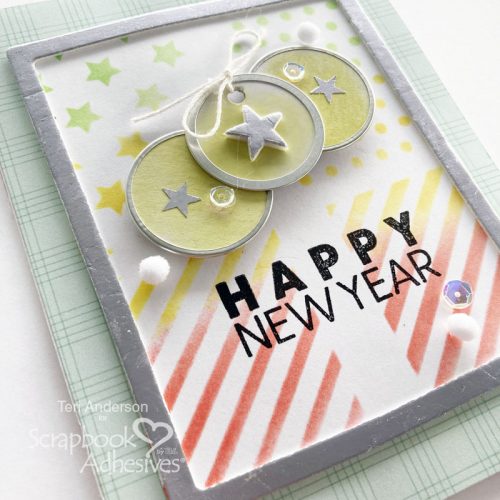
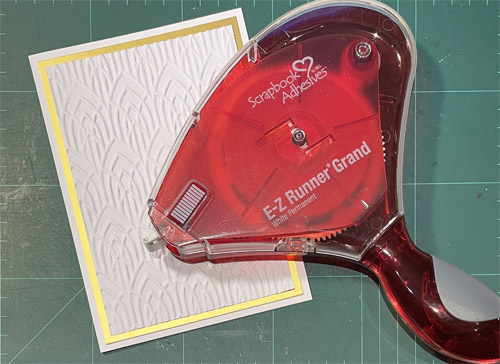
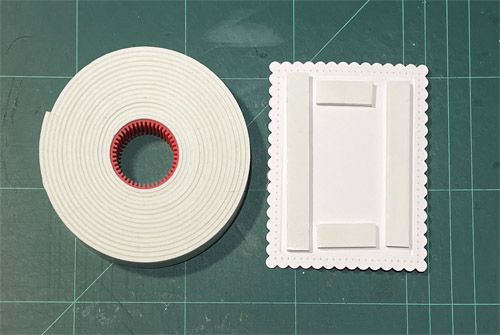
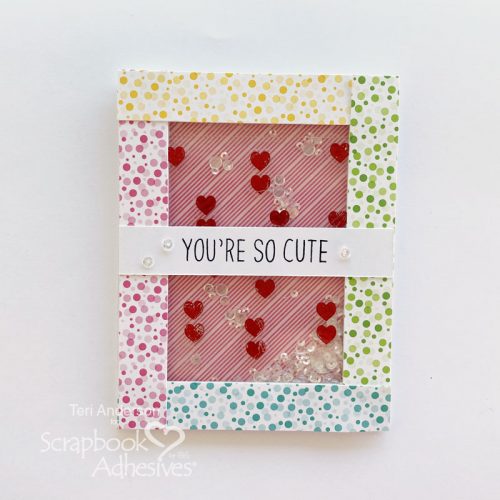
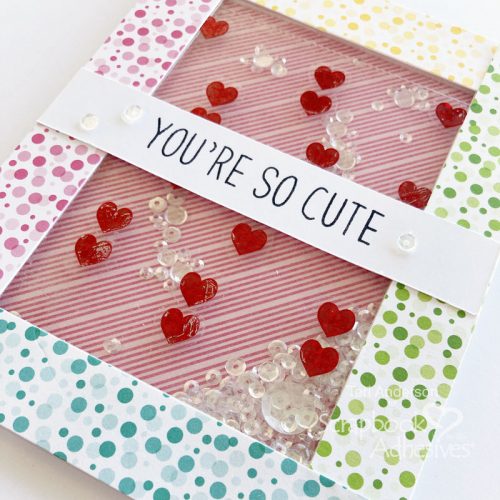
Stamp a sentiment on a strip of cardstock and adhere it to the front of the shaker window panel. Flip the window panel over and add strips of Crafty Foam Tape in White around the window.

You're So Cute Window Shaker Card by Teri Anderson for Scrapbook Adhesives by 3L

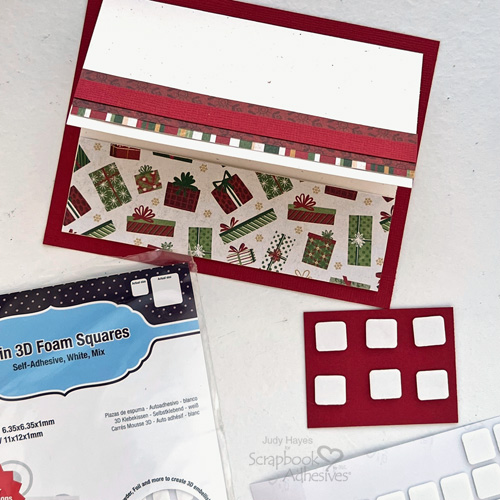
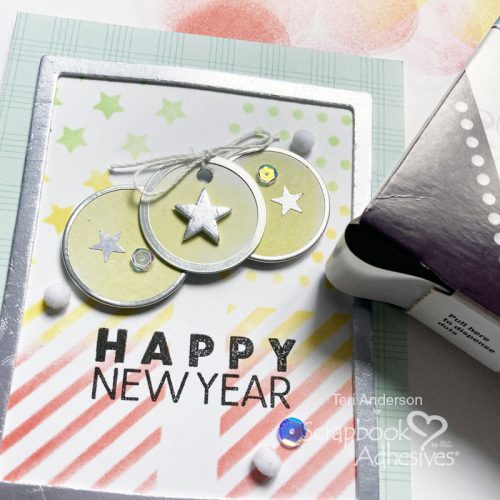
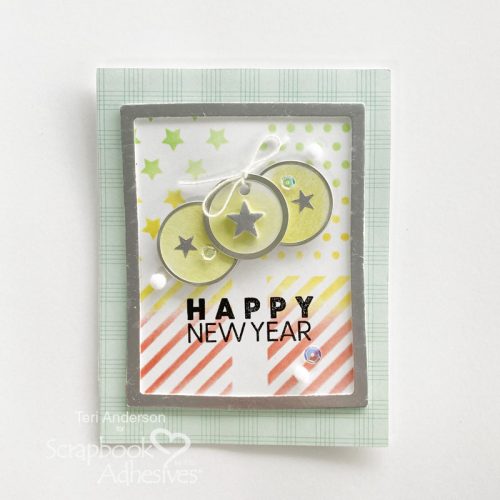
Adhere a few sequins onto your card. Add a few pinches more to the card. Apply the shaker window panel onto your card. Finish your design by adhering a few sequins on top of the shaker card window.
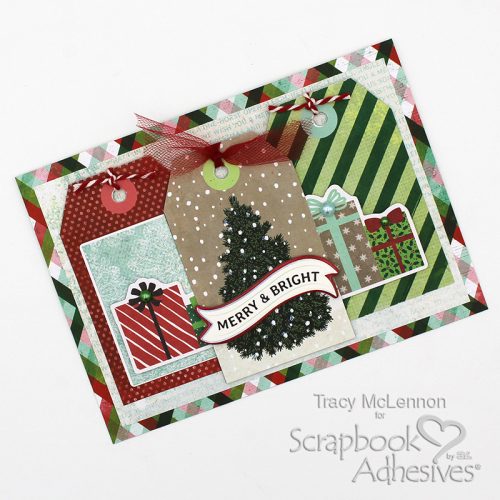
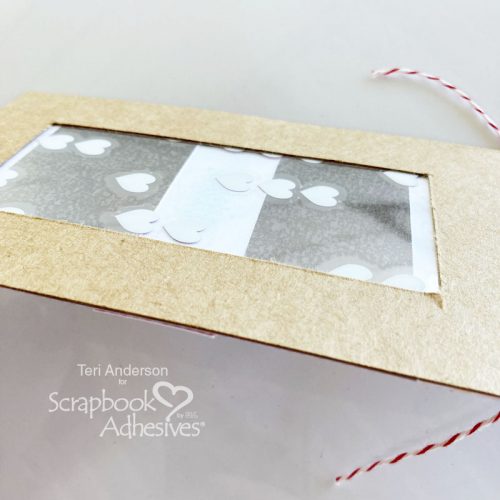
You're So Cute Window Shaker Card by Teri Anderson for Scrapbook Adhesives by 3L

Make a Window Tag

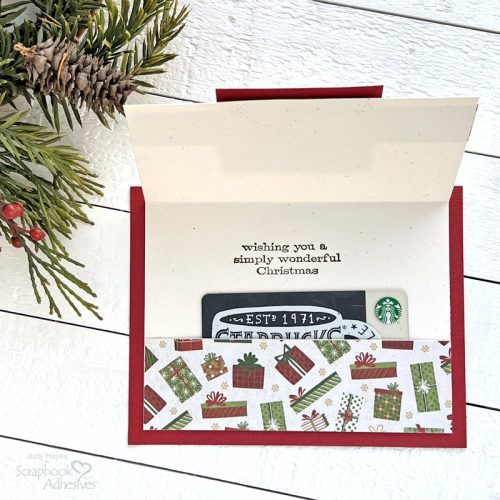
You don’t have to make a shaker card with your windows! You can also just make a window tag (or card) by skipping the steps to make a shaker.

You're So Cute Window Shaker Card by Teri Anderson for Scrapbook Adhesives by 3L

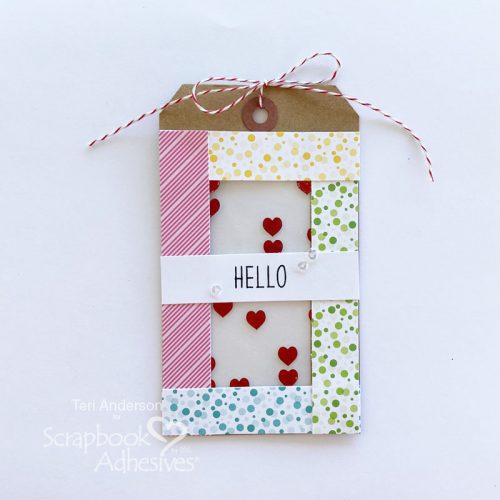
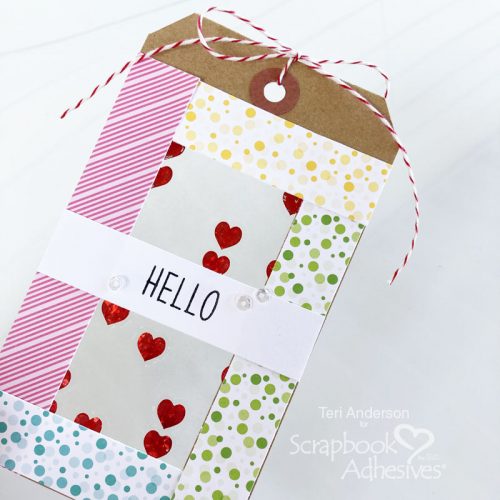
Simply cut a rectangle out of a tag. Add your decorated window to it. Then add strips of patterned paper on top, as well as a sentiment. Finish your tag off with some twine and a few sequins.

You're So Cute Window Shaker Card by Teri Anderson for Scrapbook Adhesives by 3L

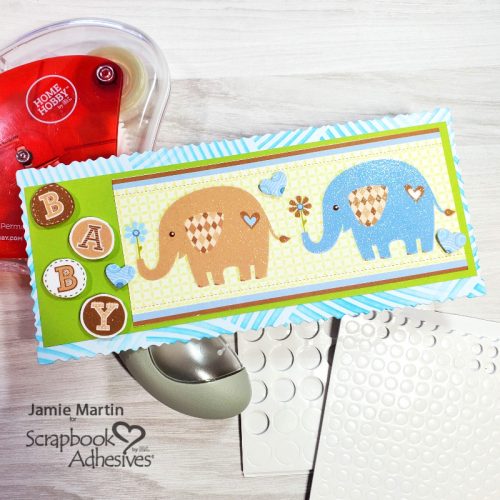
I hope you are inspired to make your own window shaker card or a window tag!

Happy creating!
Teri Anderson

Creative Time: 60 Minutes
Skill Level: Intermediate

Materials Needed
Scrapbook Adhesives by 3L®

HomeHobby by 3L®

Other
White Cardstock: Neenah Paper; Patterned Papers: Lawn Fawn (All the Dots 6×6 Paper Pad); Stamps: Waffle Flower (Bowtiful Stamp Set); Black Ink Pad and Kraft Tag: Ranger Ink; Sequins: Cartwright’s Sequins; Twine

Save to Pinterest!

You're So Cute Window Shaker Card by Teri Anderson for Scrapbook Adhesives by 3L Pinterest

Visit our Website and Blog!
Sign up for our Newsletter so you never miss a contest or giveaway!

instagram purple icon facebook icon purple pinterest purple icon twitter purple icon YouTube icon blog subscription purple icon

Christmas Tags Card

Hello Christmas crafty friends! Tracy here and today I have a quick and simple Christmas Tags card that you can create in minutes. Here are all of the festive details.

Christmas Tags Card by Tracy McLennon for Scrapbook Adheisves by 3L

Let’s Get Started

First I cut a 5×7 white cardstock card base. I cut the plaid patterned paper to 5×7, and the light blue patterned paper to 4.5×6.5. Adhere these layers of the quick and simple Christmas Card together using the E-Z Runner® Permanent Strips Refillable Dispenser.

Christmas Tags Card by Tracy McLennon for Scrapbook Adheisves by 3L

Next, cut out the coordinating patterned tags that you like. I used Thin 3D Foam Squares Black Mix at the top of the 2 outside tags, and the E-Z Runner® Permanent Strips Refillable Dispenser for the bottom of the tags. This gives that little bit of extra dimension to this quick and simple Christmas card. It also makes adding ribbon or twine to the tags easier.

Christmas Tags Card by Tracy McLennon for Scrapbook Adheisves by 3L

The Christmas Gift die cut piece and the middle tag are added to the card front using Thin 3D Foam Squares Black Mix. Again, this adds just a little bit of dimension to the card layers. Add the “Merry and Bright” chipboard sticker to the middle.

Christmas Tags Card by Tracy McLennon for Scrapbook Adheisves by 3L

Add red tulle ribbon to the middle tag of this quick and simple Christmas card. Then I added just a simple knot of red/white baker’s twine to the other 2 tags. The final touch is to add just a little shine and dimension by adding some coordinating pearls.

Christmas Tags Card by Tracy McLennon for Scrapbook Adheisves by 3L

Thanks so much for stopping by!
Tracy

Skill Level: Beginner
Creative Time: 20 minutes

Materials Needed:
Scrapbook Adhesives by 3L®

Thin 3D Foam Squares Black Mix
E-Z Runner® Permanent Strips Refillable Dispenser

Other:
Vicki Boutin Evergreen and Holly Collection, Red Tulle Ribbon, Red/White Baker’s Twine, Pearls, Cardstock- White

Save to Pinterest!

Christmas Tags Card by Tracy McLennon for Scrapbook Adheisves by 3L Pinterest

Visit our Website and Blog!
Sign up for our Newsletter so you never miss a contest or giveaway!

instagram purple icon facebook icon purple pinterest purple icon twitter purple icon YouTube icon blog subscription purple icon

Wonderful Winter Card

Hi, Connie here with a Wonderful Winter card using the wonderful 3D Foam adhesives for that wonderful dimension. In my opinion, it’s all wonderful. I’m creating some super cute stamps by KatzelKraft that are wonderful (ok, I’ll stop with the wonderful 🙂 🙂

Wonderful Winter Card by Connie Mercer for Scrapbook Adhesives by 3L

As always we have a few things to do before we are ready to assemble the card. So let’s get started~

Wonderful Winter Stamp Images

Wonderful Winter Card by Connie Mercer for Scrapbook Adhesives by 3L
  • 1. Using a stamping platform, stamp the image on white cardstock.
    2. Color with pan pastels or a medium of your choice.
    3. Color the winter scarf with colored pencils and highlight. Do the same with the hat, and clock.
    4. Stamp the trees with light grey ink and use pan pastels to put in the sky and winter sun.
    Mask off using a circle stencil and using an eraser to remove the pan pastel color.

Assembling the Card

Wonderful Winter Card by Connie Mercer for Scrapbook Adhesives by 3L

Thanks for stopping by and on to 2023!!
Happy Holidays,
Connie Mercer

Creative Time: 45 minutes
Skill Level: Beginner

Materials Needed:
Scrapbook Adhesives by 3L®

EZ Runner Permanent Strips Refillable Dispenser
EZ Runner Permanent Strips Refill
3D Foam Circles White Mix, 3D Squares White Mix and 3D Foam Strips
Crafty Foam Tape 108′

Other: Stamps: KatzelKraft; Ink: Ranger Ink; Pan Pastels; Colored Pencils; White Acrylic Paint

Save to Pinterest!

Wonderful Winter Card by Connie Mercer for Scrapbook Adhesives by 3L Pinterest

Visit our Website and Blog!
Sign up for our Newsletter so you never miss a contest or giveaway!

instagram purple icon facebook icon purple pinterest purple icon twitter purple icon YouTube icon blog subscription purple icon

Oh Deer Christmas Card

Hi everyone, Yvonne here with a last-minute Christmas card inspiration. This Oh Deer Christmas Card is very simple to create and even though it does not look that way…trust me, it’s suitable for beginner cardmakers!

Oh Deer Christmas Card by Yvonne van de Grijp for Scrapbook Adhesives by 3L

The glitter added to the card makes this Deer Christmas card extra elegant. Wanna join me in making the card?

Making the Top Card Panel

Start by trimming a piece of white cardstock to a rectangular shape. Then stamp some pine trees using different shades of green inkpads. For my card, I used water-solvable ink…I will explain later why. Next stamp the sentiment onto the card panel using a black ink pad.

Oh Deer Christmas Card by Yvonne van de Grijp for Scrapbook Adhesives by 3L

Now stamp some deer onto white cardstock using a black ink pad. Let the images dry and then fussy cut them using a craft knife or scissors.

Oh Deer Christmas Card by Yvonne van de Grijp for Scrapbook Adhesives by 3L

Adhere the deer onto the card panel using 3D Foam Squares Micro White.

Oh Deer Christmas Card by Yvonne van de Grijp for Scrapbook Adhesives by 3L

Designer’s Tip: Tweezers are a great tool for picking up and precise placement of the 3D Foam Squares Micro White.

Making the Card Base

Adhere the Deer Christmas Card top card panel onto a green card panel and next onto a white card base. To adhere use the E-Z Runner® Ultra Strong Refillable Dispenser.

Adding Glamour

To add the glitter effect I used the Dual Tip Glue Pen. Simply apply some glue to the stamped trees and also as a layer of snow under the deer.

Oh Deer Christmas Card by Yvonne van de Grijp for Scrapbook Adhesives by 3L

Then sprinkle white glitter over the card panel. The magic is that water solvent ink reacts to the glue of the  Dual Tip Glue Pen and you will see the ink solve a little bit. This makes the white glitter adapt a little bit of color to the stamped tree. Isn’t that a wonderful effect? It gives your Deer Christmas Card such a lovely effect.  

Oh Deer Christmas Card by Yvonne van de Grijp for Scrapbook Adhesives by 3L

Now let the glue dry.

Oh Deer Christmas Card by Yvonne van de Grijp for Scrapbook Adhesives by 3L

Making your adhesive shine is a technique called Wear Your Adhesive on the Outside.

And voilá, your Deer Christmas card is ready.

Wishing you happy holiday crafting!

Yvonne van de Grijp

Oh Deer Christmas Card by Yvonne van de Grijp for Scrapbook Adhesives by 3L

Creative Time: 30 minutes

Skill Level: Beginner/intermediate

Materials needed:

Scrapbook Adhesives by 3L®

E-Z Runner® Ultra Strong Refillable Dispenser

3D Foam Squares Micro White

HomeHobby by 3L®

Dual Tip Glue Pen

Other

Cardstock (White, Green); Stamps (Katzelkraft: Mini Reindeers, Winter Wonderland, Christmas Sayings); Inkpads (Distress Oxide inkpads: Evergreen Bow, Rustic Wilderness, Forest Moss; Versafine: Onyx Black); Acrylic Stamp Block Tweezers; Scissors; Paper Trimmer

Save to Pinterest!

Oh Deer Christmas Card by Yvonne van de Grijp for Scrapbook Adhesives by 3L Pinterest

Visit our Website and Blog!
Sign up for our Newsletter so you never miss a contest or giveaway!

instagram purple icon facebook icon purple pinterest purple icon twitter purple icon YouTube icon blog subscription purple icon

Sweet Slimline Baby Card

Who can resist this Sweet Slimline Baby Card? Today I am sharing a unique decorative edge card with lots of real estate – enough to fit two elephants on a card front. Lots of curvy shapes and elements to pop up on a card but I have a solution! Use 3D Foam Circles White Mix behind all the hearts and the circle sentiment.

Sweet Slimline Baby Card by Jamie Martin for Scrapbook Adhesives by 3L

Start on this Sweet Slimline Card Front Background

Using a light blue cardstock, die-cut a slimline card panel. To create interest, stencil around the edges with blue ink.

Sweet Slimline Baby Card by Jamie Martin for Scrapbook Adhesives by 3L

Layer the Card Front

The elephant-patterned paper was cut into a long card panel. Then cut a green cardstock panel slightly taller than the elephant panel but a little shorter than the stenciled panel.

Place the green panel on the slimline panel with the E-Z Runner Grand Refillable Dispense. Then adhere the elephant panel to the right side of the green panel.

Sweet Slimline Baby Card by Jamie Martin for Scrapbook Adhesives by 3L

The Sentiment

Cut the letters from the same paper pad. These will be used as a sentiment. Place a 3D Foam Circles White Mix on the back of each letter to pop them up on the left side of the card. So cute!

Sweet Slimline Baby Card by Jamie Martin for Scrapbook Adhesives by 3L

Finishing Touches

Little hearts were die-cut from blue decorative paper from the same paper pad. Let’s pop the hearts up with the 3D Foam Circles White Mix and randomly place them on the card. I usually pick up the foam circles using an Exacto or craft knife, this makes placement easy, and my big fingers don’t get in the way.

Sweet Slimline Baby Card by Jamie Martin for Scrapbook Adhesives by 3L

Create a slimline card base that is slightly smaller than the layered card panel and adhere together with the E-Z Runner® Grand Refillable Dispenser to finish.

Sweet Slimline Baby Card by Jamie Martin for Scrapbook Adhesives by 3L

Skill Level: Beginner
Creative Time: 35 minutes

Materials Needed:
Scrapbook Adhesives by 3L®

3D Foam Circles White Mix
E-Z Runner® Grand Refillable Dispenser

Plus: Stencil: Rubbernecker Stamps (Sand Stencil); Craft Dies: Stampendous/Spellbinders Paper Arts (Frames and Boarders Die Set); Ink: Ranger Ink (Distress Ink); Patterned Paper: DCWV (Baby Boy Stack Paper Pad)

Save to Pinterest!

Sweet Slimline Baby Card by Jamie Martin for Scrapbook Adhesives by 3L Pinterest

Visit our Website and Blog!
Sign up for our Newsletter so you never miss a contest or giveaway!

instagram purple icon facebook icon purple pinterest purple icon twitter purple icon YouTube icon blog subscription purple icon

Christmas Holiday Gift Card Holder

Hello everyone! It’s the time of year that I decide to make a few gift card holders for some extra gifts. This year I came up with this easy-to-make Christmas Holiday Gift Card Holder. The card holder has a pocket inside for a gift card or cash. It’s a good project for leftover pieces of holiday paper. It only takes a few minutes to put together!

Christmas Holiday Gift Card Holder by Judy Hayes for Scrapbook Adhesives by 3L

Cut Papers for the Holiday Gift Card Holder

Christmas Holiday Gift Card Holder by Judy Hayes for Scrapbook Adhesives by 3L

Let’s start with cutting the papers needed for the project.

  • Red Cardstock: 5.5 x 4.25 inches, 2.375 x 1.75 inches, and 0.375 x 5 inches
  • Cream Cardstock: 5 x 7.75 inches, and 1.5 x 2 inches
  • Packages Paper: 1.5 x 5 inches
  • Stripe Paper: 0.75 x 5 inches
  • Red Patterned Paper: 0.75 x 5 inches

Score & Fold

On 5 x 7.75-inch cream cardstock, score at 2.5 inches and 6.25 inches from one short end. Fold each score line and press with a bone folder. The short flap will be the pocket and the longer one is the top flap.

Stamp a Verse

Stamp verse with Forest Moss ink on cream cardstock piece. Use E-Z Runner® Ultra Strong Refillable Dispenser to apply adhesive to the back and attach it to the red mat.

Make the Pocket

Christmas Holiday Gift Card Holder by Judy Hayes for Scrapbook Adhesives by 3L

Apply Extreme Double-Sided Tape 1/4in at each end of the pocket along side edges, remove liners, fold the pocket up and press into place.

Christmas Holiday Gift Card Holder by Judy Hayes for Scrapbook Adhesives by 3L

Apply adhesive with E-Z Runner® Ultra Strong Refillable Dispenser to the back of the patterned package paper and secure it over the pocket.

Layer the Strips

Christmas Holiday Gift Card Holder by Judy Hayes for Scrapbook Adhesives by 3L

To the back of the red patterned paper, apply adhesive along one long edge with E-Z Runner® Ultra Strong Refillable Dispenser and place it over striped paper allowing about a 0.125-inch reveal.

Next, use the E-Z Runner® Micro Refillable Dispenser to apply the adhesive to the back of the red strip. Secure it over the patterned red paper.

Christmas Holiday Gift Card Holder by Judy Hayes for Scrapbook Adhesives by 3L

Apply adhesive on the back of the assembled band with the E-Z Runner® Ultra Strong Refillable Dispenser and place it across the top flap of the card.

Assemble the Holiday Gift Card Holder

Christmas Holiday Gift Card Holder by Judy Hayes for Scrapbook Adhesives by 3L

Now for the fun part, assembly! On the back of the pocket card, apply E-Z Runner® Ultra Strong Refillable Dispenser along all of the edges. Center the card on the red cardstock and press into place.

Christmas Holiday Gift Card Holder by Judy Hayes for Scrapbook Adhesives by 3L

Add a few regular sizes of the Thin 3D Foam Squares White Mix on the back of the matted verse keeping it slightly above the bottom edge. Peel the liners off and place the verse over the band on the card front, allowing the bottom edge to extend below the flap edge.

Christmas Holiday Gift Card Holder by Judy Hayes for Scrapbook Adhesives by 3L

If desired, stamp a verse inside. To keep the card closed, apply a small amount of E-Z Dots® Repositionable Refillable Dispenser to the back of the flap and press closed. The card will easily open as the adhesive is not permanent. Another option is to use the Adhesive Dots Large Repositionable!

Christmas Holiday Gift Card Holder by Judy Hayes for Scrapbook Adhesives by 3L

All that’s left is to tuck in a gift card! Change up the patterned papers, stamps, and cardstock colors to create this gift card holder for another occasion.

Christmas Holiday Gift Card Holder by Judy Hayes for Scrapbook Adhesives by 3L

Thanks for Visiting!
Judy Hayes

Creative Time: 20 mins
Skill Level: Beginner

Materials Needed:
Scrapbook Adhesives by 3L®
E-Z Runner® Ultra Strong Refillable Dispenser, E-Z Runner® Micro Refillable Dispenser and E-Z Dots® Repositionable Refillable Dispenser
Thin 3D Foam Squares White Mix

Home Hobby by 3L®
Extreme Double-Sided Tape 1/4in

Other: Gina K Designs (Two Step Holiday Mini), PhotoPlay Paper Co. (Christmas Memories Collection – Under the Tree, Nutcracker), Ranger Ink Distress Ink (Forest Moss), Cardstock (Red, Birch)

Save to Pinterest!

Christmas Holiday Gift Card Holder by Judy Hayes for Scrapbook Adhesives by 3L Pinterest

Visit our Website and Blog!
Sign up for our Newsletter so you never miss a contest or giveaway!

instagram purple icon facebook icon purple pinterest purple icon twitter purple icon YouTube icon blog subscription purple icon

Layered Masculine Birthday Card

Hello crafty friends! Tracy here, and today I have a sweet and simple layered masculine birthday card to share. I created this card specifically for a very sweet little 1-year-old in our lives, who just had a buffalo plaid-themed birthday. Here are all of the details.

Layered Masculine Birthday Card by Tracy McLennon for Scrapbook Adhesives by 3L

Start with Layers

Cut the card base from white cardstock to measure 5 x 7 inches. The buffalo plaid patterned paper was cut to 4.75 x 6.75 inches. Adhere this to the card base using the E-Z Runner® Petite Permanent Dots Refillable Dispenser.

Next, cut the remaining layers for the Layered Masculine Birthday card: white cardstock to 4 x 6 inches, and yellow patterned paper to 3.75 x 5.75 inches.

Place a Creative Photo Corners Kraft on each corner of the yellow patterned panel and center onto the white cardstock panel. Lastly, adhere the layered panel on the card front with the E-Z Runner® Petite Permanent Dots Refillable Dispenser.

Layered Masculine Birthday Card by Tracy McLennon for Scrapbook Adhesives by 3L

Embellish the Masculine Birthday Card Front

Add the navy patterned banner to the card front using the E-Z Runner® Petite Permanent Dots Refillable Dispenser. I also added a narrow mint patterned strip to the top, and the bear die cut shape.

Adhere the printed “Happy” banner to the card using Crafty Foam Tape Black. I added white letter stickers to mint patterned paper, then added that to the card using 3D Foam Squares White Mix.

Layered Masculine Birthday Card by Tracy McLennon for Scrapbook Adhesives by 3L

Stick the gold Thickers to buffalo plaid patterned paper and mat with white cardstock with the E-Z Runner® Petite Permanent Dots Refillable Dispenser. Adhere it straight to the Simple Layered Birthday Card front, again using the E-Z Runner® Petite Permanent Dots Refillable Dispenser.

Layered Masculine Birthday Card by Tracy McLennon for Scrapbook Adhesives by 3L

Thanks so much for stopping by!
Tracy

Creative Time: 30 Minutes
Skill Level: Beginner

Materials Needed
Scrapbook Adhesives by 3L®

Creative Photo Corners Kraft
Crafty Foam Tape Black
3D Foam Squares White Mix
E-Z Runner® Petite Permanent Dots Refillable Dispenser

Other
Simple Stories- Cabin Fever Collection, Cardstock- White, Thickers Gold, White Letter Stickers

Save to Pinterest!

Layered Masculine Birthday Card by Tracy McLennon for Scrapbook Adhesives by 3L Pinterest

Visit our Website and Blog!
Sign up for our Newsletter so you never miss a contest or giveaway!

instagram purple icon facebook icon purple pinterest purple icon twitter purple icon YouTube icon blog subscription purple icon

Reusable Place Cards Idea

Hi there, Martha Lucia here with you today with a quick and easy idea to create reusable place cards. This idea can be easily used in your holiday tables or for any occasion.

Reusable Place Cards Idea by Martha Lucia Gomez for Scrapbook Adhesives by 3L

Make the Place Card Base

For these place card holders I’m going to be using frame dies. You can also use doily dies if you prefer it more detailed. You will need to grab a frame or doily die and two circles or ovals according to the design that you plan to create.

Reusable Place Cards Idea by Martha Lucia Gomez for Scrapbook Adhesives by 3L

In my samples, I am using an oval design and a circle design. The two plain circles or ovals need to cover the free area or negative space of the frame and be a little smaller to decorate the inside part of the place card. In addition, you can die-cut some foliage to accent the place cards.

Reusable Place Cards Idea by Martha Lucia Gomez for Scrapbook Adhesives by 3L

Adhere the large circle or oval behind the frame using the Dual Tip Glue Pen. It’s dry clear and very fast.

Reusable Place Cards Idea by Martha Lucia Gomez for Scrapbook Adhesives by 3L

Take the small oval or circle and lift it up with 3D Foam Squares Black Mix for dimension. Then add the foliage with the Dual Tip Glue Pen.

Reusable Place Cards Idea by Martha Lucia Gomez for Scrapbook Adhesives by 3L

Create Reusable Letters

To personalize the place cards, die-cut letters to spell out your guests’ names. The most important point is that you can make the letters changable so you have the flexibility to switch the names around.

Reusable Place Cards Idea by Martha Lucia Gomez for Scrapbook Adhesives by 3L

To make my letters. I used a sheet of Adhesive Sheets 4×6 inch. Simply pull back the yellow liner, place the foil paper facing up on top of the adhesive, cover the liner back on top of the paper and rub the adhesive to transfer it to the paper. Then, I removed the paper and adhere it to the black cardstock for support.

Reusable Place Cards Idea by Martha Lucia Gomez for Scrapbook Adhesives by 3L

Place the letter dies on the foiled paper side and run it through the die-cutting machine 2-3 times. Gently remove the die-cut word.

Reusable Place Cards Idea by Martha Lucia Gomez for Scrapbook Adhesives by 3L

Now to spell out the guests’ names. First, apply the letters with E-Z Dots® Repositionable Dots on the back and add them to the place card. They will be secured on your place cards. Then after the event, you can remove them and use them for another occasion or spell out a different name.

Reusable Place Cards Idea by Martha Lucia Gomez for Scrapbook Adhesives by 3L

I hope you enjoyed this place card idea, and give it a try at your next event. Thanks for Visiting!

Martha Lucia

Creative Time: 40 mins
Skill Level: Intermediate

Materials Needed:
Scrapbook Adhesives by 3L®
Adhesive Sheets 4×6 inch
3D Foam Squares Black Mix.
E-Z Dots® Repositionable Dots

Home Hobby by 3L®
Dual Tip Glue Pen

Other: Craft Dies: Diamond Press; Foil Paper: Rinea; Die-Cutting Machine; Black Cardstock

Save to Pinterest!

Reusable Place Cards Idea by Martha Lucia Gomez for Scrapbook Adhesives by 3L Pinterest

Visit our Website and Blog!
Sign up for our Newsletter so you never miss a contest or giveaway!

instagram purple icon facebook icon purple pinterest purple icon twitter purple icon YouTube icon blog subscription purple icon

Happy New Year Frame Card

Hi, everyone! Ready to ring in the New Year? How about sending a little cheer to help a favorite person kick off 2023?! Teri here to show you how to make a Happy New Year Frame Card you can just that with!

Happy New Year Frame Card by Teri Anderson for Scrapbook Adhesives by 3L

Make the Frame and the Card Base

Start by creating a background paper with ink and a stencil. Don’t feel like getting inky? Pick a patterned paper out and use it instead.

Happy New Year Frame Card by Teri Anderson for Scrapbook Adhesives by 3L

Add a large 3D Foam Frame to the panel. Cut around it with scissors and then add foil to the frame. If you miss a spot, don’t worry. Just take your foil sheet and burnish some more foil onto the frame.

Happy New Year Frame Card by Teri Anderson for Scrapbook Adhesives by 3L

Mount the panel onto a larger panel of patterned paper and then onto a card. Stamp a New Year’s-themed sentiment on top.

Complete the Card with Tags and Embellishments

Take a couple circle tags. Sponge some ink onto them and then add some foam stars and adhesive stars to them. Apply foil to the stars.

Arrange the tags so they all connect. Add string to one of them. Place foam squares on the back of them and add them to your card.

Happy New Year Frame Card by Teri Anderson for Scrapbook Adhesives by 3L

Finish your card by adding some sequins and small pompoms to it. Don’t have these? Try using some small gems instead. Adhesive Dots are great for holding small embellishments in place. Remember, place the dot on your card and then set the embellishment on top.

Happy New Year Frame Card by Teri Anderson for Scrapbook Adhesives by 3L

I hope you are inspired to make some New Year’s cards of your own!

Happy creating!
Teri Anderson

Creative Time: 45 Minutes
Skill Level: Intermediate

Materials Needed
Scrapbook Adhesives by 3L®

Other
White Cardstock: Neenah Paper; Patterned Papers: Simple Stories (Sunkissed Collection); Stamp: Waffle Flower (New Beginning Stamp Set); Stencil: Waffle Flower (Small Prints); Ink Pads: Ranger Ink; Sequins: Cartwright’s Sequins; Pompoms: Darice; Round Tags

Save to Pinterest!

Happy New Year Frame Card by Teri Anderson for Scrapbook Adhesives by 3L Pinterest

Visit our Website and Blog!
Sign up for our Newsletter so you never miss a contest or giveaway!

instagram purple icon facebook icon purple pinterest purple icon twitter purple icon YouTube icon blog subscription purple icon

Sparkly Christmas Tree Card

Hi everyone, Yvonne here with a quick and easy way to create a sparkly Christmas tree card. The holiday season is coming up, so time for some Christmas card inspiration. The 3D Foam Trees are such a whimsical design that makes this Christmas card a playful twist.

Sparkly Christmas Tree Card by Yvonne van de Grijp for Scrapbook Adhesives by 3L

Using the Wear Your Adhesive on the Outside concept creates a stunning effect on your card. And…the great thing is, this card is also suitable for beginner cardmakers. Join me in making the card!

Making the Card Base

For my card, I chose the colors white and gold, a great combination for your festive Christmas cards.

Let’s start with an embossed white cardstock panel. Simply put a piece of white cardstock between an embossing folder and run through your die-cutting and embossing machine.

Next. layer the embossed paper onto a brushed gold card panel with the E-Z Runner® Grand Refillable Dispenser.

Sparkly Christmas Tree Card by Yvonne van de Grijp for Scrapbook Adhesives by 3L

To finish, place the panels onto a white card base with the E-Z Runner® Grand Refillable Dispenser.

Embellish the Top Panel

Die-cut and emboss a decorative edge rectangular panel from the brushed gold cardstock. Center one of the largest trees and two of the smallest trees on each side of the large tree from the 3D Foam Trees to the gold panel.

Sparkly Christmas Tree Card by Yvonne van de Grijp for Scrapbook Adhesives by 3L

Now for the fun part! Remove the top liners from each of the trees and cover them with white glitter. Press the glitter into them to secure and tap off the excess. Maybe use a small brush to remove the stubborn glitter.

Sparkly Christmas Tree Card by Yvonne van de Grijp for Scrapbook Adhesives by 3L

We refer to this technique as Wear Your Adhesive on the Outside. It brings out our adhesives from underneath layers and to the front to shine as embellishments. Easy, right? Perfect idea for holiday kids’ crafts!

Finishing the Christmas Card

To add more dimension, adhere the embellished front panel using Crafty Foam Tape White to the layered card base.

Sparkly Christmas Tree Card by Yvonne van de Grijp for Scrapbook Adhesives by 3L

Using a sentiment sticker, place it on a white cardstock banner. Next, add it to the card front, using Crafty Foam Tape White. For the finishing touch, colorful rhinestones adhered to the glittered trees for an extra festive effect on this Sparkly Christmas Tree card.

Sparkly Christmas Tree Card by Yvonne van de Grijp for Scrapbook Adhesives by 3L

And voilá… your Sparkly Christmas Tree card is ready to be sent! I hope you enjoyed this simple tutorial and wish you happy holiday crafting!

Yvonne van de Grijp

Sparkly Christmas Tree Card by Yvonne van de Grijp for Scrapbook Adhesives by 3L

Creative Time: 30 minutes

Skill Level: Beginner/Intermediate

Materials needed:

Scrapbook Adhesives by 3L®

E-Z Runner® Grand Refillable Dispenser

3D Foam Trees

Crafty Foam Tape White

Other

Cardstock (White, Brushed Gold); Etched dies and Die-Cutting and Embossing Machine (Spellbinders Paper Arts®: Platinum 6 Machine, Fancy Edged Rectangles Etched dies); Sentiment Sticker (Tim Holtz: Label Stickers Christmas); Glitter (White); Rhinestones; Tweezers; Scissors; Paper Trimmer

Save to Pinterest!

Sparkly Christmas Tree Card by Yvonne van de Grijp for Scrapbook Adhesives by 3L Pinterest

Visit our Website and Blog!
Sign up for our Newsletter so you never miss a contest or giveaway!

instagram purple icon facebook icon purple pinterest purple icon twitter purple icon YouTube icon blog subscription purple icon