
Do you love romantic cards? With a new year just begun, I have started to think about, and long for, all things spring – lace and floral, anything romantic themed.
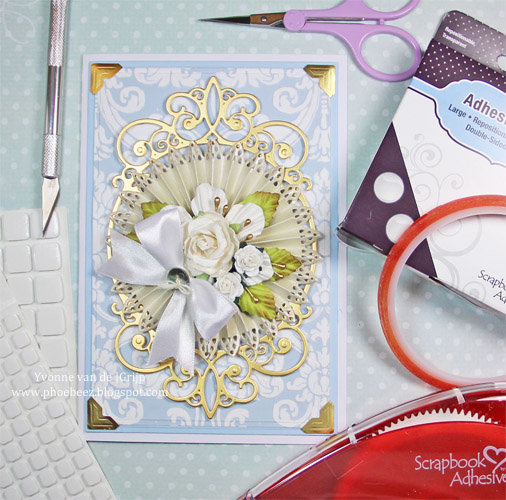
Hello everyone, I have a love for multiple layered cards! For this card, I used lots and lots of my favourite Scrapbook Adhesives by 3L® products like the E-Z Runner® Grand Refillable Dispenser, Adhesive Dots, 3D Foam Squares, Extreme Double-Sided Tape 1/8in and to finish the card some gorgeous Creative Photo Corners Gold. Let me show you how I used all these yummy products to create my romantic card.
Creating Layers
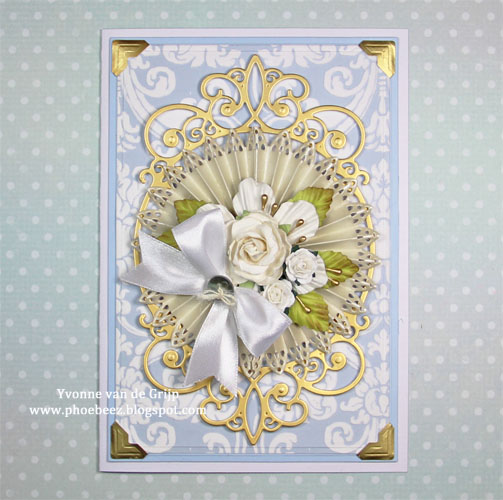
Create a card base and adhere a blue rectangle die-cut using the E-Z Runner® Grand Refillable Dispenser.

Die cut a patterned rectangle and adhere to the card base using Creative Photo Corners Gold and the E-Z Runner® Grand Refillable Dispenser.
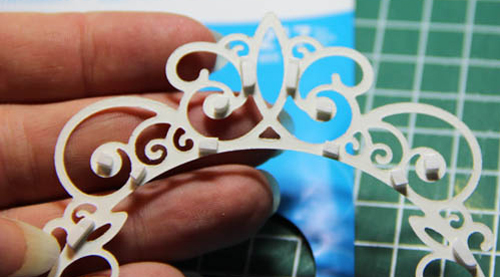
Die-cut a golden frame and adhere to the card base using 3D Foam Squares White Mix cut into small strips and squares to fit the die-cut. Tip: I like using a sharp craft knife for cutting stripes; usually simply pressing onto the foam cuts through the foam square.
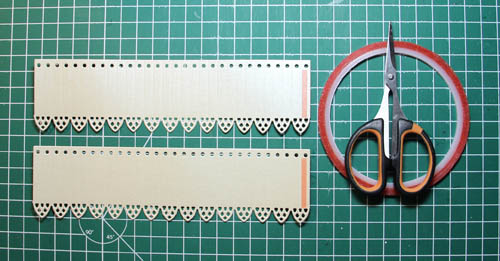
Die-cut the rosette strips and adhere the ends using Extreme Double-Sided Tape 1/8in. Once assembled, adhere the rosette to the card base using 3D Foam Squares White Regular Size.
To finish the card adhere mulberry flowers, leaves and a bow using Dodz Adhesive Dots. Tip: did you know that when you use Dodz Adhesive Dots to glue on the ribbon, you will not get any glue stains shining through the ribbon.
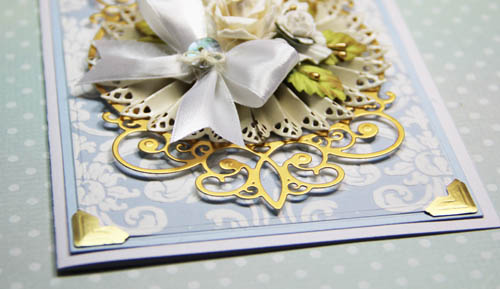
Voila….an elegant pastel layered card is created!
Scrapbook Adhesives by 3L®:
E-Z Runner® Grand Refillable Dispenser
Adhesive Dots Large
Dodz Adhesive Dots Medium
3D Foam Squares White Mix
Extreme Double-Sided Tape 1/8in
Creative Photo Corners Gold
Other:
Etched dies: Spellbinders® Paper Arts (5×7 Matting Basics A and B, Tiered Rosettes, Tiara Rondelle)
White, blue, patterned (Me & My Big Ideas) and gold cardstock; mulberry flowers, leaves, stamens, satin bow, pearl button
I hope you enjoyed the tutorial. Thanks for stopping by and wishing you happy crafting!
Find more wedding inspiration on Top Wedding Ideas!
Hugs from Holland,
Yvonne
By Deborah S January 9, 2018 - 10:29 am
What an elegant card! It reminds me of the Vintage Victorian love notes. Perfect for your favorite Valentine tfs?
By KarenHTK February 4, 2018 - 1:53 pm
Very Romantic and Elegant Creative Work of Art. Love the Romantic, Elegant style, design, use of color…Well Done…Great Job!