
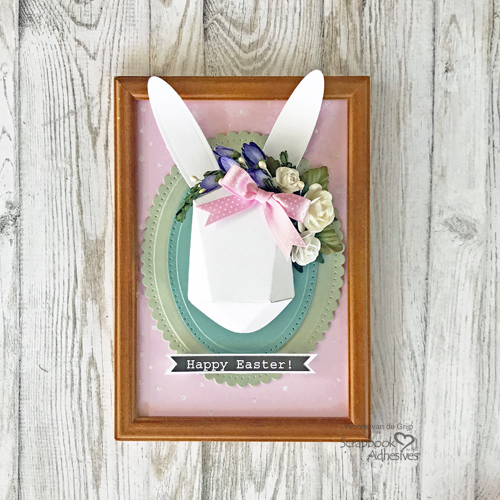
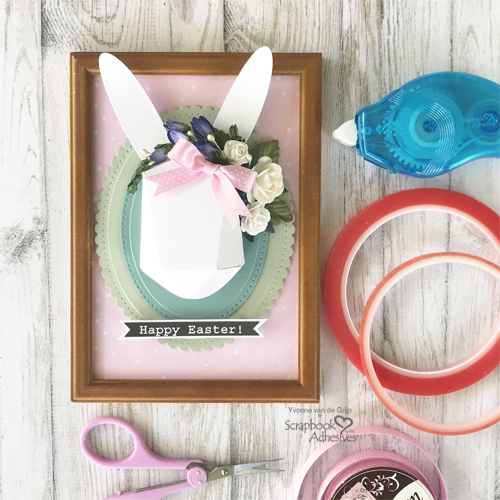
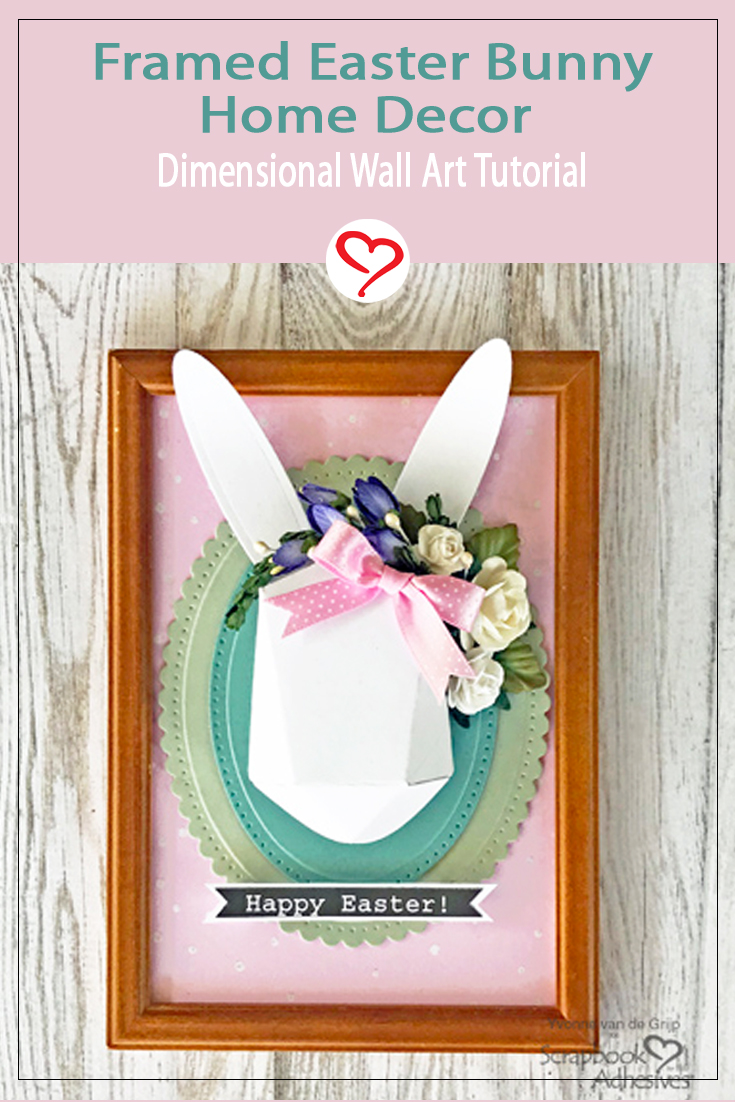
Hi everyone, Yvonne here. I made a cute Framed Easter Bunny project. It is a dimensional home decor piece and what a cute Easter decoration! Don’t you agree?
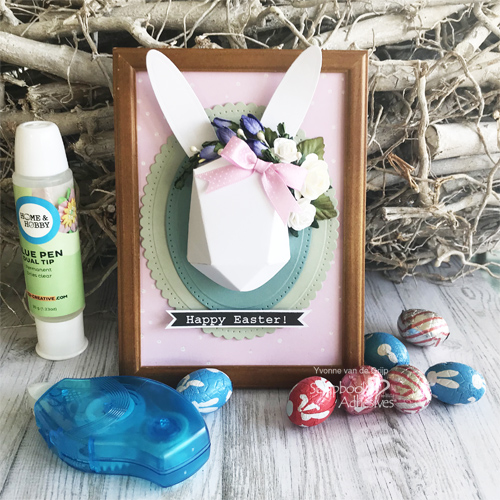
Another idea is to simply replace the Happy Easter sentiment with a child’s name to decorate a children’s bedroom. I am sure you will get lots of ooh’s and ahh’s when you gift this 3D bunny frame.
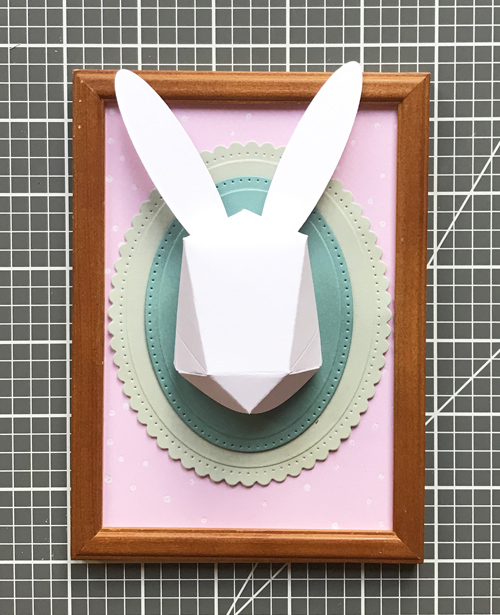
Framed Easter Bunny Base
Start with a wooden photo frame and removed the glass. Cut a piece of pink patterned paper to fit the frame and place it into the frame.
Die-cut and embossed two oval shapes from two different shades of green cardstock. Stack the smaller oval shape on top of the larger oval using the E-Z Runner® Petite Permanent Dots Refillable Dispenser.

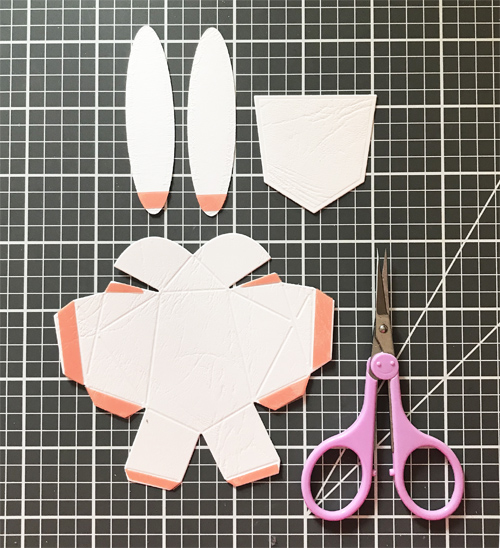
Create the Bunny Head
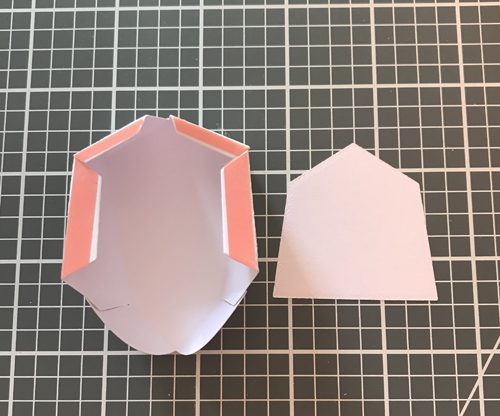
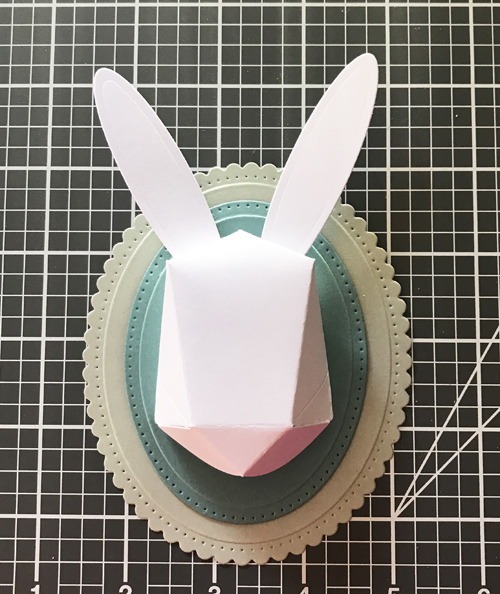
Die-cut the bunny head with white cardstock. Fold the score lines of the pieces and assemble with a combination of the Extreme Double-Sided Tape 1/8in and Extreme Double-Sided Tape 1/4in.
Once the bunny is assembled, adhere it onto the stacked oval shape.
Then secure the entire piece onto the photo frame with 3D Foam Squares White Small Size to create some extra depth.
Embellishing the Bunny
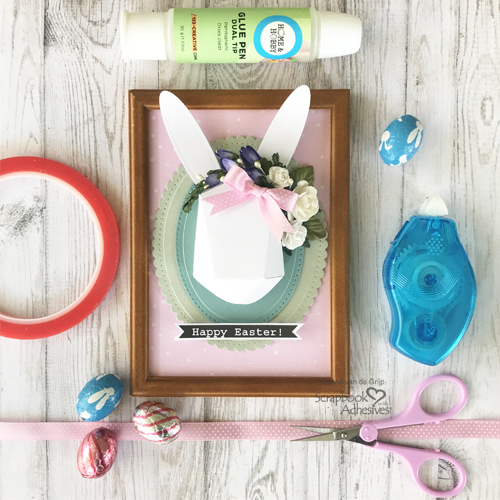
Secure mulberry flowers, stamens and leaves pieces with the Dual Tip Glue Pen around the top of the bunny. Tie a pink satin bow and place it by the right ear with Adhesive Dots Small. Lastly, adhere a Happy Easter sentiment to the frame by stacking two 3D Foam Squares on each end to lift it up for interest.
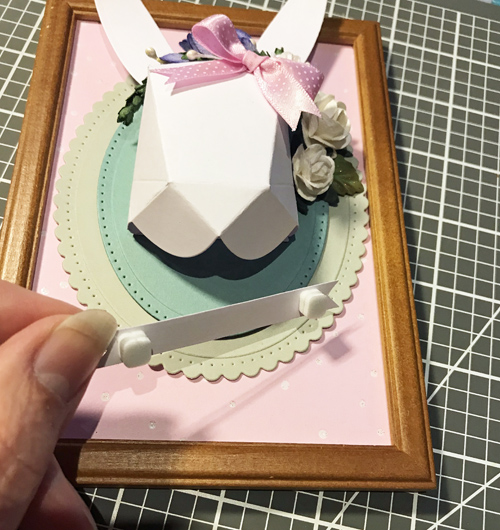
For a realistic look, slightly bend the bunny ears and voila…your Framed Easter Bunny Home Decor piece is ready! Isn’t it cute?
Wishing you happy Easter crafting!
Yvonne van de Grijp
Creative Time: 60 minutes
Skill Level: Intermediate
Materials needed:
Scrapbook Adhesives by 3L®
E-Z Runner® Petite Permanent Dots Refillable Dispenser
3D Foam Squares White Small Size
Adhesive Dots Small
HomeHobby by 3L®
Extreme Double-Sided Tape 1/8in
Extreme Double-Sided Tape 1/4in
Dual Tip Glue Pen
Other
Etched Dies and Tools: Spellbinders® Paper Arts (Scored and Pierced Ovals, Fancy Edged Ovals Dies and Platinum Machine) and Sizzix (Origami Rabbit Die); White, Green and Pink Patterned Cardstock; Mulberry Flowers; Stamens; Leaves; Sentiment; Satin Bow; Scissors
Love It? Save It to Pinterest!
Visit our Website and Blog!
Sign up for our Newsletter so you never miss a contest or giveaway!


By amy tsuruta April 5, 2020 - 10:40 am
This is AMAZING.