
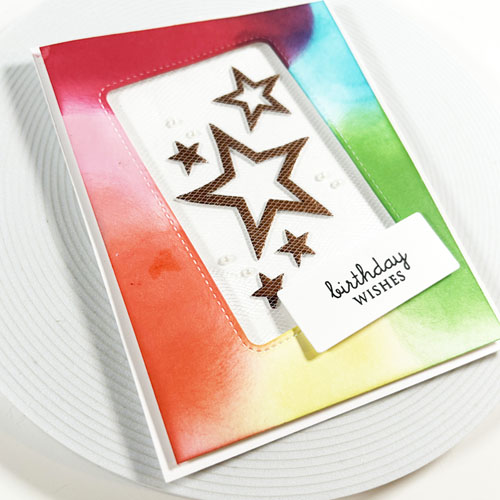
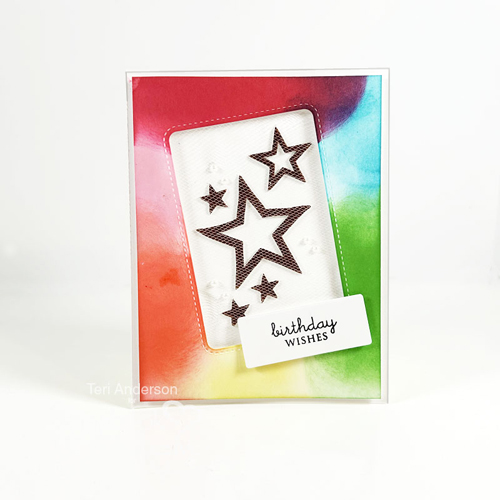
Hello, Crafty Friends! If you are like me, the one occasion I am always sending cards out for is birthdays! Because of this, I always like to have a few on hand that are ready to go! Teri here and I’m going to show you how I put together my latest, Birthday Stars Card, in the stash!
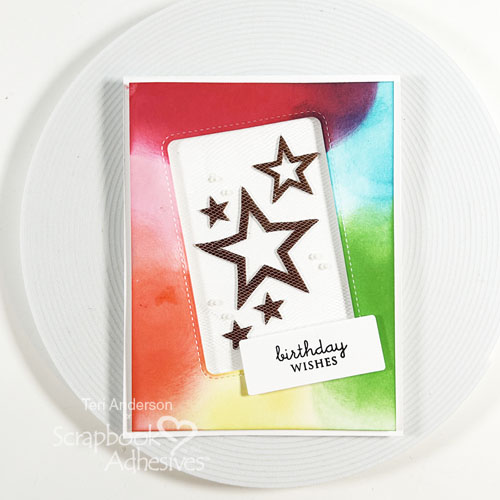
This card came together quickly with 3D Foam Stars, Crafty Foam Tape, Metallic Transfer Foil, and a few basic cardmaking supplies!
Create the Birthday Stars Card Panel
Start by cutting a panel of white cardstock to place on a card. You’ll want to cut a frame out of it. Use a rectangle die or a paper trimmer to do so! Set the panel on your card. Use the opening as a guide to randomly apply some 3D Foam Stars to the card base.
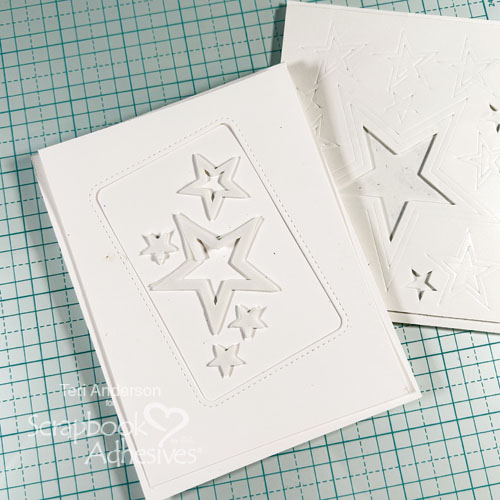
Wear Your Adhesive on the Outside with 3D Foam Stars
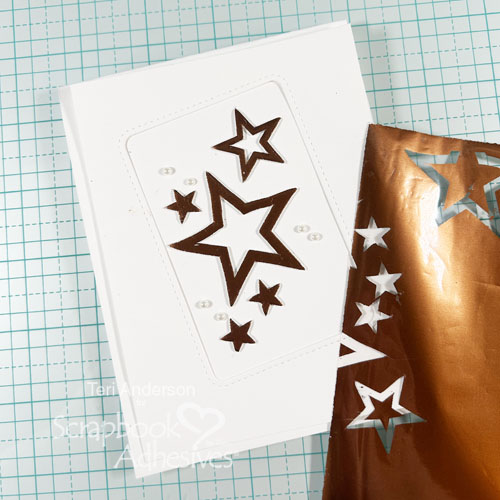
Remove the panel from your card. Apply the brown foil from the Metallic Transfer Foil Nature Colors to the 3D Foam Stars. Remember to face the foil color to you. Peel off the top liner and rub to transfer the color. Add a few random pearls or gems to the design.
Embellish the Cardstock Panel
Take your cardstock panel and blend several ink colors onto it. Flip the panel over and apply the E-Z Runner® Petite Permanent Dots Dispenser to it. Set a piece of tulle over the window opening. Trim the excess tulle.


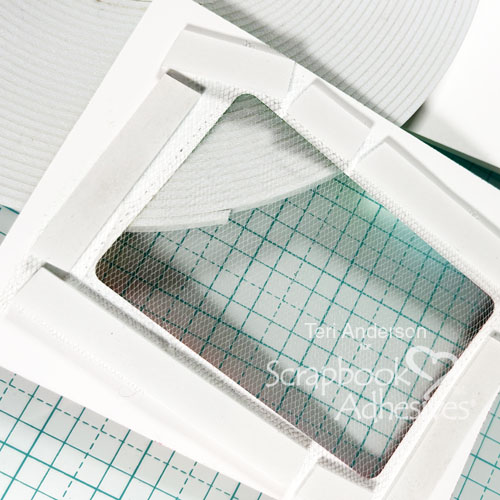
Use pieces of Crafty Foam Tape and place them around the window opening. Designer’s Tip: If you want more dimension, consider stacking up the Crafty Foam Tape to create two layers. Adhere your panel to your card.
Add the Sentiment
Cut a small rectangle of cardstock. Stamp a sentiment on it and mount it onto your card, slightly over the window opening. Use Crafty Foam Tape to make it really pop off the card.
I hope you are inspired by today’s Birthday Stars Card tutorial to make a few birthday cards to keep on hand for yourself!
Happy Creating!
Creative Time: 60 mins
Skill Level: Intermediate
Materials Needed:
Scrapbook Adhesives by 3L®
E-Z Runner® Petite Permanent Dots Dispenser
Metallic Transfer Foil Sheets Nature Colors
Other: Cardstock: Neenah; Cutting Dies: Sunny Studio Stamps (Rounded Rectangle Window Dies); Stamps: Papertrey Ink (Mega Mixed Messages Stamp Set); Pearls: Stampin’ Up!; Ink Pads: Catherine Pooler (Red, Pink, Orange, Yellow, Green, Blue), Ranger Ink (Black); Die-cutting Machine: Sizzix (Big Shot); Tulle
Save to Pinterest!
Visit our Website and Blog!
Sign up for our Newsletter so you never miss a contest or giveaway!


