
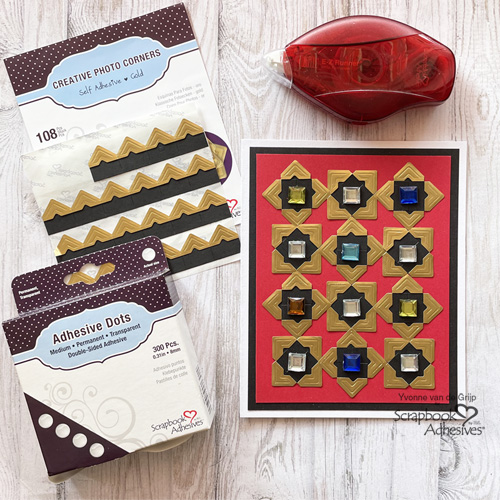
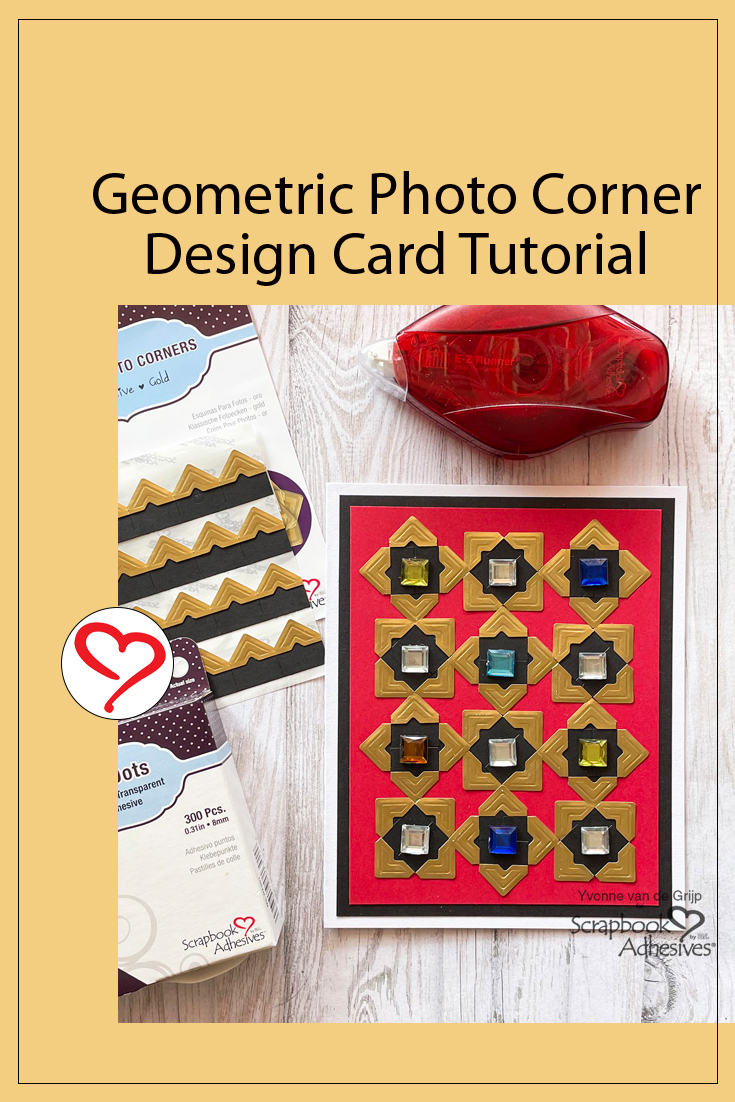
Hi everyone, Yvonne here with a fun and unique design! I’m sharing this Geometric Photo Corner Design Card. Yes, the pattern on this card is made with just Creative Photo Corners Gold!
And…it’s really fairly simple to create. I would love to tell you how I made my card! Hope you will join me in creating it.
Geometric Photo Corner Design
Let’s start with creating the geometrical squares. As a temporary base, I used a leftover liner sheet from a Creative Photo Corners Gold. You can easily remove the Creative Photo Corners Gold squares without them sticking to the sheet. Simply adhere the Creative Photo Corners Gold as shown in the picture in the four steps below.
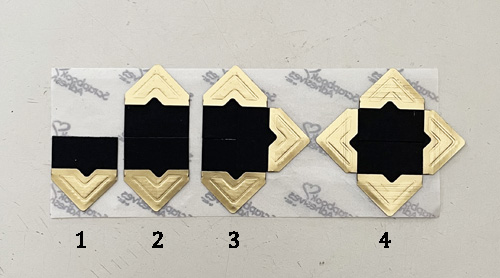
For my Geometric Photo Corner Design Card, you will need to create a total of 12 geometrical squares.
Assemble the Card Layers
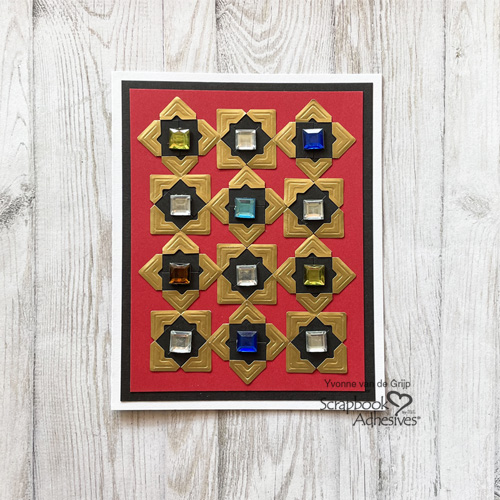
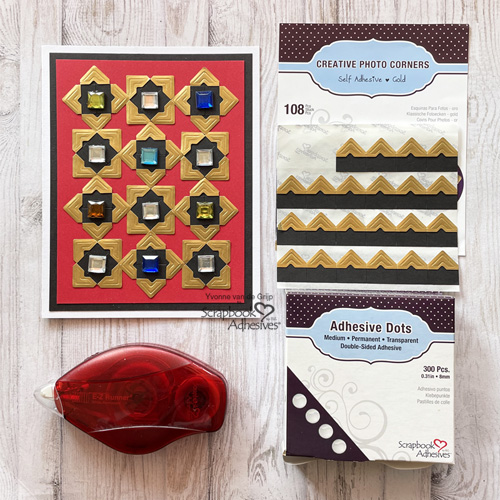
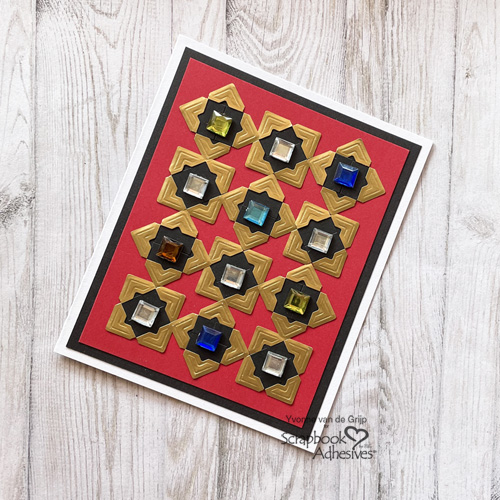
For the top panel of the Geometric Photo Corner Design Card, use a piece of red cardstock. Adhere the Creative Photo Corners Gold squares you created onto the card panel as shown in the picture below. Then mat the panel to a black cardstock and then on a white card base with the E-Z Runner® Permanent Strips Refillable Dispenser.
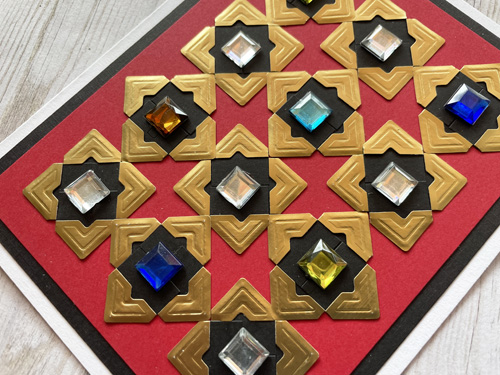
To finish, center the rhinestones on each square center with Adhesive Dots Medium. And voilá, your Geometric Photo Corner Design Card is ready. I hope you enjoyed this tutorial and wish you happy crafting!
Creative Time: 35 minutes
Skill Level: Intermediate
Materials needed:
Scrapbook Adhesives by 3L®:
E-Z Runner® Permanent Strips Refillable Dispenser
Other: White, Red, Black Cardstock; Rhinestones; Paper Trimmer; Scissors
Save to Pinterest!
Visit our Website and Blog!
Sign up for our Newsletter so you never miss a contest or giveaway!


