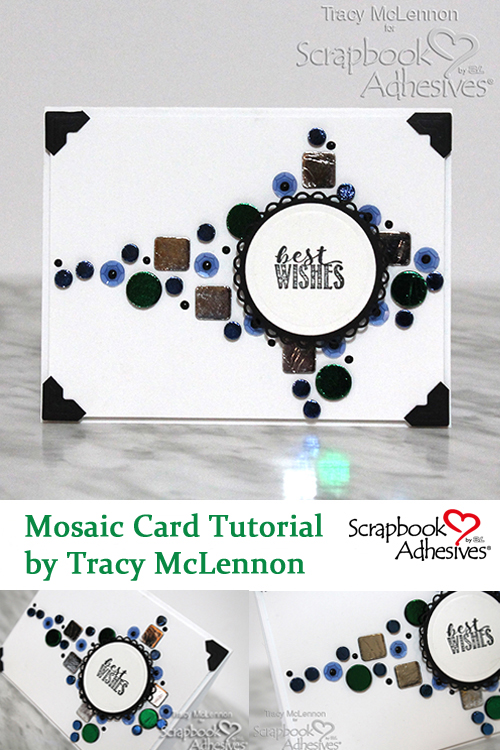
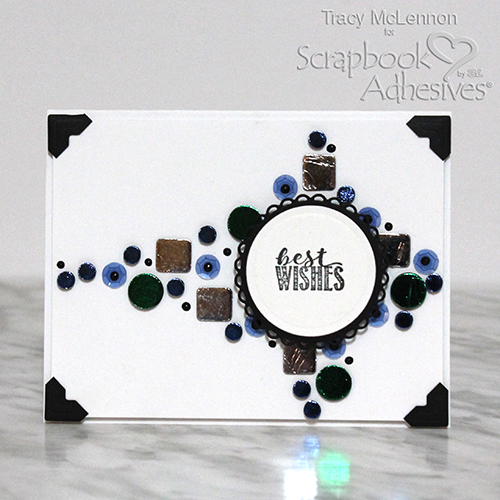
Welcome back, crafty friends! Tracy here, and today I have a fun Best Wishes card to share. This card is a great way to Wear Your Adhesives on the Outside with Metallic Transfer Foil, by making a mosaic using 3D Foam Squares and 3D Foam Circles.
This card lets you play with texture, dimension and sparkly fun all in one project. Here are all the details:
Making the Mosaic Card
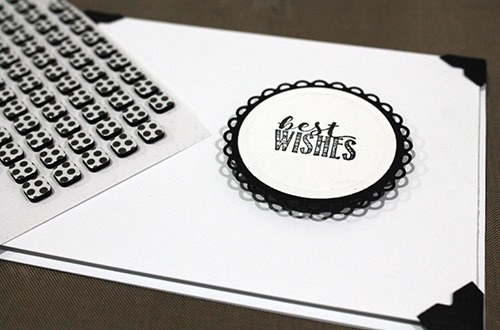
First I create my cardstock layers. The card base is 8.5 x 5.5-inch and folded in half. Then the next white cardstock layer is 4 x 5.25-inch. I use dies to cut the white cardstock circle and the black cardstock scalloped circle.
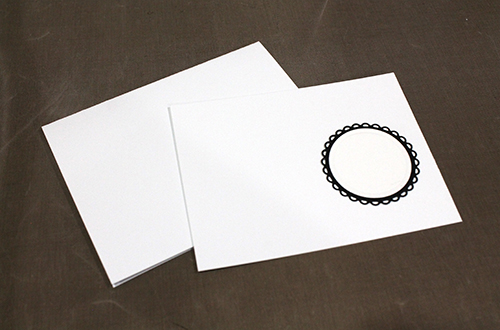
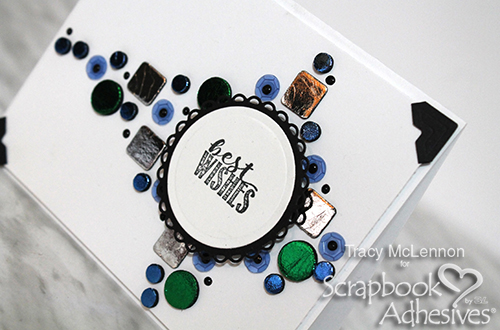
Stamp the sentiment onto the white cardstock circle using black ink. Use the E-Z Runner® Permanent Fine Adhesive Dispenser to adhere the cardstock circles together.
Then add Creative Photo Corners Black to the white cardstock layer and adhere that layer to the card base using Crafty Foam Tape.
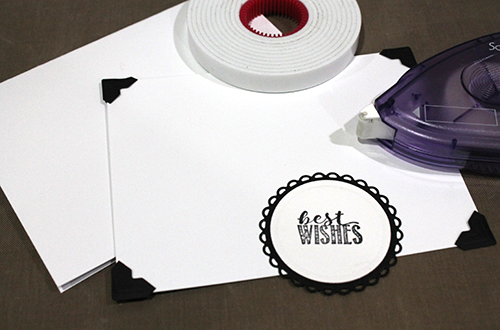
Add the layered circle to the card using 3D Foam Squares Black Small Size.
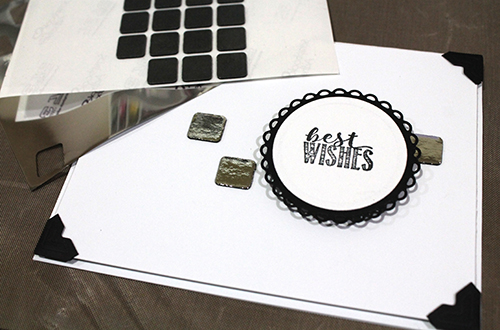
Adding Metallic Transfer Foil
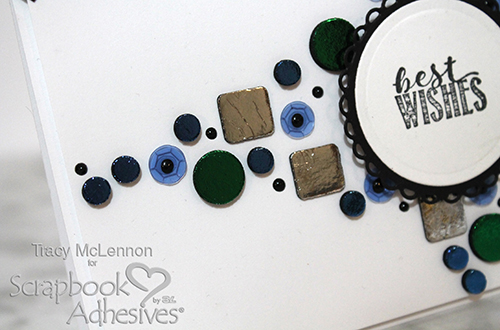
Next, start the card design with Thin 3D Foam Squares Black by placing them around the circle on the card panel. Add Silver Metallic Transfer Foil from the 3D Foam Creative Embellishment Kit. Simply remove the top liner from the foam, place the foil with the colored side up, gently rub and remove the foil. No machine or heat needed!
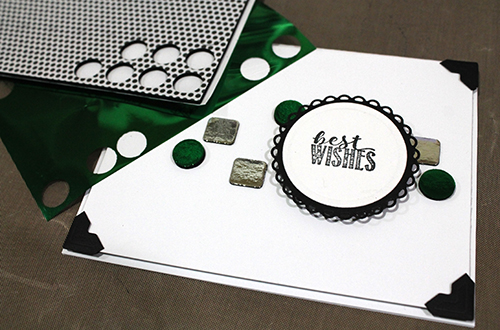
Add large 3D Foam Circles Black to the design and add green foil in the same process as above.
When adding sequins to any project, my go-to adhesive is the Adhesive Dots Micro.
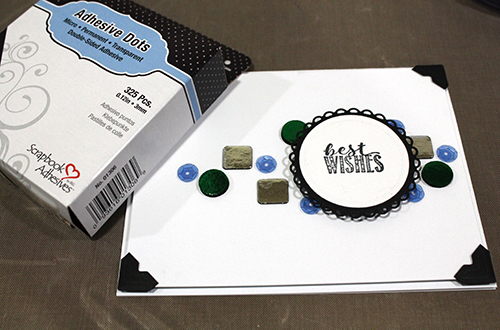
Then add the final elements, small size 3D Foam Circles, and apply the blue foil.
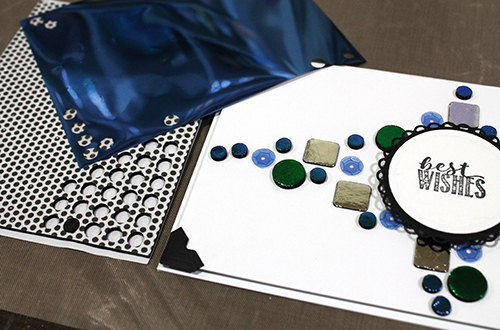
The final accents are enamel dots, placed in and around the foiled 3D Foam and sequins.
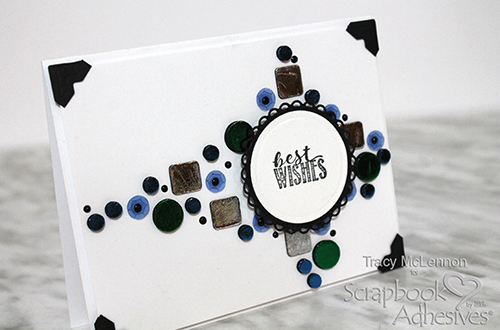
The different adhesive shapes and sizes along with the sparkle of foil create a stunning background pattern. This is an easy and fun way to Wear Your Adhesives on the Outside.
Thanks so much for stopping by!
Tracy
Creative Time: 90 Minutes
Skill Level: Intermediate
Materials Needed:
Scrapbook Adhesives by 3L®
Adhesive Dots Micro
3D Foam Circles Black Mix
3D Foam Squares Black Small Size
Crafty Foam Tape
E-Z Runner® Permanent Fine Adhesive Dispenser
Creative Photo Corners Black
Thin 3D Foam Black Mix
3D Foam Creative Embellishment Kit with Foil
Other
Cardstock (White and Black), Nuvo Crystal Drops- Ebony, Heartfelt Creations Circle Dies, Heartfelt Creations Sentiment Stamp, Sequins, Black Dye Ink
Save It to Pinterest!