
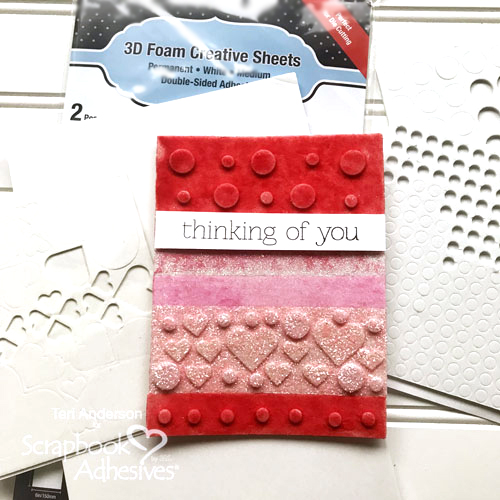
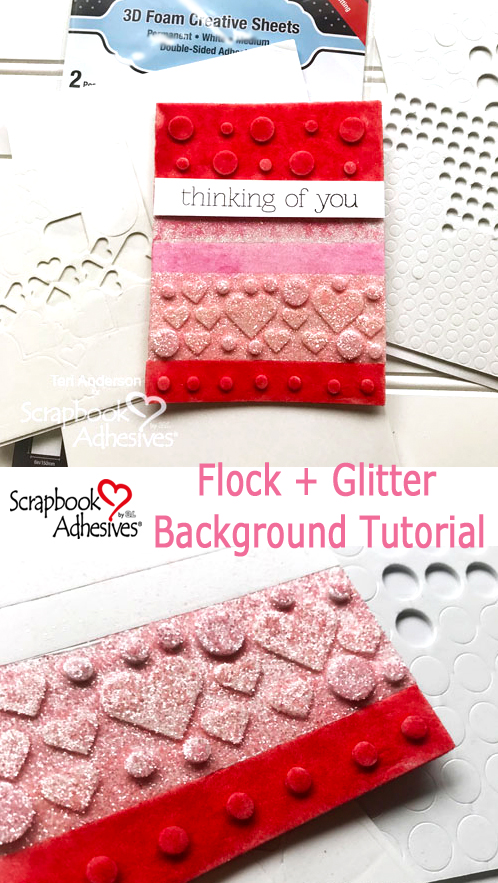
Like to add texture to your handmade cards? Teri here to show you how to create a flock and glitter background with 3D Foam Creative Sheets from Scrapbook Adhesives by 3L.
Creating the Background
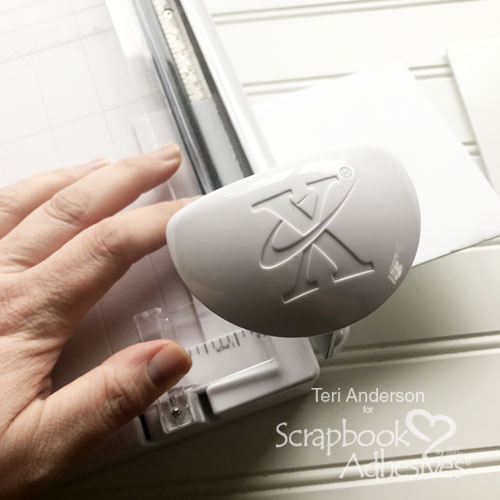
Start by cutting a 4 1/4″ x 5 1/2″ rectangle from a 3D Foam Creative Sheet. You could easily do this with scissors or you can use a guillotine cutter.
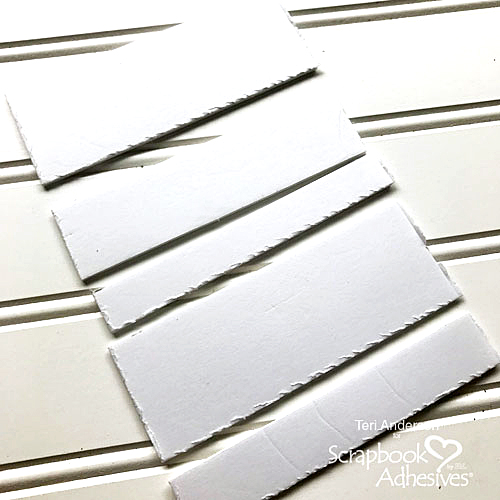
Once you’ve got your rectangle, cut five 4 1/4″ wide strips. You can make your strips the same size or you can mix things up and cut a variety of sizes.
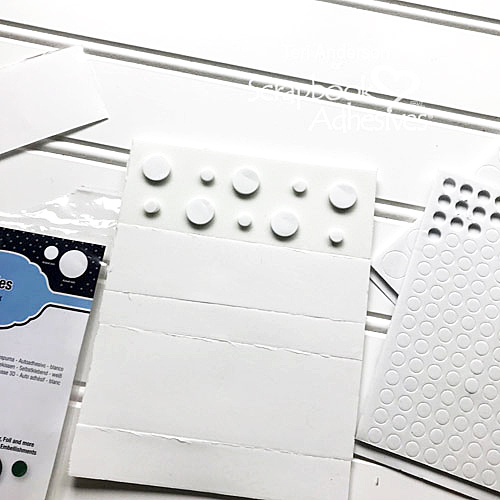
Adhere all the strips onto an A2 top-folded card. Be sure to remove only one side of the foam strips’ backing papers. You’ll see why in a minute.

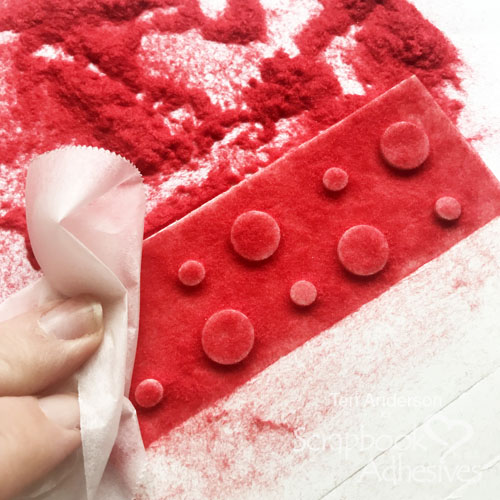
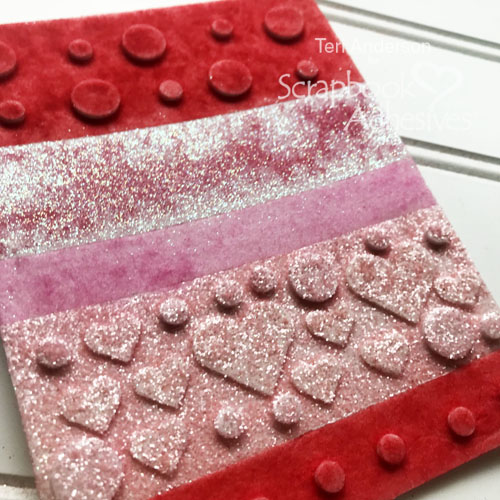
Now, remove the backing paper from the top strip of foam on your card. Randomly adhere some 3D Foam Circles onto it. You can make them as even (or uneven) as you want. Take off the backing paper after you’ve placed all the circles on the strip.
Adding the Flock and Glitter
Dump flock over the strip. Use parchment paper or wax paper to burnish the flock onto the foam strip and circles.
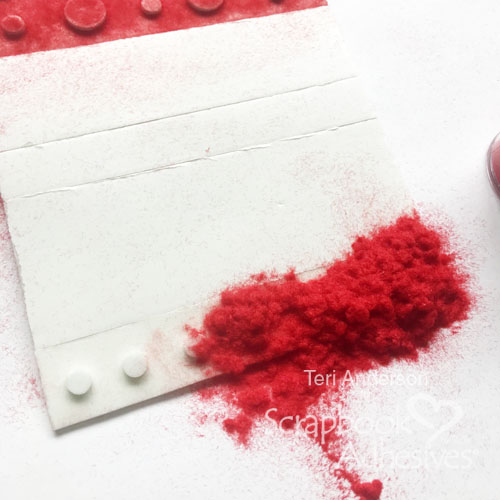
Now, you are going to move onto another strip! Remove the backing paper from the bottom foam strip on the card and then randomly add circles to it. Pull the backing paper off the circles and then dump some flock onto the strip and circles. Remove the excess flock.
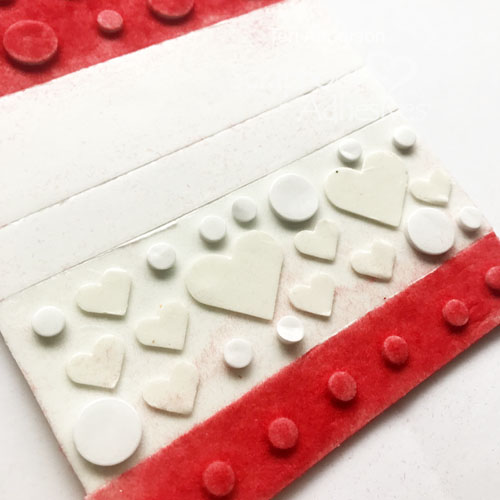
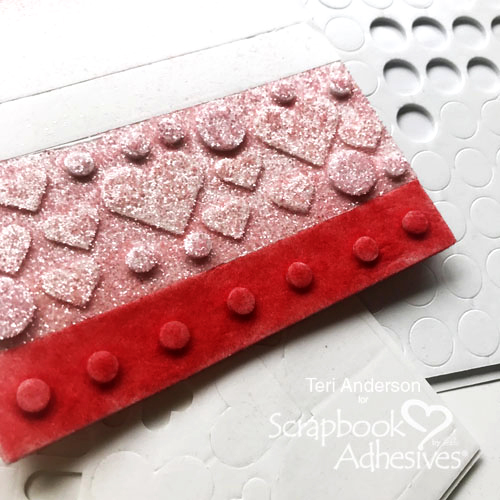
Remove the backing paper from one more strip. You’ll add circles and 3D Foam Hearts to it. Place them onto the strip as randomly as you want them to appear. Take the backing paper off of the hearts and circles and then dump glitter all over the strip. Again, use parchment paper or wax paper to burnish the glitter onto the foam.
Finishing the Background and Card
You should have two strips of foam left on your card to embellish. Remove the backing paper on one and adhere flock to it. Then take the backing paper off the other and apply glitter to it.
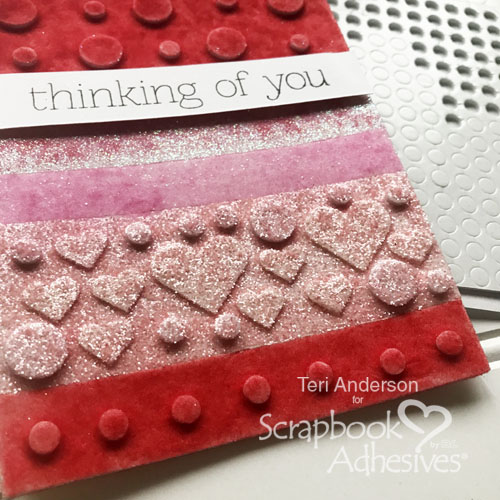
Complete the card by stamping a sentiment onto a strip of cardstock. Don’t have the right sentiment? Computer-generate one and print it out. Adhere it to the card with 3D Foam Circles.
I’d love to see you take on this background technique! Please share your projects with me by leaving a link in comments.
Creative Time: 1 hour
Skill Level: Beginner
Materials Needed
Scrapbook Adhesives by 3L®
3D Foam Creative Sheets Medium White
3D Foam Hearts and 3D Foam Circles
Other
White cardstock from Neenah Paper; Friendly Flowers stamp set from Simon Says Stamp; Black ink pad; Pink glitters; Red and Pink flock
Pin It!
By Kirsty Vittetoe March 13, 2019 - 11:58 pm
Great card, so beautiful!