
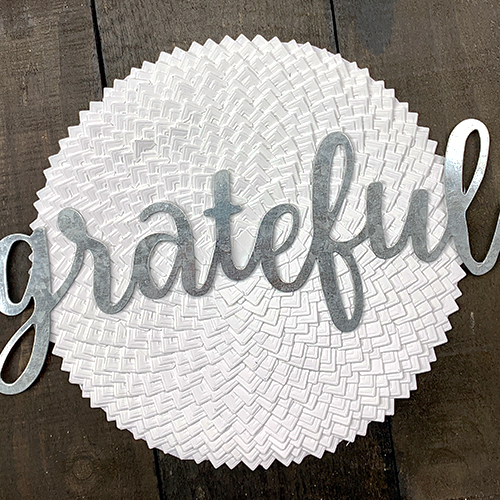
Recently, my ten year old son came to me and said he wanted to find a way to earn some money. We had some leftover scrap wood from building a fence, so I decided to start working with him on learning how to do some woodworking projects. The more time we’ve spent together sanding and staining, the more ideas I get rolling through my head. Today’s project is the end result of one of those ideas! Christine joining you today, with a DIY farmhouse sign showcasing our Creative Photo Corners.

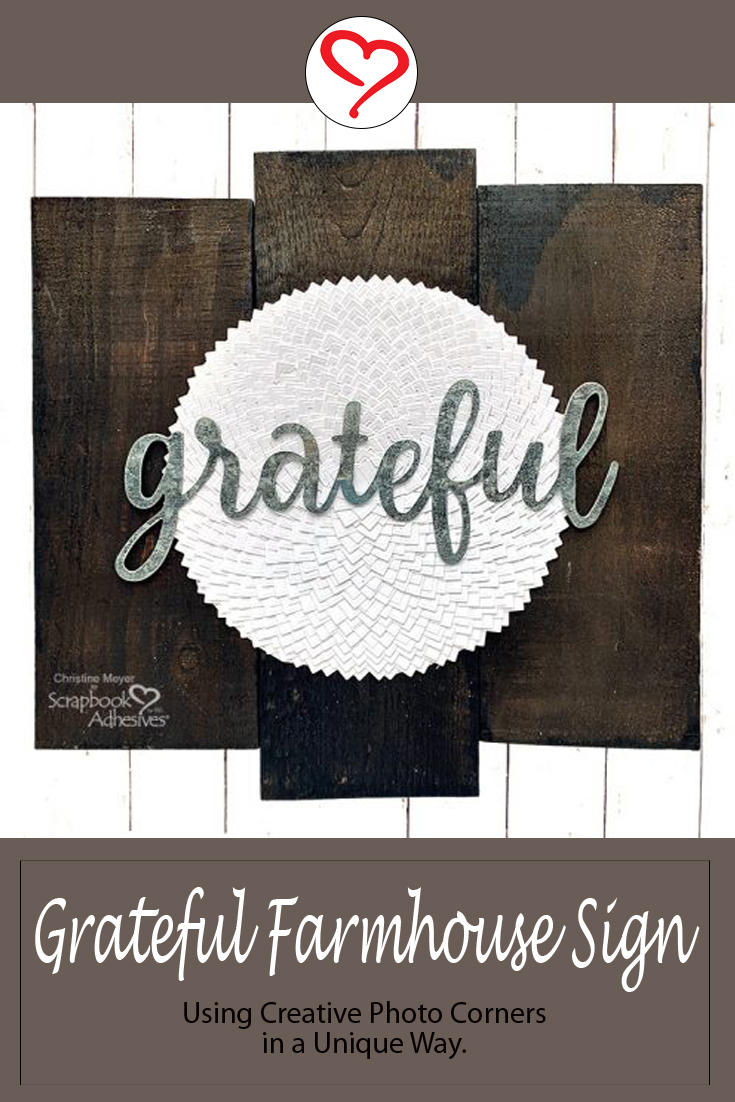
As you can see, I used A LOT of Creative Photo Corners. I had previously done this same technique on a layout, which you can see here. For months I have been wanting to try it on a home decor project. As we sanded and stained wood, I knew this would look gorgeous on these scrap wood pieces. Bigger bonus, my son got to contribute to the project, so he gets to feel some pride as he sees it too!
Creative Photo Corner Background
Creating this background was more simple and forgiving than you might expect.
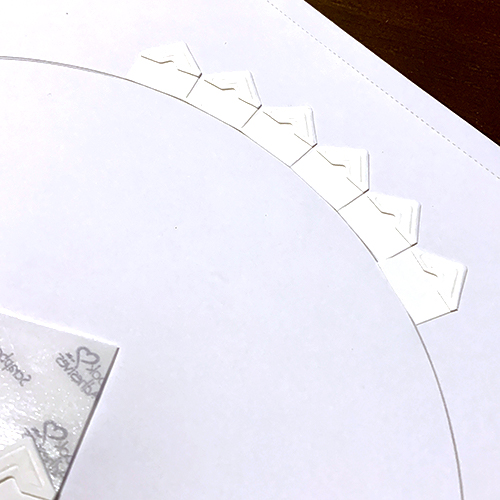
I started by tracing a circle onto 12 x 12 paper using a dessert sized plate. I opted to put it onto paper first rather than try to go straight onto the wood. That way, if I made any mistakes I didn’t have to start all over with the wood.
I used the circle as my outline for the first border of Creative Photo Corners. If you have to overlap a little, don’t worry about it! This has so many layers that it is incredibly forgiving and none of it shows up!
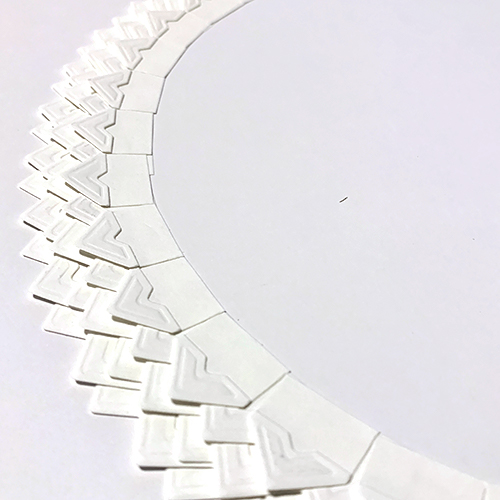
I did two layers on each row – adding the second layer in between the peeks. This made it easier to add each consecutive row. To begin each consecutive row, I just moved in about 1/8 of an inch and started the next circle. Beyond my first circle traced, I just eyeballed things. As I mentioned earlier, even if it looks like things are getting off, it’s very forgiving!
In the end, this took me about 90 minutes to do, and I watched a movie with a friend while I did it! It took just over 1000 Creative Photo Corners.
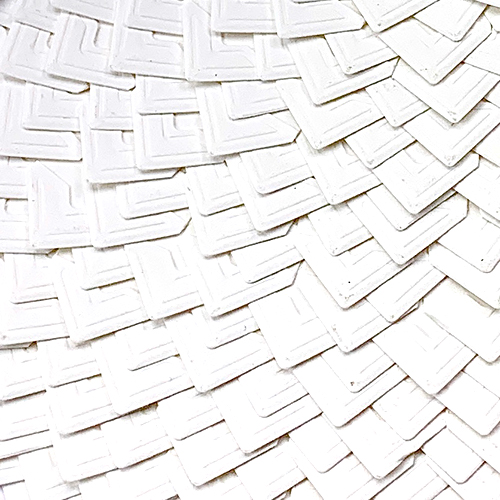
Look at all those beautiful layers!
Additional Adhesives
Wasn’t sure how this was going to work putting together the rest of it but I was thrilled to discover that the E-Z Runner Grand Ultra Strong Refill solved that problem!
To secure the circle onto the wood, cover the back of the circle with the runner – giving a very thorough coverage. It stuck right onto the wood with no problem.
I even added the metal word “grateful” on top using the E-Z Runner Grand Ultra Strong Refill! With the smooth surface, I wasn’t sure but the adhesive worked well!
I hope you’ve enjoyed this unique Farmhouse Sign today. Create something unique and a little bit outside of the box on using those supplies!
Creative Time: 2 hours
Skill Level: Intermediate
Materials Needed:
Scrapbook Adhesives by 3L®
Creative Photo Corners White
E-Z Runner Grand Ultra Strong Refill
Save It!
Visit our Website and Blog!
Sign up for our Newsletter so you never miss a contest or giveaway!


