
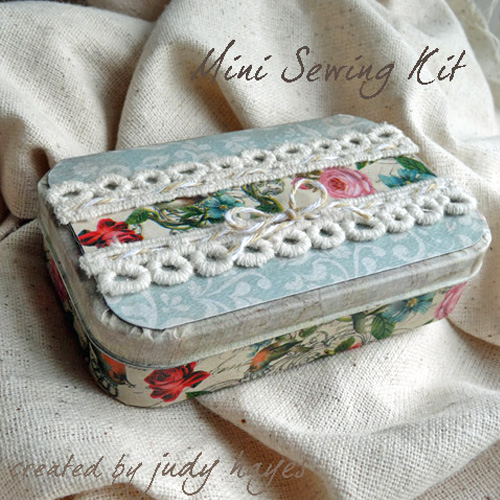
Hello blog friends! It’s Judy here today to share a Mini Sewing Kit created from a mint tin. The last time I traveled I discovered my plastic sewing kit was broken. I decorated this tin and transferred all the supplies into it!
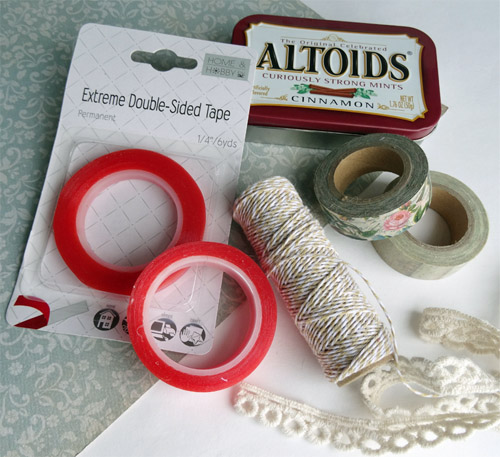
Here are my supplies!
To decorate this tin, wrap washi tape around the bottom of tin. Then wrap TWO layers washi tape around edge of lid.
Fasten a piece of patterned paper to top of the tin with Extreme Double-Sided Tape ½ʺ . Add a strip of washi tape to thin cardboard and trimmed it same width as tape. Fasten to tin with Extreme Double-Sided Tape ½ʺ. Next thread twine through the top straight edges of the Lace Ribbons. With another piece of twine, tie a bow and secure with a dot of Art Medium to the knot. This will keep the bow from coming undone.
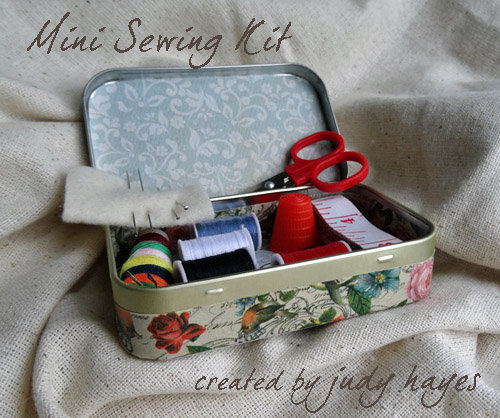
The Lace Ribbons were fastened to top of tin with Extreme Double-Sided Tape ¼ʺ. Then add a piece of patterned paper to the bottom of the tin with Extreme Double-Sided Tape ½ʺ. For the inside, add washi tape around the sides of bottom. Patterned paper was added on the inside lid and bottom.
To finish it off, I transferred all the supplies from my broken kit and I have a pretty (and sturdy) Mini Sewing Kit!
Thanks for visiting!
Judy
Supplies Used:
HomeHobby by 3L
Others:
- Patterned Paper (Carta Bella);
- Mint Tin;
- Thin Cardboard
- Art Medium glue
- Twine
- Lace Ribbons
- washi tape
Visit our Website and Blog!
Sign up for our Newsletter so you never miss a contest or giveaway!


By ~amy~ July 9, 2016 - 6:58 am
This kit is perfect!
By Maria badrock July 20, 2016 - 8:28 am
Everything created is awe inspiring. Love love the altoids tin can cover up. ..