
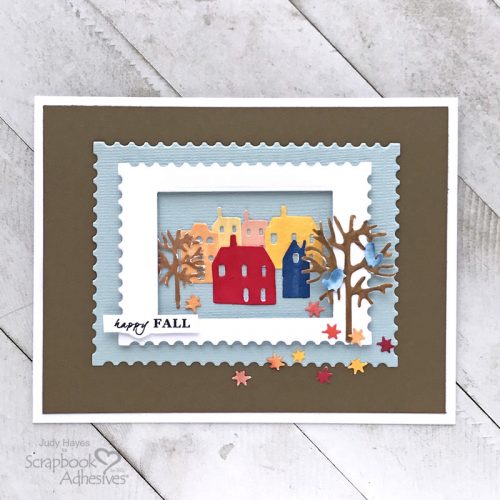
Hello friends! I hope you’re having a great fall! I’ve certainly been enjoying the warm weather in the countryside where I live so today, I put together a Happy Fall card with a country scene. I used a word program on my computer to print the greeting.
Card Base
From white cardstock form 4.25 x 5.5 inch card. Cut dark Khaki brown paper 4 x 5.25 inches
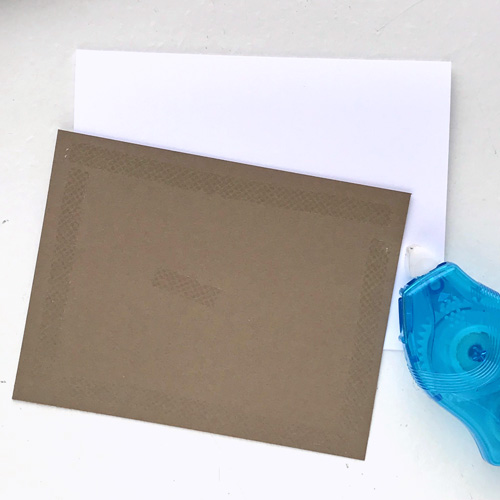
Use E-Z Runner® Petite Permanent Dots Refillable Dispenser to apply adhesive to back and fasten to the card front. Set aside.
Cut Frame and Background
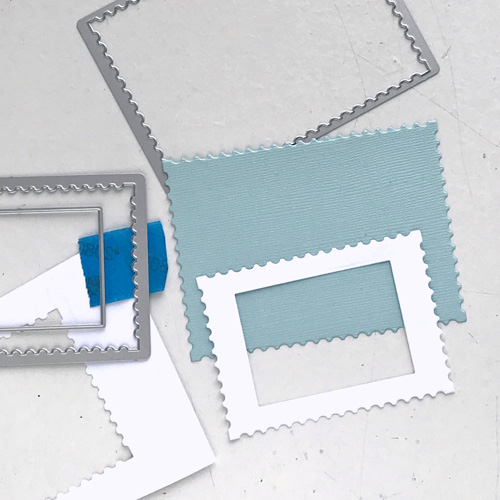
Align Stacked Postage die with largest Stacked Tiles, Rectangles die in center and tape to white cardstock. Use a die-cutting machine to cut the frame.
Cut a rectangle of light blue using larger Stacked Postage die and die cutting machine.
Fasten Frame to Background
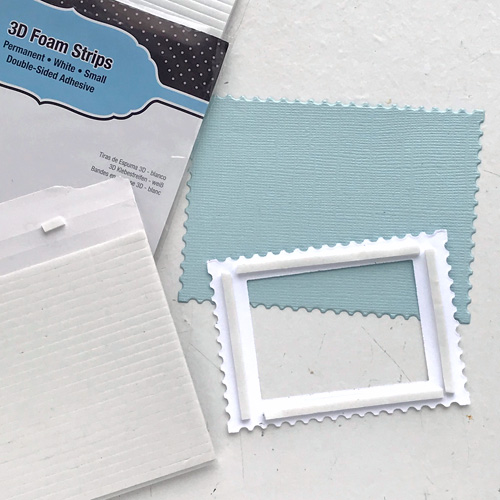
Apply 3D Foam Strips to the back of the white frame. Remove liners and fasten to the light blue background.
Countryside Pieces
From white cardstock cut a piece to fit Countryside die.
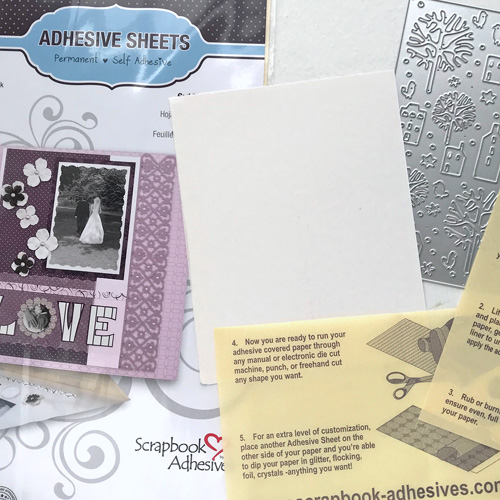
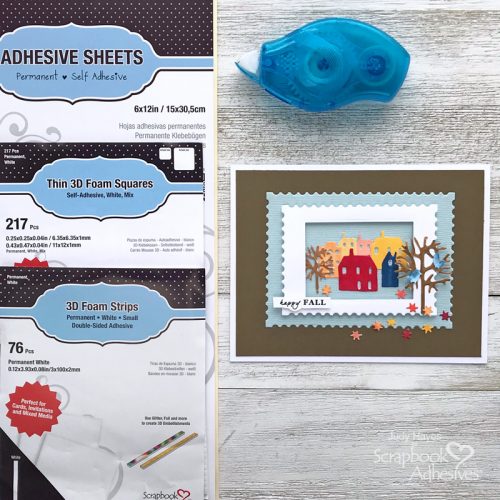
Remove the liner and apply a piece of Adhesive Sheets 6×12 inch the same size as white cardstock to the back. Place Countryside die on white cardstock and pass through die cutting machine to cut.
Color Pieces
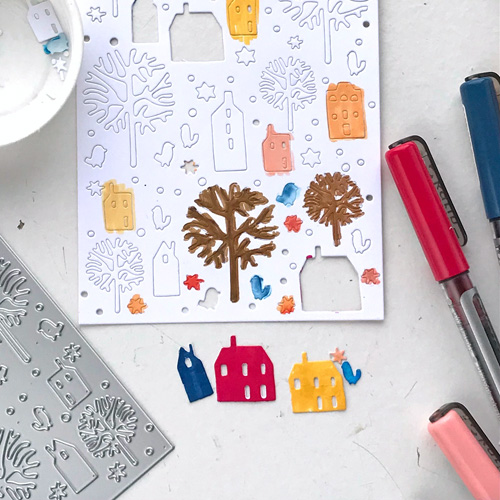
Color buildings, trees, birds and leaves with markers. (Designer Tip: I find it easiest to leave the small pieces in place to color).
Place Pieces in Frame
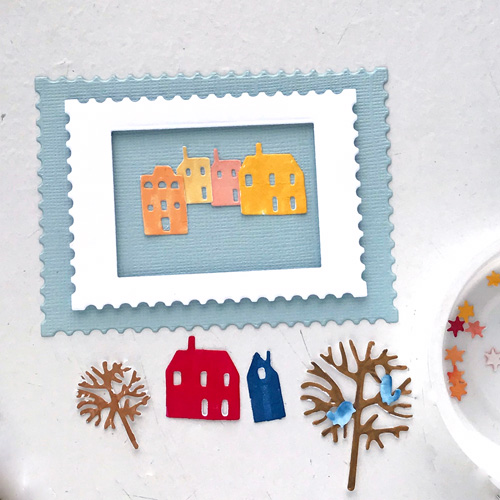
Arrange buildings as desired in the frame. Peel liners from the back of buildings and press them in place. Fasten small tree in the frame. Peel liners from birds and fasten to the large tree. Peel liner from large tree and press in place on the frame.
Fasten Frame to Card
Use E-Z Runner® Petite Permanent Dots Refillable Dispenser to apply adhesive to back of the light blue piece with frame. Align and press firmly in place on the card front
Add Leaves
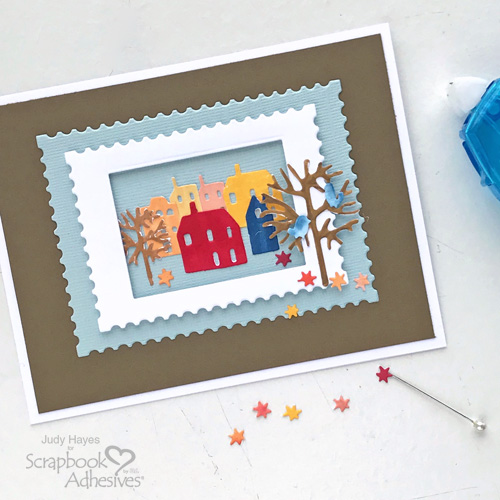
Remove liners from tiny leaves and press in place below the big tree spreading onto the card front. Add a leaf under the small tree. (Designer Tip: Use sewing pin to help get liner loose from small pieces and to place leaves.)
Greeting
Print greeting on white cardstock using computer and word program. Trim around the verse.
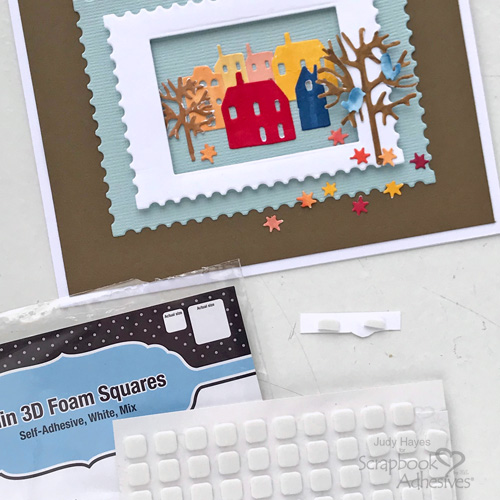
Cut small Thin 3D Foam Squares White Mix in half and apply to the back of greeting. Remove liners and press in place on the frame.
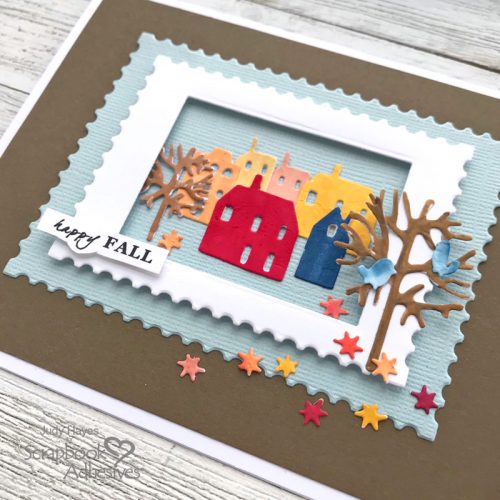
Happy Fall! Thanks for Visiting!
Judy Hayes
Creative Time: 30 Minutes
Skill Level: Intermediate
Materials Needed
Scrapbook Adhesives by 3L®
- Adhesive Sheets 6×12 inch
- E-Z Runner® Petite Permanent Dots Refillable Dispenser
- Thin 3D Foam Squares White Mix
- 3D Foam Strips
Other: Bazzill Basics Paper -Jetstream; Karin Brushmarker PRO; Sizzix Tim Holtz Dies – Countryside; Stacked Postage, Stacked Tiles, Rectangles; Cardstock – Dark Khaki Brown, White; Computer Printed Greeting
Save to Pinterest!
Visit our Website and Blog!
Sign up for our Newsletter so you never miss a contest or giveaway!


