
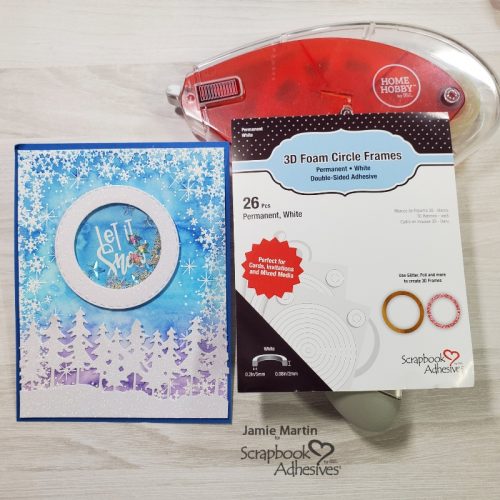
Hi, Jamie here with you today to let you know that you still have time to make those Christmas cards if you haven’t started yet. See how I created this wonderful watercolor winter shaker card!
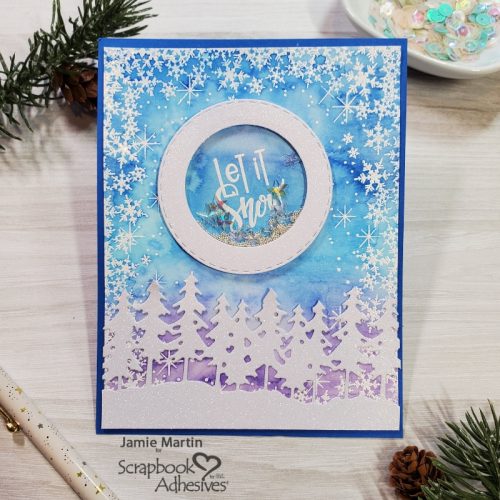
Watercolor Winter Shaker Background
To make my card I ink blended blue and purple inks on watercolor paper then went over it with a wet brush to make it look like it was watercolored. Once this panel is dry, stamp the snowflake with VeraMark Ink and emboss it with white embossing powder. A pine tree die was used to cut white glitter cardstock.
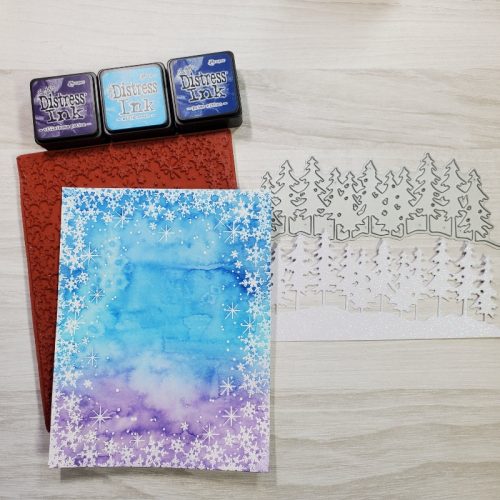
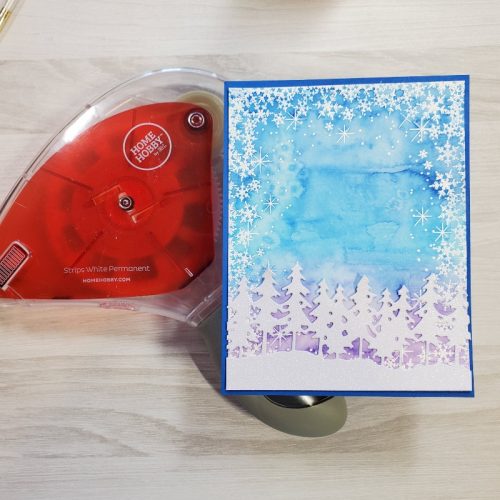
The E-Z Runner Grand was used to tape pine trees to the bottom of the watercolor panel, then the panel was taped to a blue card.
Winter Shaker Feature
3D Foam Circle Frames make shaker cards super easy! After stamping the sentiment with VersaMark Ink in the center of the card, heat emboss with white embossing powder. Then place one of the 3D Foam Circle Frames on the card. Make sure the sentiment is in the center.
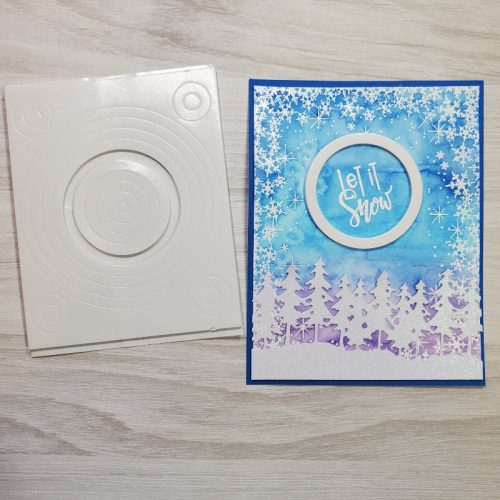
Next, nest two circle dies together and cut to create a circle ring from white glitter cardstock. This size will cover the 3D Foam Circle Frame on the card panel.

Die-cut a piece of acetate using the larger circle die. Use the E-Z Runner Grand to tape the back of the circle ring and cover over the acetate to create the window. Add shaker bits in the center of the 3D Foam Circle Frame on the card panel. Peel off the top liner of the foam circle frame and place the window on top of the foam to finish.
Skill Level: Intermediate
Creative Time: 35 minutes
Materials Needed:
Scrapbook Adhesives by 3L®
3D Foam Circle Frames White
E-Z Runner Grand
Plus
Rubbernecker Stamps- Stamps, Dies
Printworks Specialty Paper- Glitter Cardstock, Cardstock
Ranger Ink- Distress Inks
Stampendous- White Embossing Powder
Save to Pinterest!
Visit our Website and Blog!
Sign up for our Newsletter so you never miss a contest or giveaway!


