
Hi, everyone! Teri here to show you how to make a colorful So Kind Thanks Card that is packed with color and details! If you want to thank someone, do it big and bold! I used colorful patterned papers, a cover die, and 3D Foam adhesives to pop elements out.
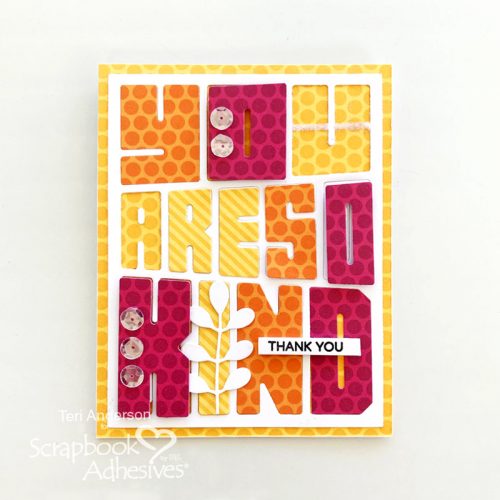
Big & Bold So Kind Thanks Card
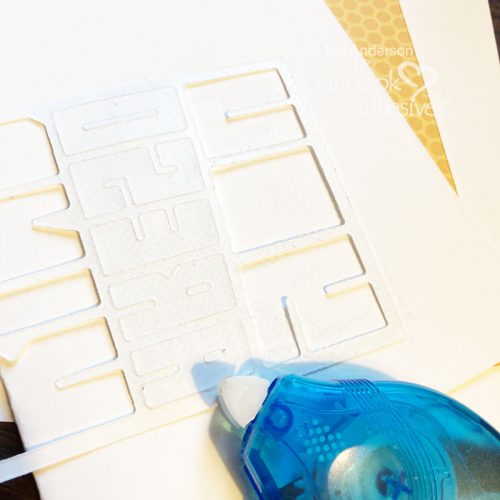
Start with a cover plate die with a lot of text on it. Die-cut the cover plate multiple times from cardstock and patterned paper.
Remove the letters from all the dies. Apply E-Z Runner® Petite Permanent Dots to the back of one of the dies. If you have left any letters in the die, don’t stress about it. Just put adhesive on them as well.
I like to use E-Z Runner® Petite Permanent Dots because the adhesive hits large spots, as well as narrow areas. Simply set the die on a piece of scratch paper and then run the E-Z Runner® Petite Permanent Dots over it until it’s completely covered.
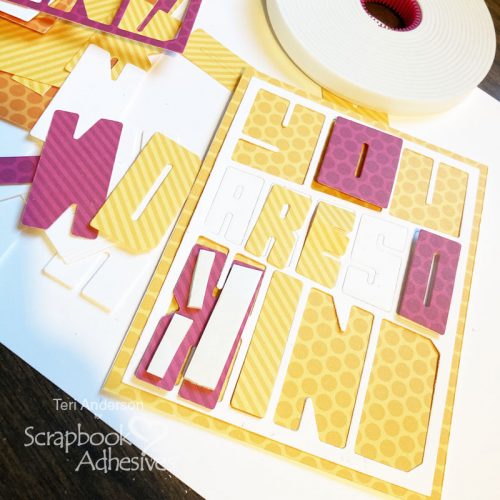
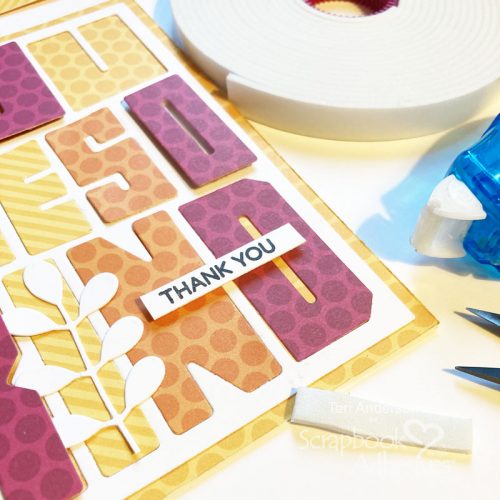
Adhere a piece of patterned paper onto a card as a card panel and then add your cover plate die-cut shape.
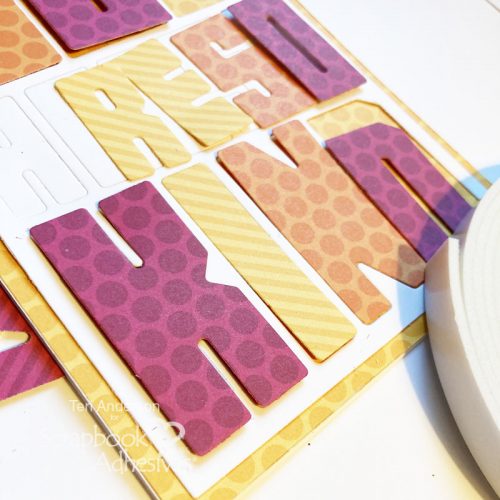
Begin placing your letters in the die-cut shape’s open spaces. Use Crafty Foam Tape 13ft. in White to mount some of them to make them pop off the card. Don’t be afraid to use your scissors to cut your tape pieces to fit onto your letters. Continue adding letters to the card with the E-Z Runner® Grand Ultra Strong Refillable Dispenser.
Embellish the Card Panel
Embellish the card by adding a small die to it. Also, stamp a secondary sentiment onto a strip of cardstock as well. Mount it to the card base with Crafty Foam Tape 13ft. in White. Use your scissors once again to trim the tape to fit on the sentiment strip. If you have the 3D Foam Strips, use those and cut (pun intended!) your time.
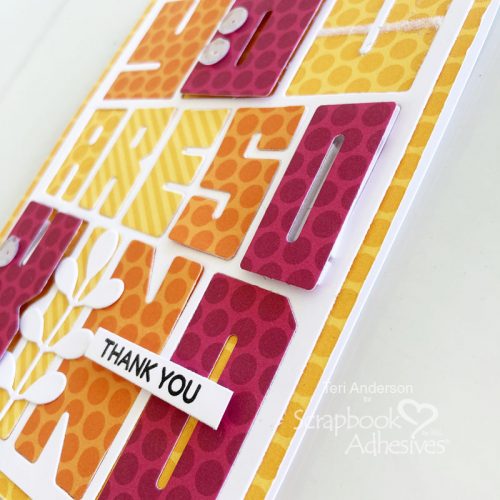
Apply a strip of E-Z Runner® Micro Refillable Dispenser onto one of the letters. Give it a little texture by adding flock or glitter to it.

Complete your card by securing some sequins to some of the letters with Adhesive Dots Micro.
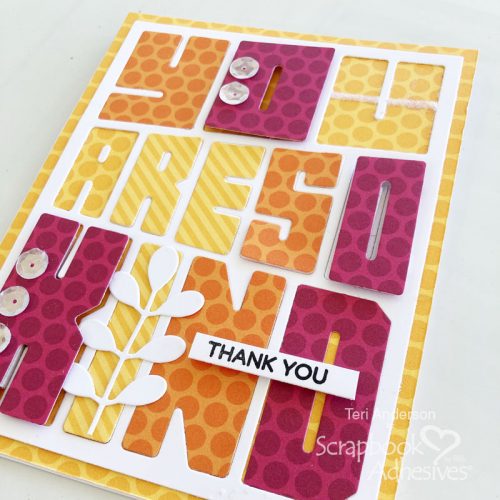
Got leftover die-cuts? Use them to make more cards. Replicate your card design or change it up by embellishing it in different ways! I hope you enjoyed this So Kind Thanks Card Tutorial.
Happy Creating!
Creative Time: 60 mins
Skill Level: Intermediate
Materials Needed:
Scrapbook Adhesives by 3L®
E-Z Runner® Micro Refillable Dispenser and E-Z Runner® Petite Permanent Dots Refillable Dispenser
E-Z Runner® Grand Ultra Strong Refillable Dispenser
Other: Cardstock: Neenah; Patterned Paper: Sunny Studio (Dots & Stripes Jewel Tones 6×6 Paper Pack); Stamps and Dies: Hero Arts (Everyday Sentiments Stamp Set, Sentiment Strips Die), Simon Says Stamp! (Leaf Column Background Die), Concord & 9th (So Kind Die); Ink: Ranger Ink (Black); Sequins: Pretty Pink Posh; Flock: Stampendous!
Save to Pinterest!

Visit our Website and Blog!
Sign up for our Newsletter so you never miss a contest or giveaway!


