
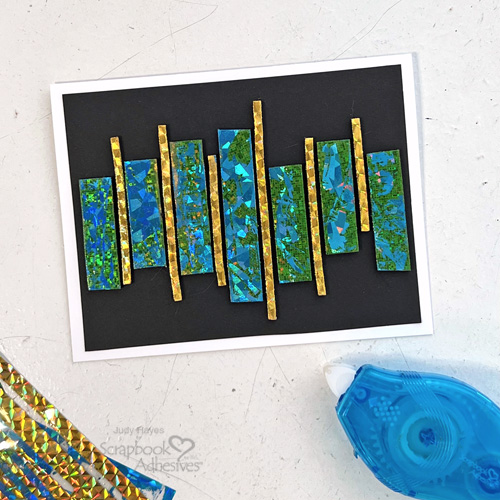
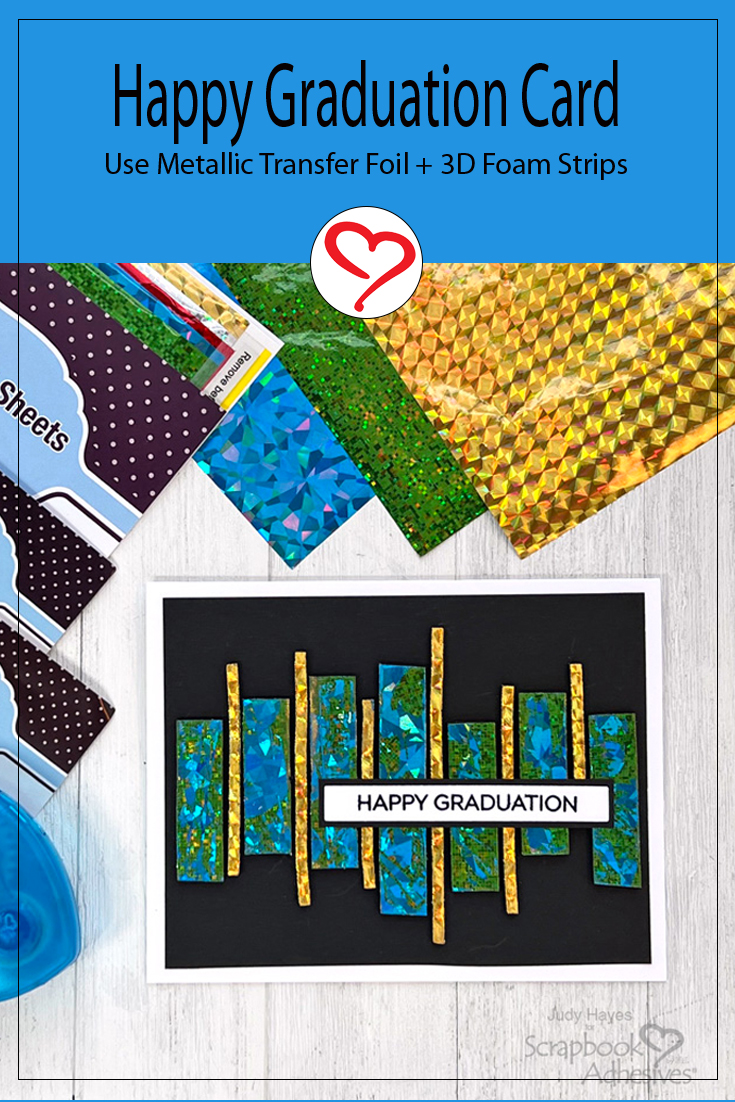
Hi, Judy here today! At this time of year, I always think it’s graduation season. I have a Metallic Foil Graduation Card to celebrate with lots of shine and sparkle! I used a combination of Metallic Transfer Foil Sheets Celebrate Colors, 3D Foam Strips Black, and 3D Foam Large Black for a super easy and quick make!
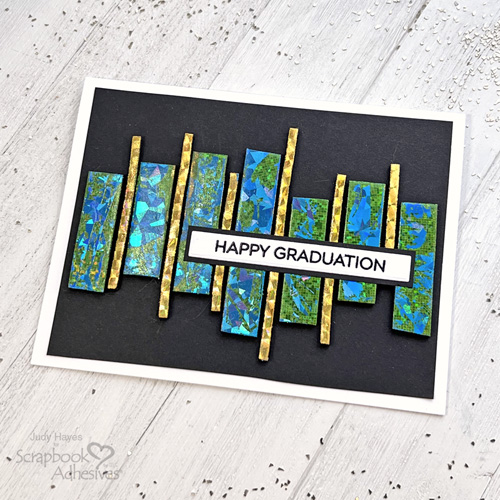
Metallic Foil Graduation Card Pieces
Cut white cardstock 5.5 x 8.5 inches, score and fold to make a 4.25 x 5.5 inch card base. Then from black cardstock, cut a 4 x 5.25 inch background piece and a 0.5 x 3.125 inch mat for greeting.
Attach 3D Foam Strips to Card Front
Find horizontal center of black background piece and mark with pencil or use ruler. I measured 2.375 inches from short edge and kept ruler there to place first strip of 3D Foam Large Black.
Next leave a narrow gap and place a narrow strip of 3D Foam Strips Black and cut to desired length. I positioned strips starting at top, pressed them in place and then cut length at bottom.
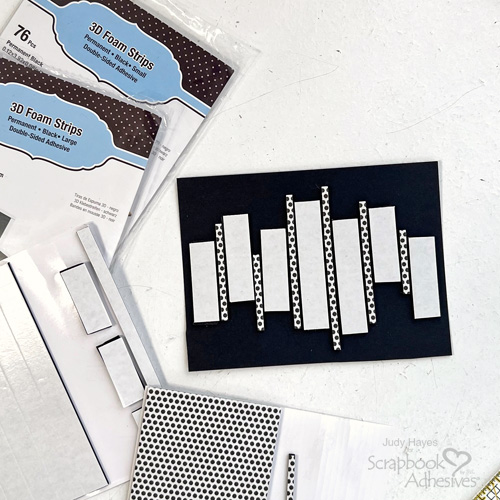
Continue to alternate and stagger 3D Foam Large Black and 3D Foam Strips Black (small) across panel leaving a narrow gap between each strip. (Designer Tip: If they don’t come out even at edges of background, simply trim it slightly to be even.)
Wear Your Adhesive on the Outside with 3D Foam Strips
Peel liner from one 3D Foam Large Black Strip, gently press green foil from Metallic Transfer Foil Sheets Celebrate Colors so that foil does not completely cover 3D Foam Strip and peel away foil. Then apply blue foil over green to fill in space not covered by green. Continue to apply foil in this manner to all 3D Foam Large Black Strips.
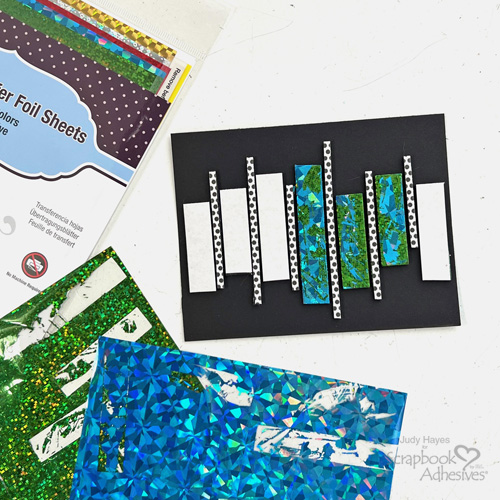
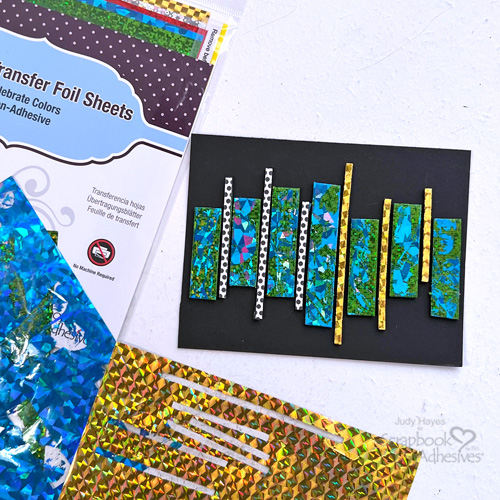
Next peel liner from a narrow 3D Foam Strips Black, cover with gold foil from Metallic Transfer Foil Sheets Celebrate Colors, press well and peel away foil. Continue to apply gold foil to all narrow 3D Foam Strips Black.
Secure to the Card Base
Use E-Z Runner® Petite Permanent Dots Refillable Dispenser to apply adhesive to back of foil strip background and fasten to card front
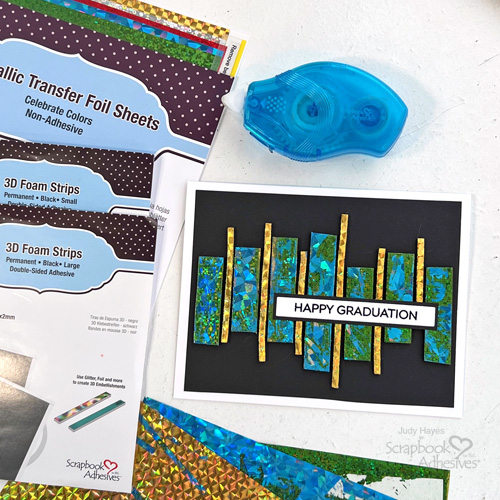
Prepare Greeting
Stamp greeting with black ink on white cardstock. Align coordinating die over greeting, tape in place and run through die cutting machine to cut.

Apply adhesive to back of greeting with E-Z Runner® Petite Permanent Dots Refillable Dispenser and fasten to black cardstock mat. Then apply adhesive to back and fasten across foil strips on card front.
Just like that, it’s done!
Thanks for visiting!
Judy Hayes
Creative Time: 15 mins
Skill Level: Beginner
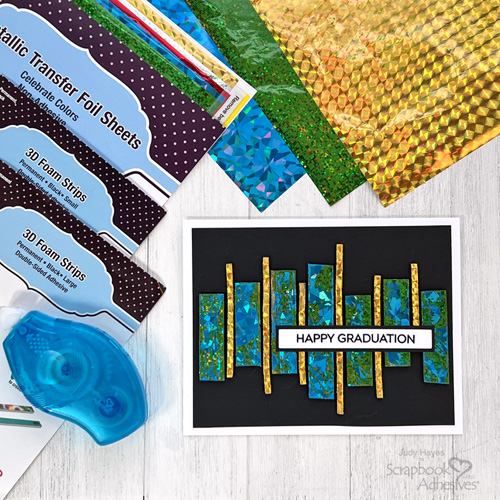
Materials Needed:
Scrapbook Adhesives by 3L®
E-Z Runner® Petite Permanent Dots Refillable Dispenser
3D Foam Strips Black, 3D Foam Large Black
Metallic Transfer Foil Sheets Celebrate Colors
Other: Stamp: Hero Arts (Message Strips Cut and Stamp XL); Ink: Tsukineko (Versafine Onyx Black); Craft Dies: Hero Arts (Message Strips Cut and Stamp XL); Black+ White Cardstock
Click Preferred Retailers List
Save to Pinterest!
Visit our Website and Blog!
Sign up for our Newsletter so you never miss a contest or giveaway!


