
Have you been inspired to do a technique found on social media? I saw a Fabric Tape one on Instagram. So, I thought I would try with our tear tape, the Premium Double-Sided Tape 1/2in., and fabric scraps! Hi, Judy here today! Let me show you how. Love the look and texture of this Fabric Tape Card. It combines my love of sewing and paper crafting.

Make Fabric Tapes
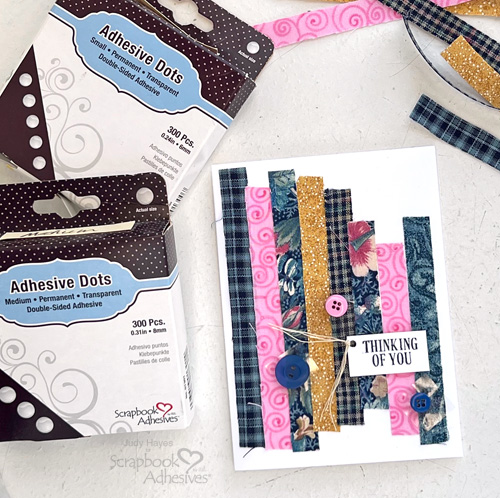
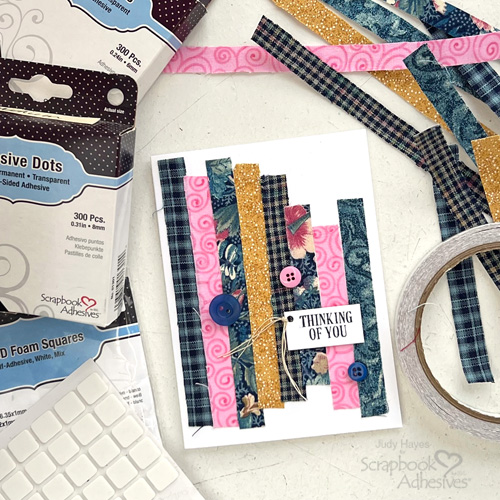
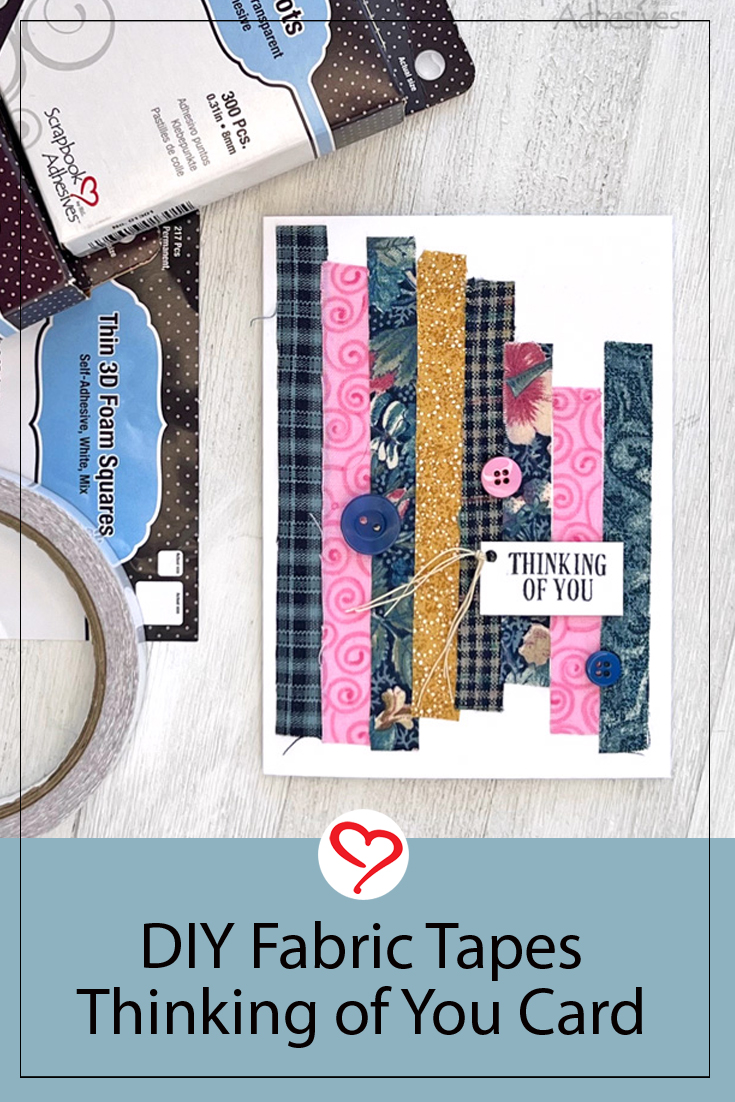
Gather an assortment of six coordinating fabric scraps. Place a fabric piece right side down on the work surface. Press about a 9 to 10 inch piece of Premium Double-Sided Tape 1/2in. onto fabric and rub well with a bone folder.
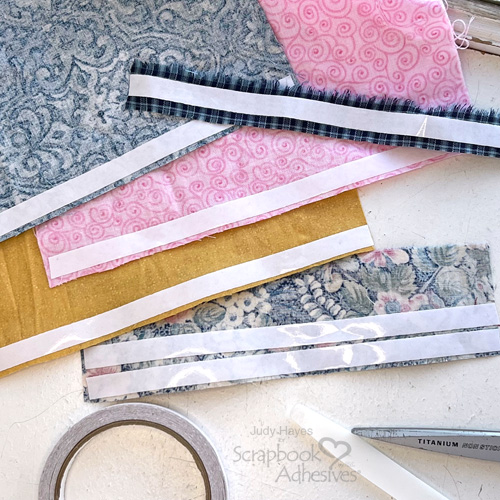
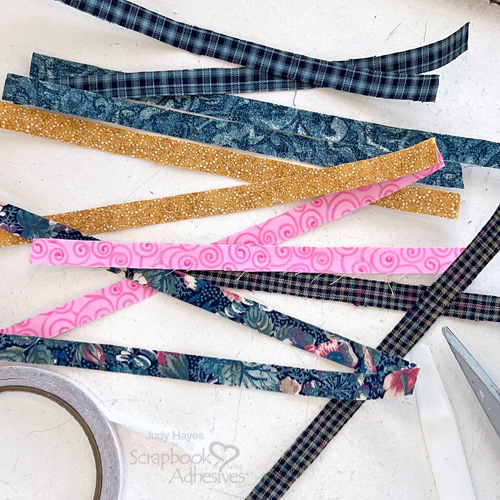
Turn the fabric over and rub again with the bone folder. Repeat this application with the Premium Double-Sided Tape 1/2in. to make two tapes of the six different fabrics. Use scissors to trim away fabric along the edges of the tape on all pieces. I found this quite easy to do as the tape made a stiff edge to follow.
Designer Tip: Longer fabric tapes can certainly be made if fabric scraps are long enough!
Fasten Fabric Tapes
Decide on the color/pattern arrangement of fabric strips for the 4.25 x 5.5-inch white cardstock card base. Cut a piece of fabric tape to fit along the card fold, peel away the liner, and place on the card, leaving some space of about 0.125 to 0.25 inch.
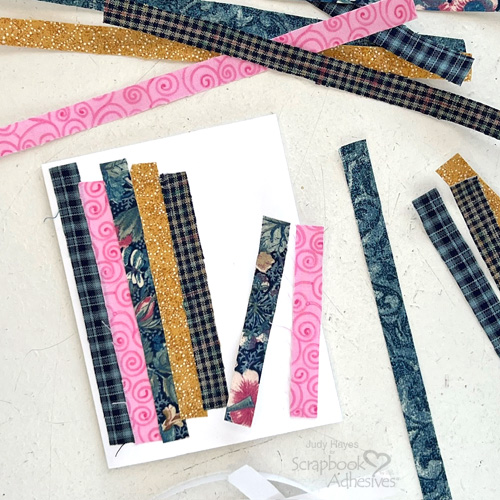
Continue with a different fabric tape cut at a slightly different length than the first one, peel the liner, and attach alongside the first tape. Repeat the process with different colors and varying lengths of fabric tape across the card front.
Designer Tip: Since I unintentionally lapped a few of my tapes (once in place, the pieces will not move), the border on the right edge of the card was a bit wider than I wanted. Simply trim off some of the edge.
Prepare Greeting
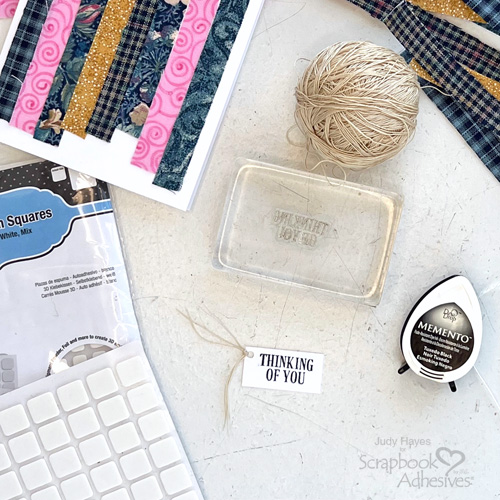
Stamp greeting on a piece of 0.75 x 1.5-inch white cardstock with black ink. Punch a hole at the left top corner, thread three pieces of string through the hole to tie a knot. Place on the back of the sentiment, two smaller squares of the Thin 3D Foam Squares White Mix, and adhere it on the card front on top of the fabric.
Add Buttons
Choose 3 coordinating buttons of different sizes, about .375 -.625 inches in size. On back of each button, place Adhesive Dots Small or Adhesive Dots Medium according to button size. Leave liner in place to arrange buttons as desired on card front (as shown in photo). Then peel the liners off each button and press into place.
Thanks for visiting!
Judy Hayes
Creative Time: 20 mins
Skill Level: Beginner
Materials Needed:
Scrapbook Adhesives by 3L®
Thin 3D Foam Squares White Mix
Adhesive Dots Small and Adhesive Dots Medium
HomeHobby™ by 3L
Premium Double-Sided Tape 1/2in.
Other: Stamp: Ranger Ink (Beautiful Blooms Stamp Set by Simon Hurley); Ink: Tsukineko (Memento in Tuxedo Black); White Cardstock; Various Fabric Scraps; Buttons
Click Preferred Retailers List
Save to Pinterest!
Visit our Website and Blog!
Sign up for our Newsletter so you never miss a contest or giveaway!


