
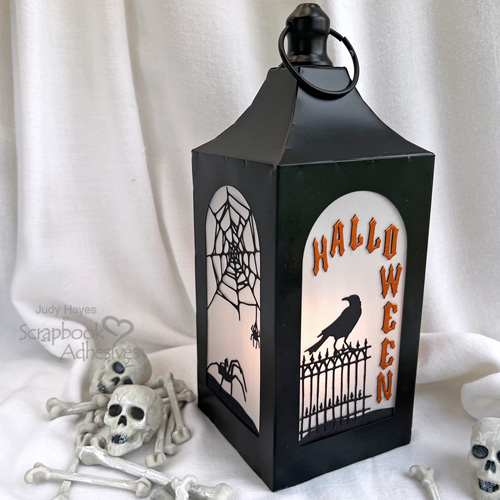
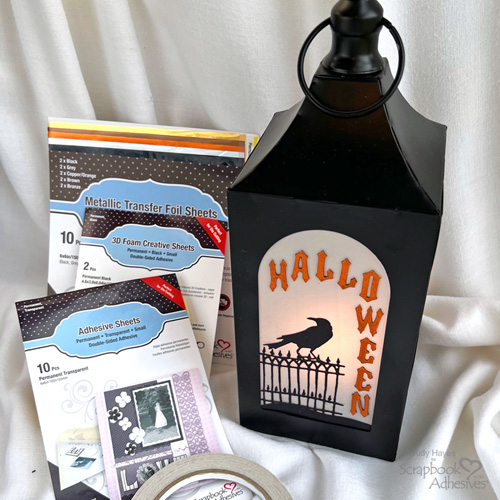
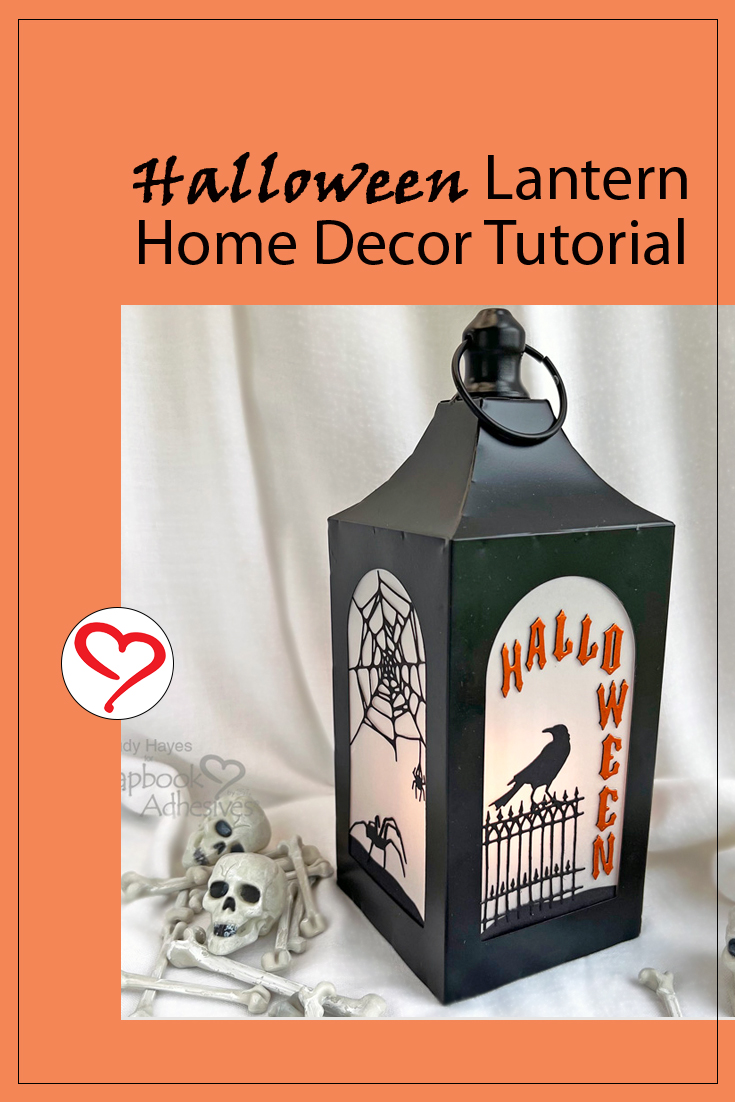
Hi, Judy here today! With the daylight hours getting shorter and fall approaching, I start to think of Halloween crafts. I found a metal lantern at Dollar Tree with the idea of making it into an Altered Lantern for Halloween. Once all the pieces are cut, it’s quite easy to assemble. With a candle or LED light inside, it’s a fun decor piece!
Add Vellum in Lantern
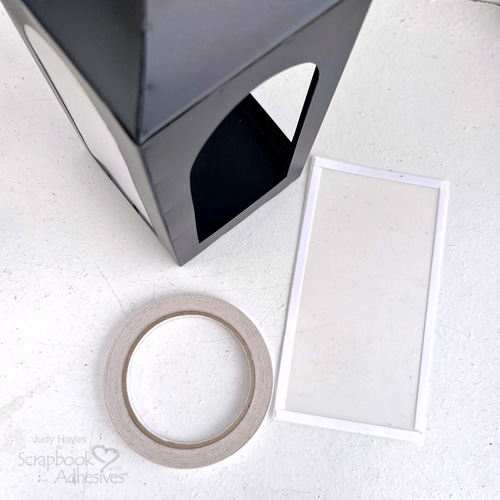
Cut three vellum pieces to fit behind lantern windows. For this lantern, the pieces were cut as 3.75 x 7-inch rectangles. Add Premium Double-Sided Tape 1/4in. along each side of the vellum piece, peel off the liners, and place it inside the lantern with tape facing out. Press in place behind the opening. Repeat for the other two sides with the vellum pieces. The fourth opening will be left open.
Lantern Side One
Apply Adhesive Sheets 4 x 6in. to the back of the black cardstock. Repeat as needed to use for all die-cut pieces. Use it with dies to cut spiders and the web. To finish the scene, free-hand cut a ground piece.
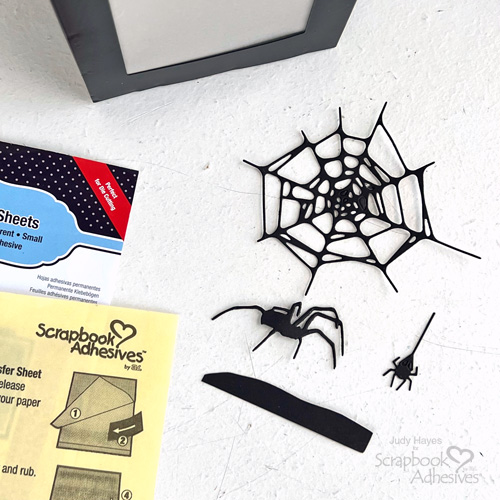
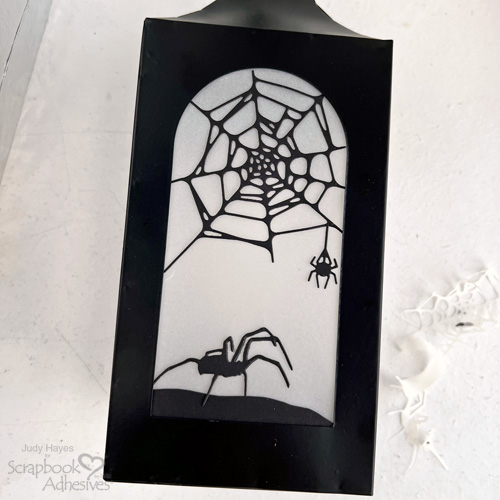
Gently peel off the liners from the spider web, slide under the upper edges of the lantern opening, and carefully press in place on the vellum. Then turn the lantern over with the web side down on the work surface and press from the back side to firmly secure the web. Proceed to add the ground and spiders. Make sure to press in place from the front and the back.
Lantern Side Three
For lantern side three (opposite of side one), die cut two bats, three trees, and a graveyard from black cardstock with Adhesive Sheets 4 x 6in. applied. Apply a small piece of Adhesive Sheets 4 x 6in. to the back of the white cardstock to die-cut the moon. Next, color the moon with Distress ink or marker.

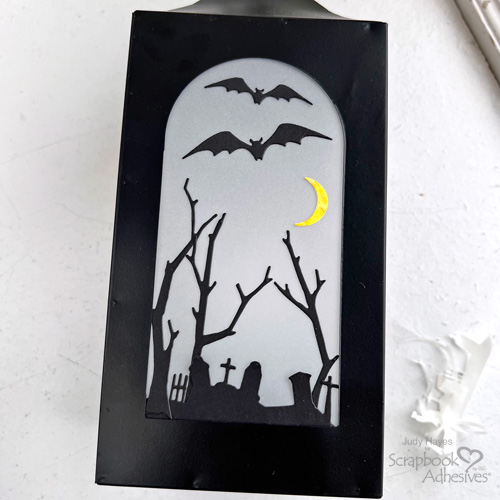
Turn the lantern to side three (opposite side of the spiders) to place the graveyard scene. Then arrange two trees behind it and one in the front. Don’t forget to press on the back of each piece to secure. Lastly, add the bats and the moon on the vellum. Press again from the back side.
Lantern Side Two – Front
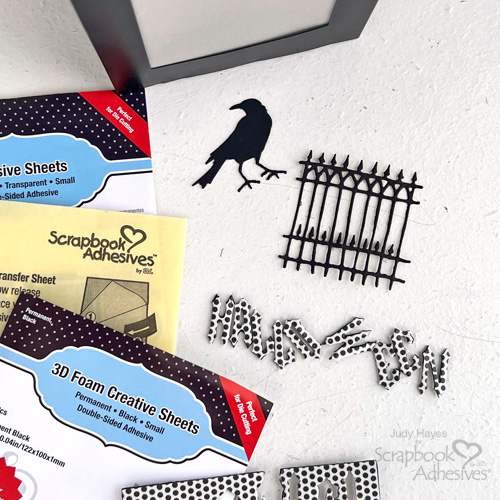
From the black cardstock with Adhesive Sheets, die cut the fence, the bird, and the ground (not shown in photo). Use an alphabet die to cut “HALLOWEEN” from 3D Foam Creative Sheets Small Black. Very carefully remove letters, keeping the liners in place on both sides. This is the hardest part of this project!

Place the fence, the bird, and the ground in place using the same steps to adhere to the vellum. Arrange the letters for “HALLOWEEN” and remove the bottom liners and press in place…once those letters stick, they will not move! LOL!
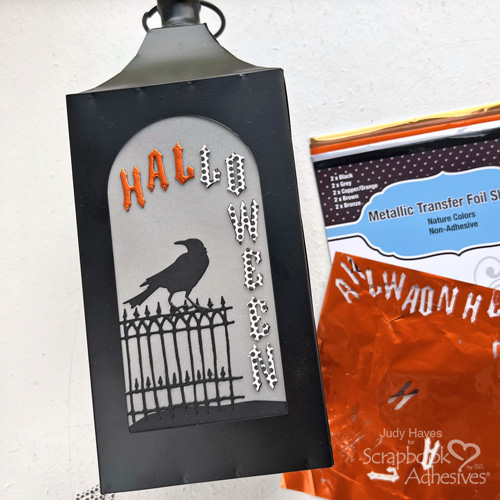
Remove the liner from the top of a letter, cover with the copper color foil (color side facing you) from Metallic Transfer Foil Sheets Nature Colors, rub well, and peel away to reveal the color. Repeat the foiling steps for all letters.
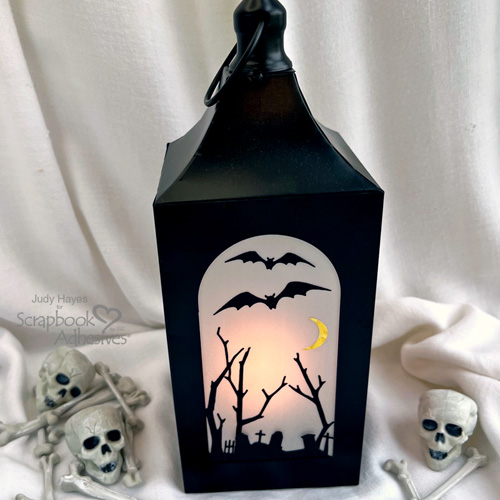
Place a small battery candle or LED light inside to light up this Altered Halloween Lantern…and you’re done!
Thanks for visiting!
Judy Hayes
Creative Time: 45 mins
Skill Level: Intermediate
Materials Needed:
Scrapbook Adhesives by 3L®
3D Foam Creative Sheets Small Black
Metallic Transfer Foil Sheets Nature Colors
HomeHobby™ by 3L
Premium Double-Sided Tape 1/4in.
Other: Ink: Ranger Ink (Distress in Mustard Seed); Craft Dies: Sizzix (Tim Holtz Vault Coffin Box, Vault Gothic Portraits, Vault Fright Night, Vault Series Halloween 2021); Black + White Cardstock; Heavy White Vellum; Dollar Tree (Black Metal Lantern), Battery Candle or LED Light
Click Preferred Retailers List
Save to Pinterest!
Visit our Website and Blog!
Sign up for our Newsletter so you never miss a contest or giveaway!


