
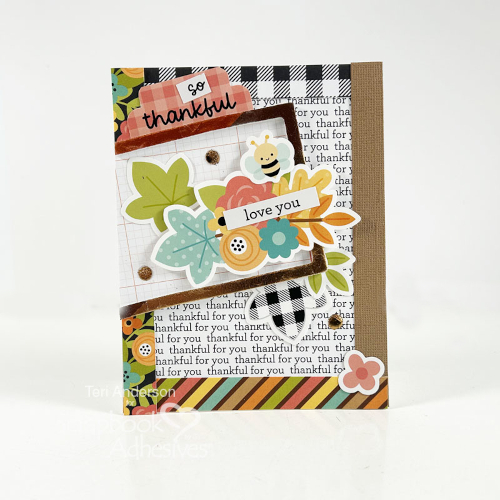
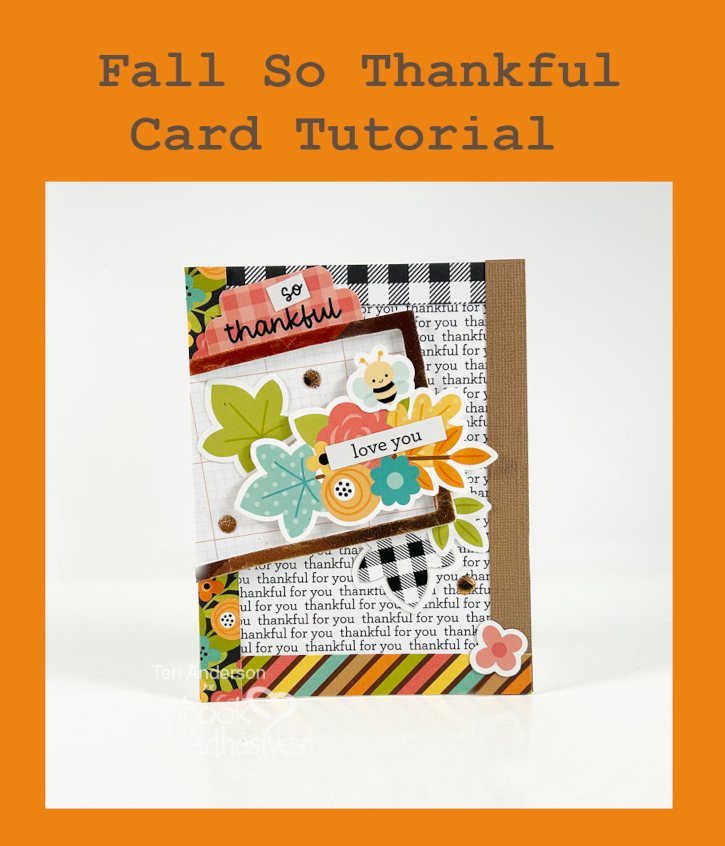
Hi, friends! Thanksgiving is almost here, and it’s a great time to let the ones you love know how much they mean to you! Teri here to show you how to put together a fun Fall So Thankful Card to share your gratitude!
Wear Your Adhesives on the Outside with the Fall So Thankful Card + 3D Foam Frames
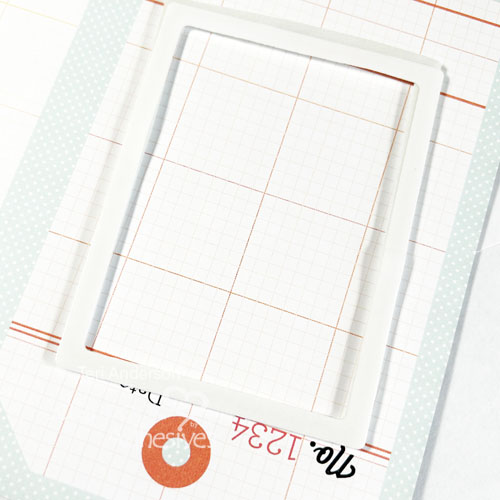
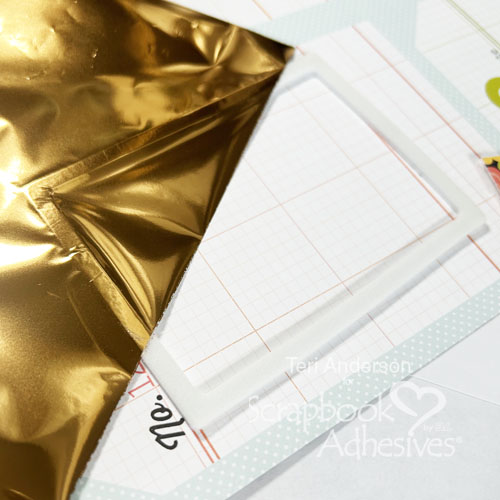
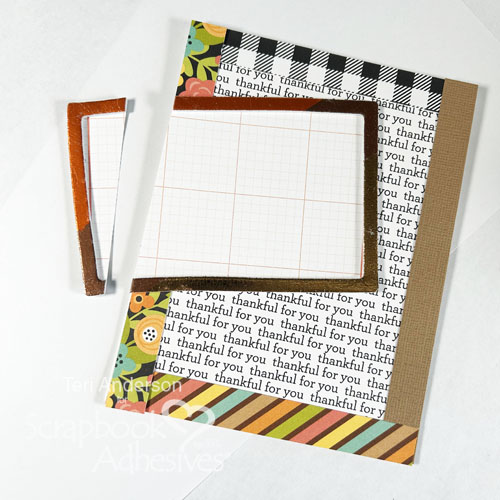
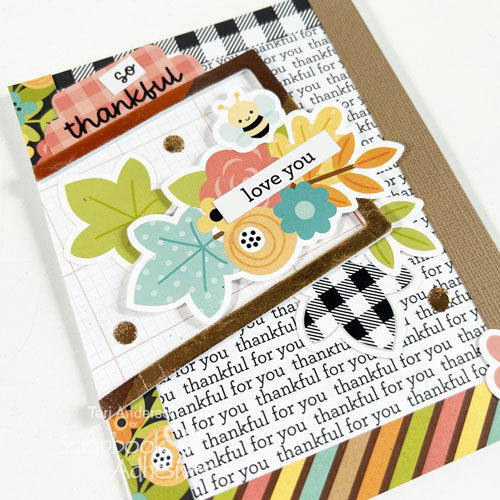
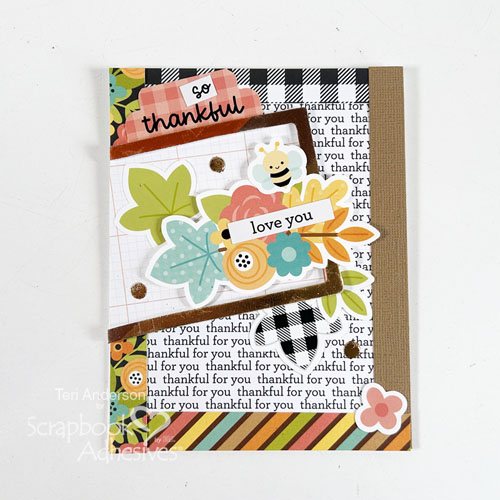
Place one of the larger frames from the 3D Foam Frames on top of patterned paper. I picked three foil colors (bronze, copper, and black) from the Metallic Transfer Foil Sheets in Nature. Remove the top liner and in sections, place one color on one section of the frame with the color side facing you. Rub to transfer the color to the frame. Peel off the foil to reveal the shine! Reapply the foil in missed areas.
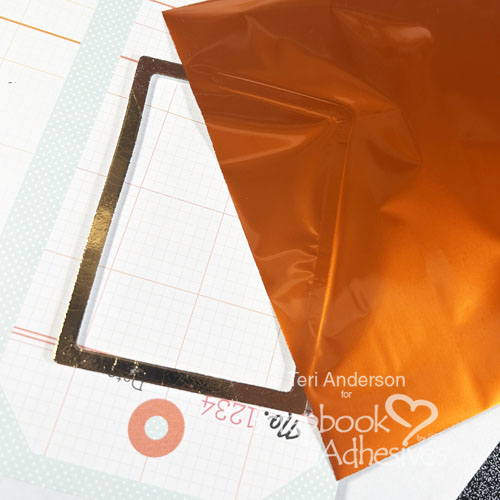
Repeat the foiling steps with the other two colors. Trim off the excess patterned paper from the foiled frame.
Building Card Panel Layers
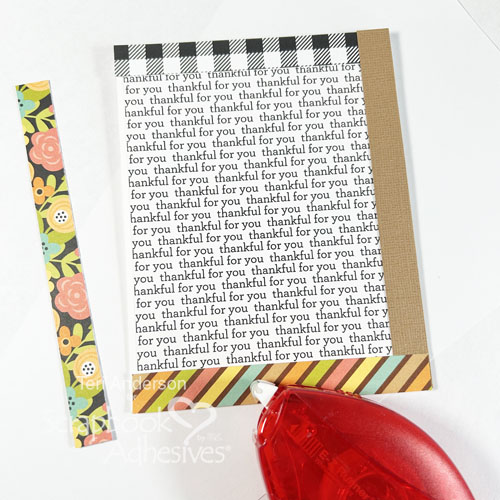
Adhere a patterned paper panel to a kraft card base using the E-Z Runner® Permanent Strips Refillable Dispenser. Then place patterned paper strips along the edges for color and interest. Next, mount your foiled frame to your card front at an angle and trim off the excess. Throw out or save your excess for another project!
Embellish the Card
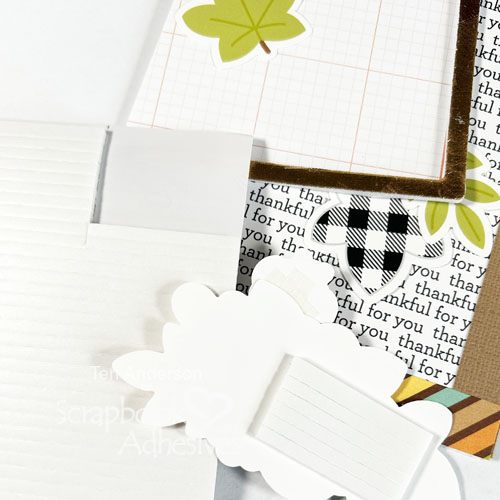
Take several ephemera pieces and arrange them on the card front. With the 3D Foam Strips, pop up some the pieces. Designer’s Tip: Use scissors to cut down the foam strips into smaller pieces. Plus I like to use several strips together at one time…customize!
Add Interest with Faux Splatters
Complete your card with faux paint splatters. How? Simply place Adhesive Dots Micro onto your card, stretching them out a little to look like uneven circles. Set a piece of Metallic Transfer Foil Sheets in Nature on them with the same foiling steps. Designer’s Tip: Practice foiling with the adhesive dots on a scratch paper a few times to get a feel of the process…transferring the color to the dot, the release of the foil, etc.
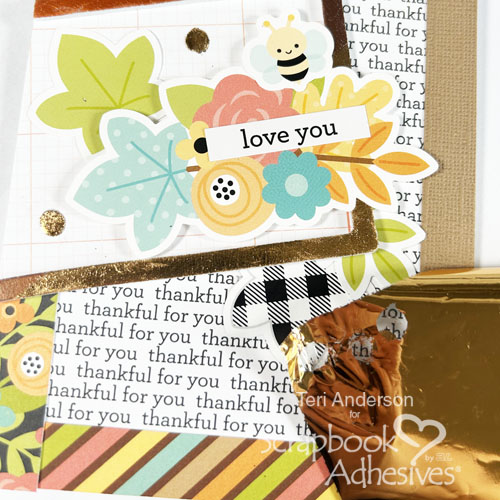
Lastly, use stickers, die-cuts or stamps to add a sentiment to your card…and done! I hope you are inspired by today’s Fall So Thankful Card tutorial to make some cards of your own for those you are thankful for!
Happy Creating!
Creative Time: 60 minutes
Skill Level: Intermediate
Materials needed:
Scrapbook Adhesives by 3L®:
3D Foam Strips and 3D Foam Frames
E-Z Runner® Permanent Strips Refillable Dispenser
Metallic Transfer Foil Sheets Nature Colors
Other: Patterned Paper and Die-cuts: Doodlebug (Farmhouse Collection); Cardstock: Neenah and Doodlebug
Save to Pinterest!
Visit our Website and Blog!
Sign up for our Newsletter so you never miss a contest or giveaway!


