
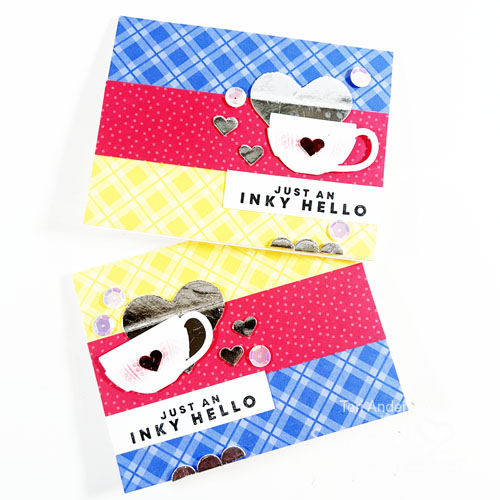
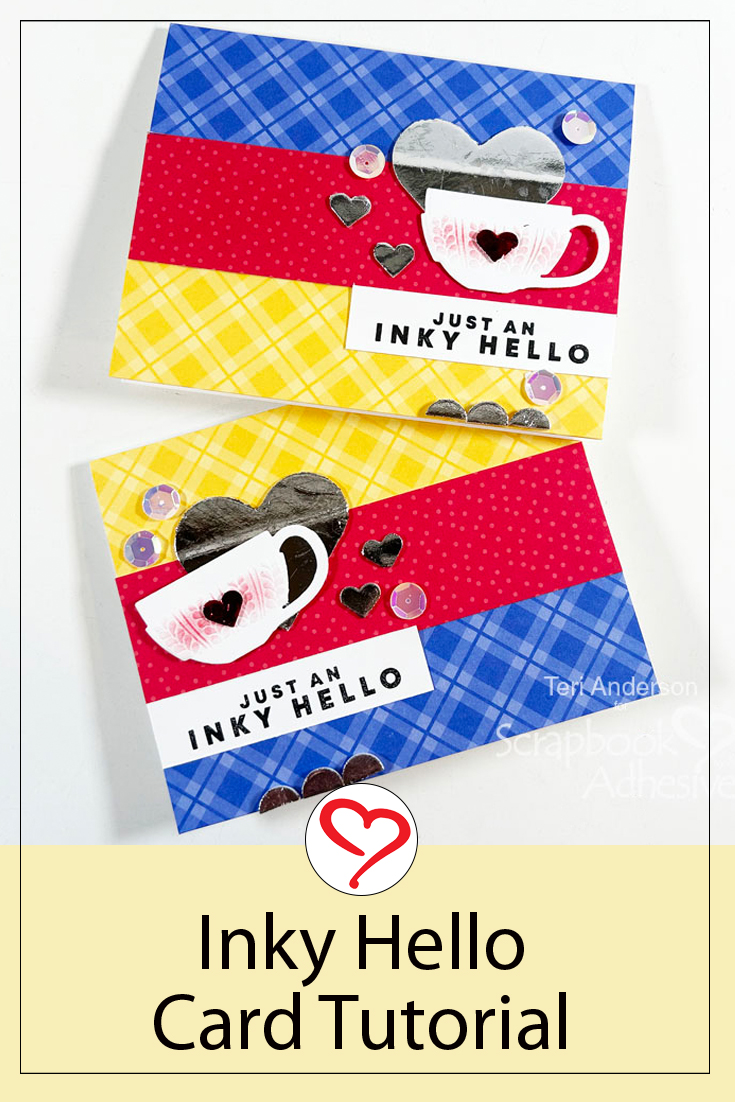
Hi, everyone! Got a crafty friend in need of a hug? Teri here to show you a fun and easy Inky Hello Card that’s sure to cheer your friend up!
Make the Card Base and Add Hearts and Foil
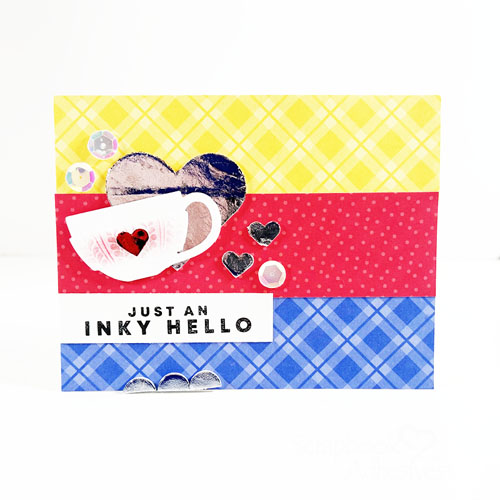
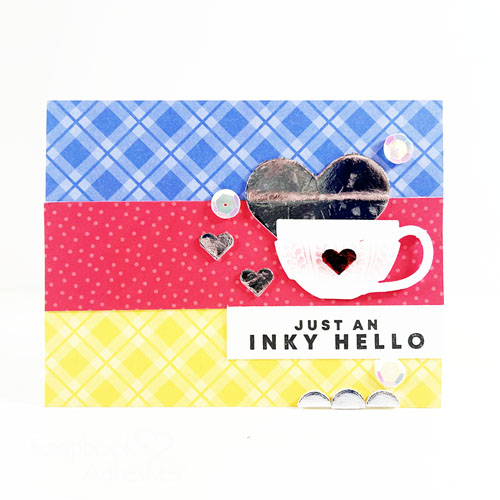
Start by adhering strips of patterned paper to a card.

Randomly adhere three 3D Foam Hearts to your card. (Not a fan of hearts? Try using 3D Foam Stars or 3D Foam Butterflies instead.)
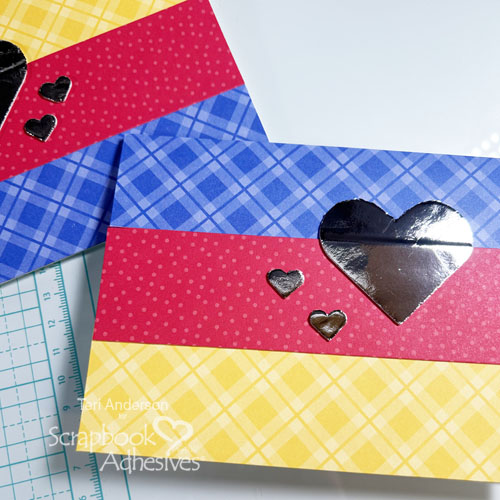
Apply foil to the hearts. Be sure to place the foil over the hearts with the pretty side up.
Create a Scalloped Border
Take some 3D Foam Circles. Cut them in half. Line them up to make a scallop on your card. Again, burnish the foil onto them.
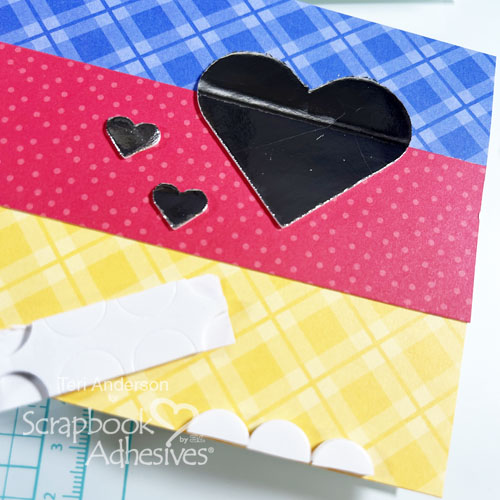
Stamp or computer generate a sentiment on a strip of cardstock and add it to your card.
Finish the Card
Take a stamped or die-cut coffee cup and mount it onto your card, partly over the largest heart. Add a 3D Foam Heart to the middle of the cup and remove its top liner. Take a piece of silver foil from the 3D Creative Embellishment Kit with Foil, and place the foil color side facing you over the exposed adhesive. Rub to transfer the color to the heart and peel off the foil to reveal the result!
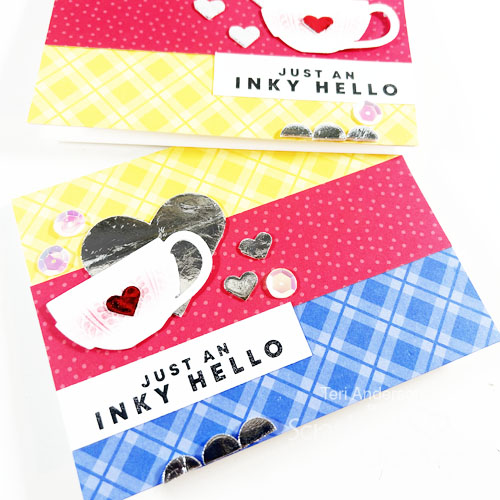
Complete your card by adding a few sequins or gems to it. It’s ready to give away!
I hope you are inspired by today’s tutorial to make a few cards of your own. Remember, you do not have to use the products I did. Shop your supply stash for similar products that will work.
Happy Creating!
Creative Time: 45 minutes
Skill Level: Beginner
Materials needed:
Scrapbook Adhesives by 3L®:
3D Foam Hearts, 3D Foam Circles White Mix, 3D Creative Embellishment Kit with Foil and 3D Foam Strips
E-Z Dots® Petite Permanent Dots Refillable Dispenser
Other: Cardstock: Neenah; Patterned Paper: Doodlebug (Petite Prints Collection); Stamp Set: Waffle Flower (Inky Friends); Embossing Folder and Cutting Die: Simon Says Stamp (Autumn Knits Combo Pack); Sequins: Simon Says Stamp; Black and Red Ink Pads: Ranger Ink
Save to Pinterest!
Visit our Website and Blog!
Sign up for our Newsletter so you never miss a contest or giveaway!


