
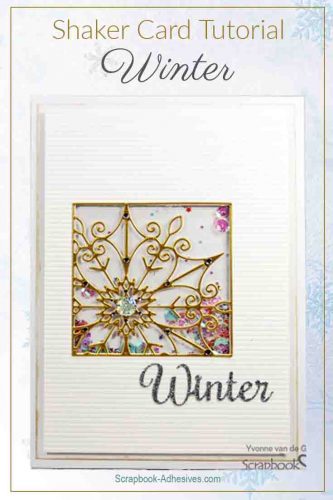
Hi everyone, Yvonne here with a beautiful Winter Shaker Card featuring an intricate snowflake die cut, Adhesive Sheets 4×6 inch and Crafty Foam Tape White.
Sequins and micro beads are a great way to add a snowy winter effect to your card and what better way that to emphasize them by making a shaker card so you can see all those tiny embellishments twirl around behind the shaker window!
Let me show you how easy it is to make a card using Crafty Foam Tape White and adhere a detailed die cut without any glue trace…simply by making your snowflake die-cut into a sticker using Adhesive Sheets 4×6 inch.
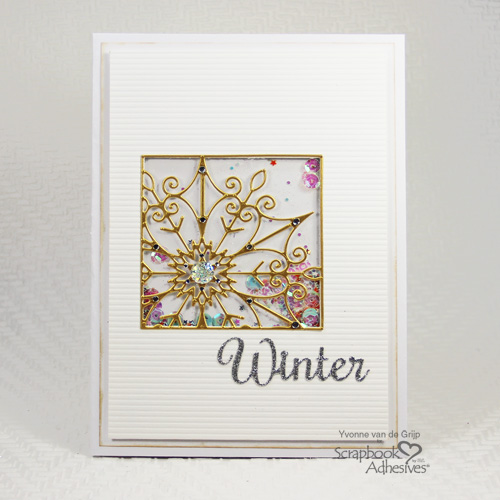
Winter Shaker Card Base
First die-cut a window into a rectangle piece of white embossed cardstock. Make sure the window fits the die-cut you will place over the window later.
Use the E-Z Runner® Ultra Strong Refillable Dispenser to adhere a slightly larger than the window piece of clear acetate to the back of the opening.
Then adhere Crafty Foam Tape White to the back of the window opening, all around the window, so no shaker ingredients can escape. And then place some more Crafty Foam Tape White around the panel’s edges.
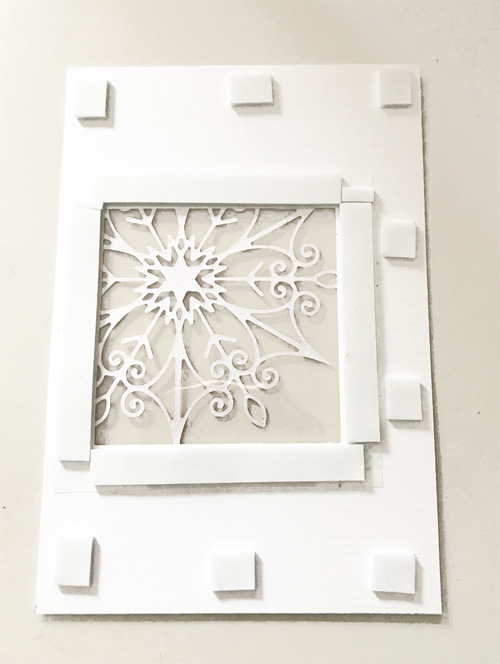
Before removing the liner of the Crafty Foam Tape White, sprinkle sequins, micro beads, and glitter onto the acetate window.
Now gently remove the liners of the Crafty Foam Tape White and place a piece of white cardstock upon. Flip it around to see your shaker feature!
Trim the back layer to size and lightly ink the edges of the cardstock. Adhere on a white card base using the E-Z Runner® Ultra Strong Refillable Dispenser.
A Snowflake Die Cut
Cut a piece of gold cardstock to the desired size. Remove the yellow liner of a piece of Adhesive Sheets 4×6 inch and place the gold cardstock upon (with the back of the gold cardstock facing the Adhesive Sheets 4×6 inch).
Then die-cut the snowflake shape from the gold cardstock. Now you have created your own die-cut sticker! Next, remove the white liner from the back of the gold die cut and adhere the die cut to the card base.
View this 1 minute video: How to Use Adhesive Sheet for Die-Cutting below.
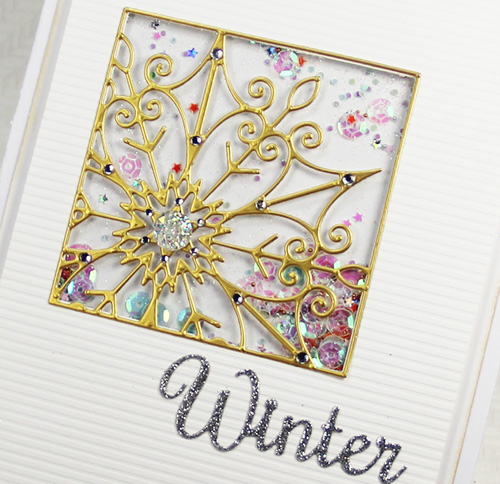
Repeat the same steps as above to make the Winter sentiment die cut sticker and then adhere to the card. For a final touch, add a few rhinestones to the card and voila…your Winter Shaker Card is ready.
Wishing you happy crafting!
Yvonne
Creative Time: 40 minutes
Skill Level: Intermediate
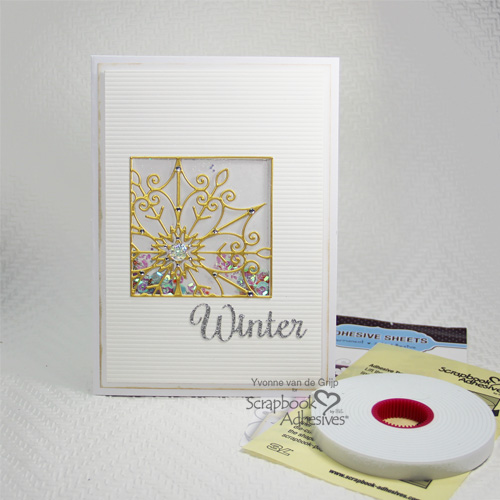
Materials Needed
Scrapbook Adhesives by 3L®
E-Z Runner® Ultra Strong Refillable Dispenser
Crafty Foam Tape White
Adhesive Sheets 4×6 inch
Other
Spellbinders® Paper Arts (Seasonal Words Lene Lok, Fancy Edged Squares, Snowflake Snippets Holiday), Cardstock (White, Gold, Silver Glitter), Sequins, Micro Beads, White Glitter, Self-Adhesive Rhinestones, Craft Knife, Ruler, Scissors
Save it on Pinterest
Visit our Website and Blog!
Sign up for our Newsletter so you never miss a contest or giveaway!


