
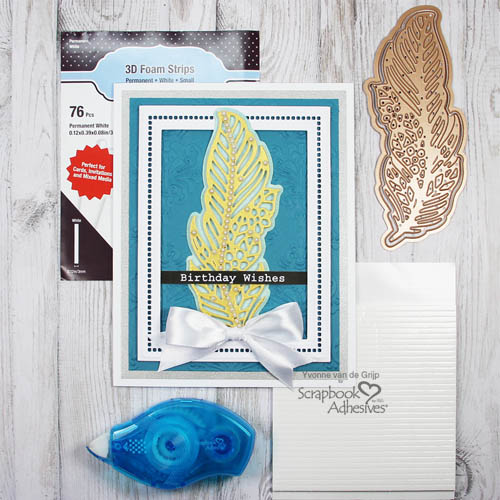
Hi everyone, Yvonne here with a Birthday Wishes card. Have you seen the brand new 3D Foam Strips? I love, love, love this product! I’m going to show you how to use them in three ways with 3D frames and an intricate feather die-cut.
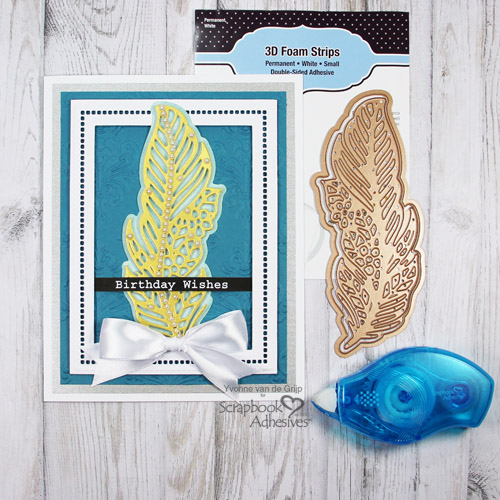
Birthday Wishes Card Base
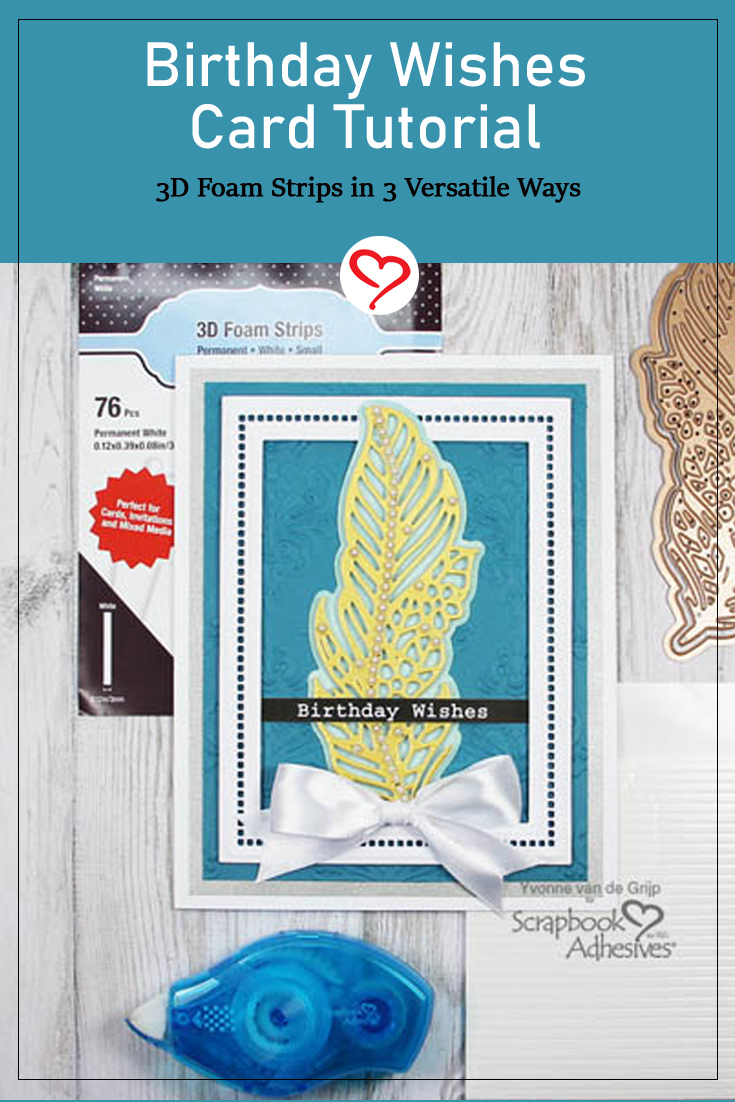
Make a white card base. Add a silver rectangle card panel and then an embossed card panel with the E-Z Runner® Petite Permanent Dots Refillable Dispenser on top of the white card base.
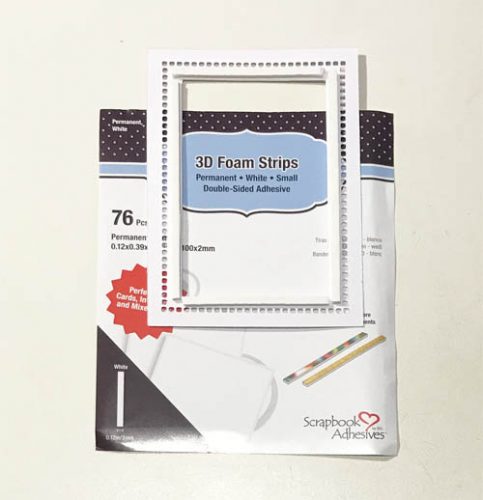
Die-cut and emboss a frame from white cardstock. To lift the layer, adhere the frame to the card base using 3D Foam Strips.
Intricate Feather Die Cut and 3D Foam Strips
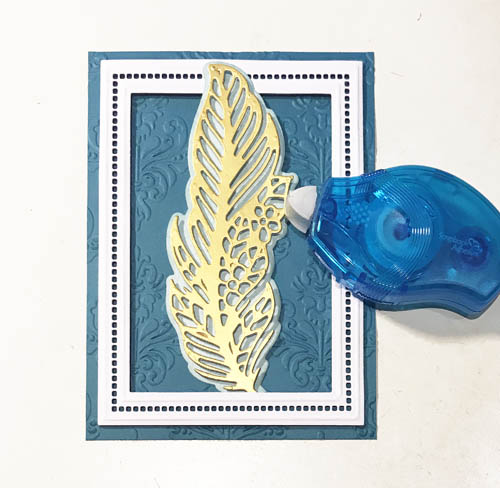
Die-cut an intricate feather shape from gold cardstock and then die-cut its silhouette from mint cardstock.
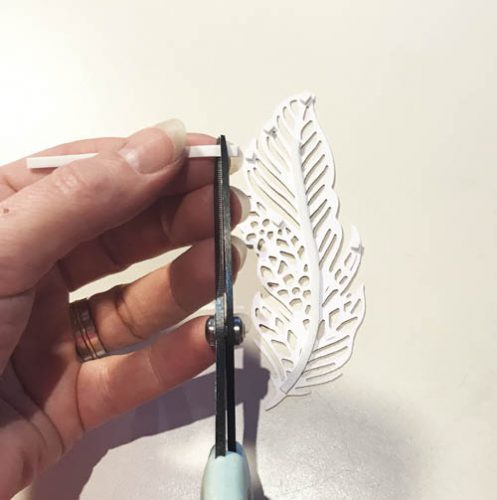
Handcut with scissor cut some of the 3D Foam Strips into small pieces to fit behind the gold feather die cut. It cuts beautifully (as all the 3D Foam does) with scissors. See how I’m using a full 3D Foam Strip to curve along the spine of the feather?
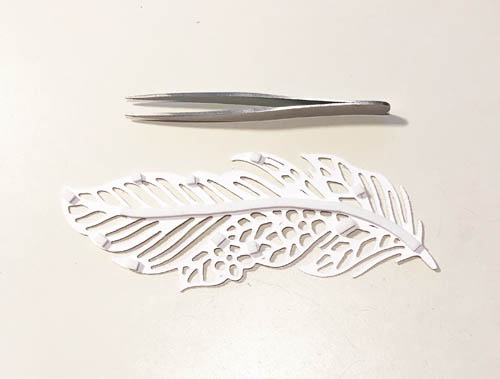
Remove the liners from the 3D Foam Strips and adhere it onto the mint silhouette shape. Use the E-Z Runner® Petite Permanent Dots Refillable Dispenser to adhere the layered feather onto the white frame.
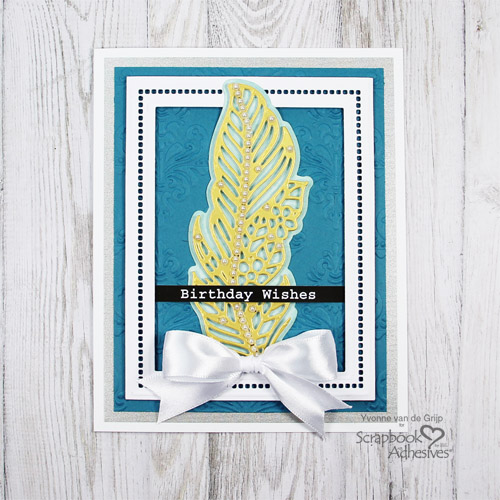
For more dimension and elegance, add self-adhesive pearls and a pearl strip onto the feather.
Completing the Card
Stamp Birthday Wishes sentiment on black cardstock and trim it to a thin band. Using Adhesive Dots Micro, adhere it toward the lower part of the feather die cut.
Tie and adhere a white satin bow to the card with Adhesive Dots Micro. I enjoy using the Adhesive Dots because they don’t stain and there is no glue shining through the satin bow. The best part, there’s no drying time!
Voila…your feathered Birthday Wishes card is ready. I hope you enjoyed the tutorial and wish you happy crafting!
Hugs, Yvonne
Creative Time: 30 minutes
Skill Level: Intermediate
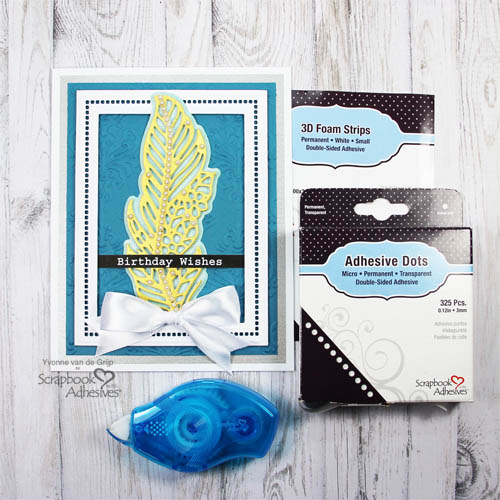
Materials needed:
Scrapbook Adhesives by 3L®
Other
Etched Dies and Die-Cutting Machine: Spellbinders® Paper Arts (Feathers in the Wind, Hemstitch Rectangles, Medallion Embossing Folder and Platinum 6 Die-Cutting and Embossing Machine); White, Gold, Silver, Sea Blue and Mint Cardstock; Self-Adhesive Pearls; Satin Bow, Sentiment; Scissors, Paper Trimmer; Bone Folder; Tweezers
Save It and Pin It!
Visit our Website and Blog!
Sign up for our Newsletter so you never miss a contest or giveaway!


