
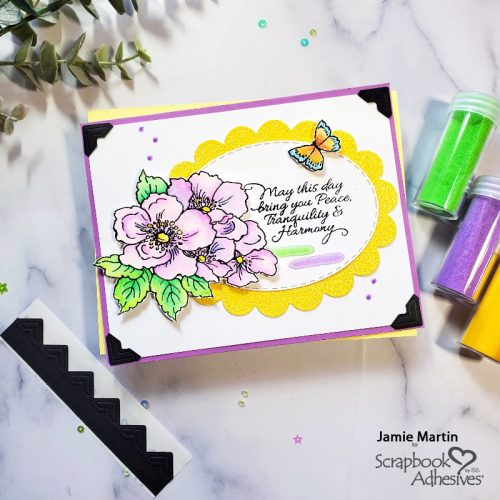
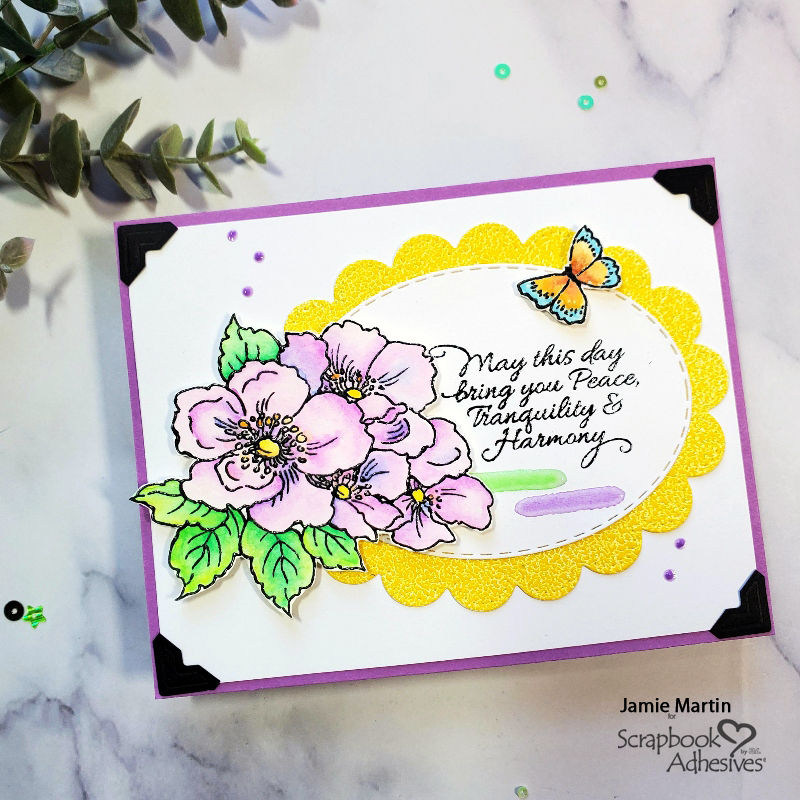
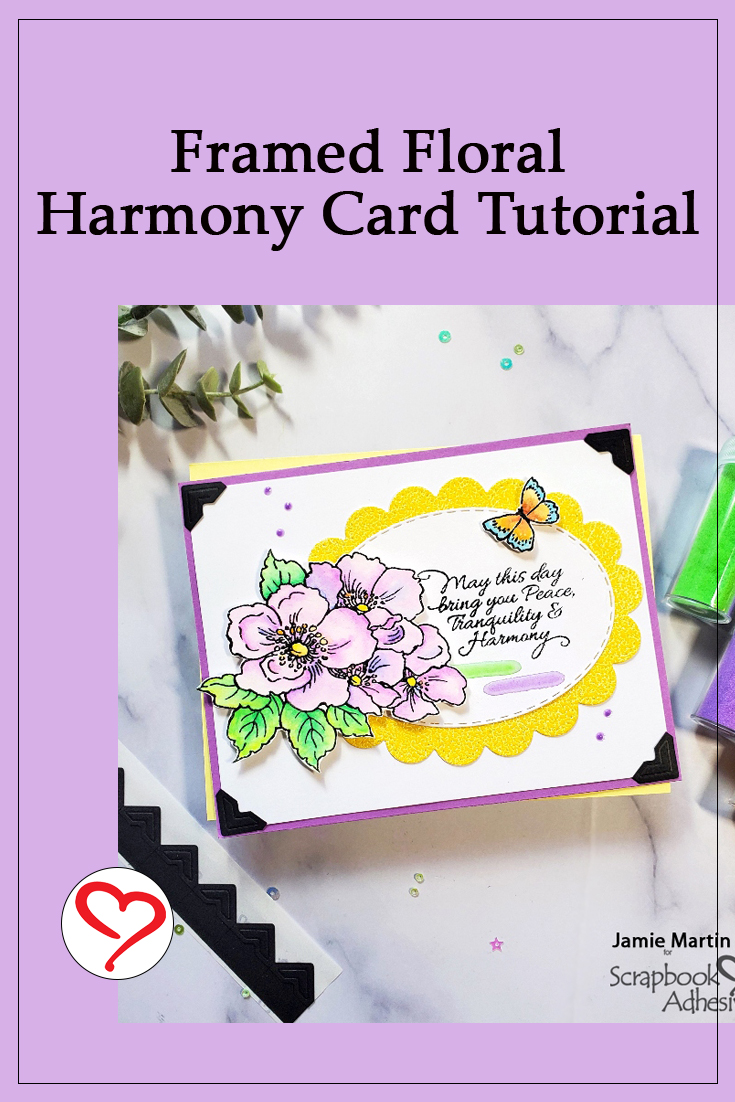
Hello, friends! Jamie here and today, I have a Framed Floral Harmony Card. Making your cards a little extra special is easy with Creative Photo Corners, Adhesive Lines, and Adhesives Sheets 4 x 6in. I used these items to add interest and color to my card that can be used for most occasions with the sweet sentiment.
Framed Floral Piece
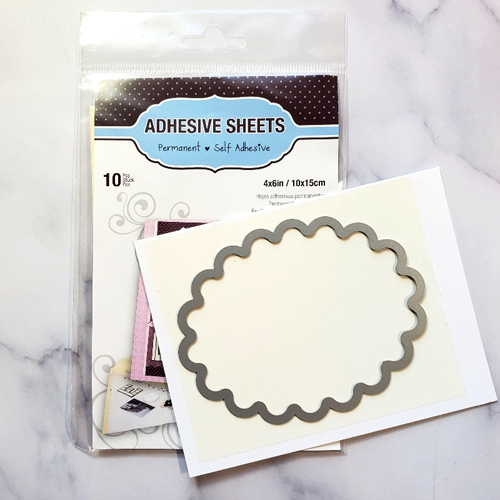
Trim an Adhesives Sheets 4 x 6in. slightly larger than the Nested Oval Scallop Die, remove the liner and place it on white cardstock. Then die-cut the piece with the die.
Wear Your Adhesive on the Outside
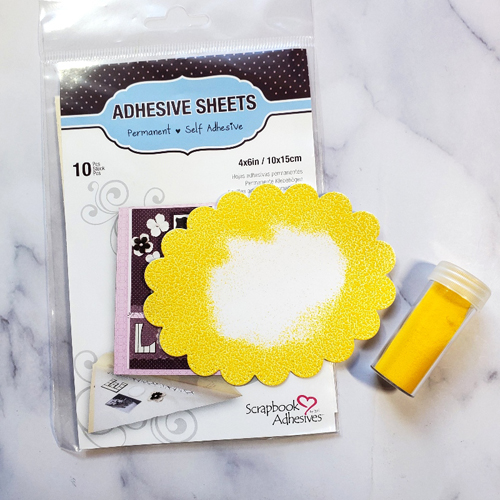
This fun concept makes the adhesive an embellishment piece with embossing powder! Simply remove the liner from the other side of the oval scallop shape to expose the adhesive and sprinkle the edges with yellow embossing powder. Then melt the powder with a heating tool. Set aside.
Framed Floral Sentiment
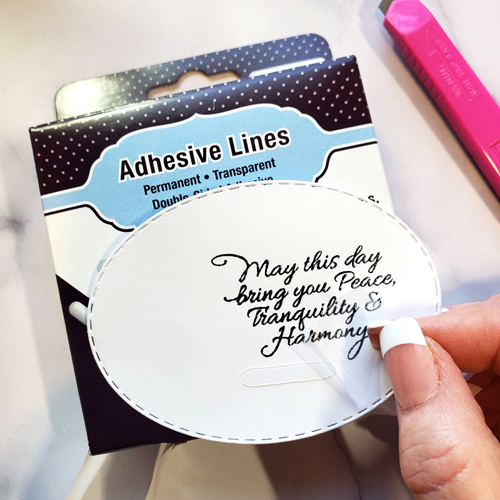
Die-cut white cardstock using a Nested Oval Stitch Die. Then stamp with the sentiment with black ink and emboss with clear embossing powder.
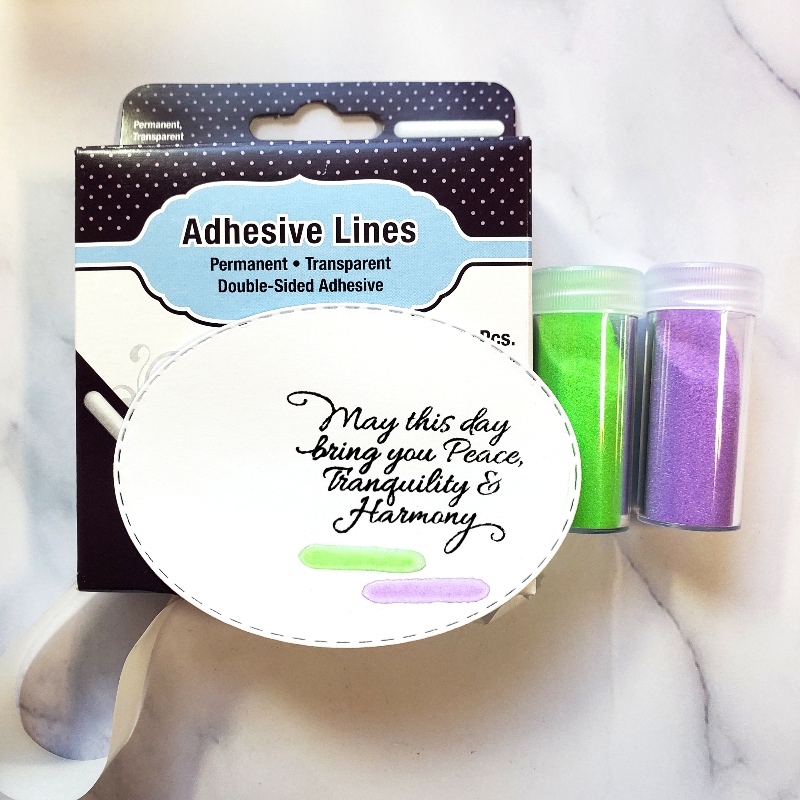
Adding Colors
Another Wear Your Adhesive on the Outside concept is using Adhesive Lines and embossing powder! Place one Adhesive Line below the sentiment and emboss with green embossing powder. Next, place a second Adhesive Line below the first and emboss it with purple embossing powder. I love that they are heat resistant and hold their shape!
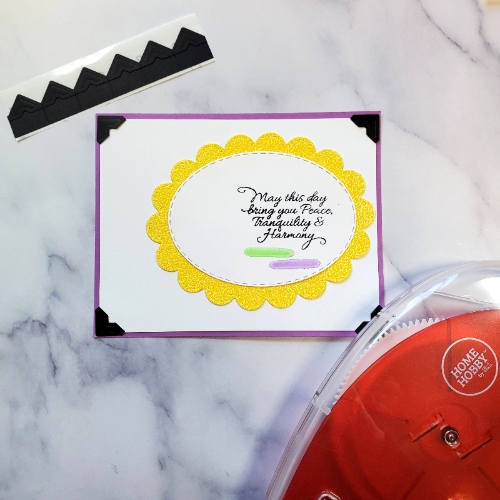
Framed Floral Card Front
Place the oval sentiment in the center of the scallop oval which has exposed adhesive from the Adhesive Sheet. Using the EZ Runner Grand Refillable Dispenser, adhere it to a white cardstock panel. Next, add Creative Photo Corners in Black to each corner and attach the piece to a purple card base.
Other Embellishments
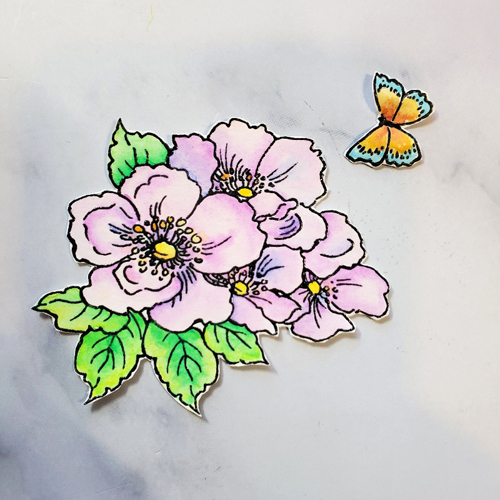
Stamp the flowers and the butterfly on watercolor paper with black ink, emboss with clear embossing powder, and watercolor. Once the images have dried, cut them out.
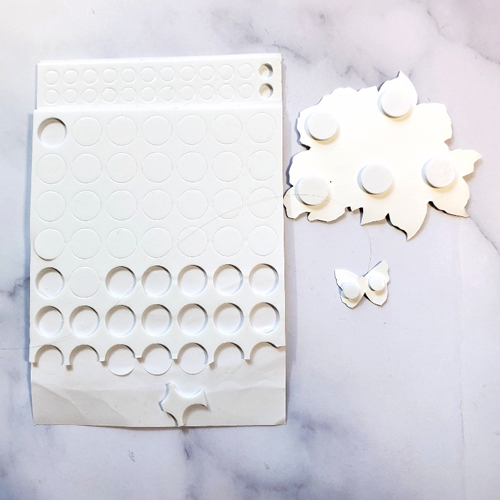
Place 3D Foam Circles in White on the back of the flowers and butterfly. Pop them up as shown in the photo below. Randomly add Violet Liquid Pearl above the flowers and below the scallop.
I hope you enjoyed my Framed Floral Harmony Card. Make one and comfort someone who needs it!
Thanks for stopping by!
Jamie Martin
Skill Level: Intermediate
Creative Time: 35 minutes
Materials Needed:
Scrapbook Adhesives by 3L®
Adhesives Sheets 4 x 6in.
E-Z Runner® Grand Permanent Strips
Creative Photo Corners in Black
Adhesive Lines
3D Foam Circles in White
Other
Stamps and Embossing Powder: Stampendous (Tranquil Rose Perfectly Clear Stamp Set, and Floral Garden Embossing Powder Kit); Craft Dies: Rubbernecker (Nested Oval Scallop with Pierce); Ink: Tsukineko (VersaFine Ink in Onyx Black); Liquid Enamel: Ranger Ink (Liquid Pearls in Violet); PrintWorks Specialty Paper White and Purple Cardstock
Save it to Pinterest!
Visit our Website and Blog!
Sign up for our Newsletter so you never miss a contest or giveaway!


