
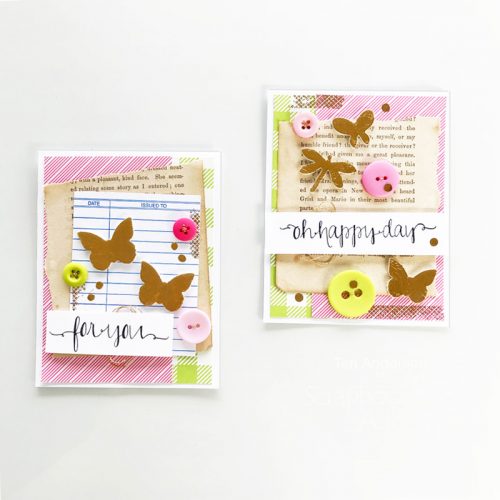
Hi, everyone! Spring is almost here, and Teri here to show to how to make a couple of Happy Spring Cards inspired by the season’s color scheme and butterflies!
Happy Spring Cards’ Layers
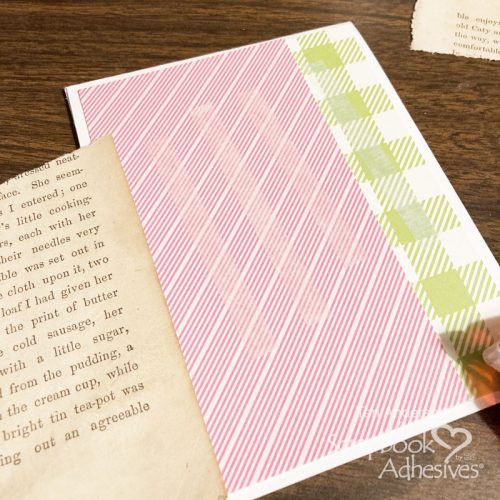
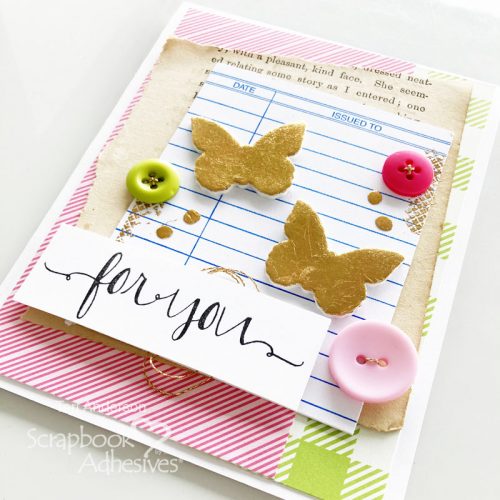
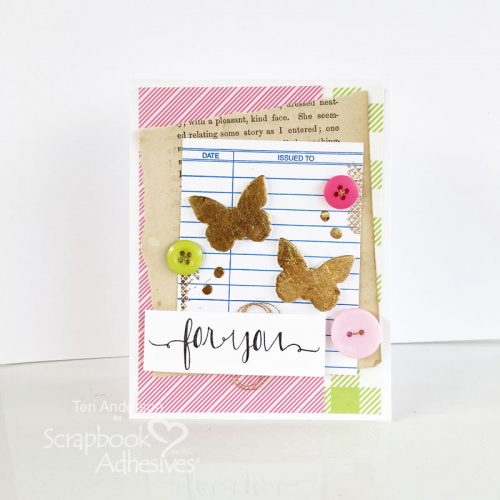
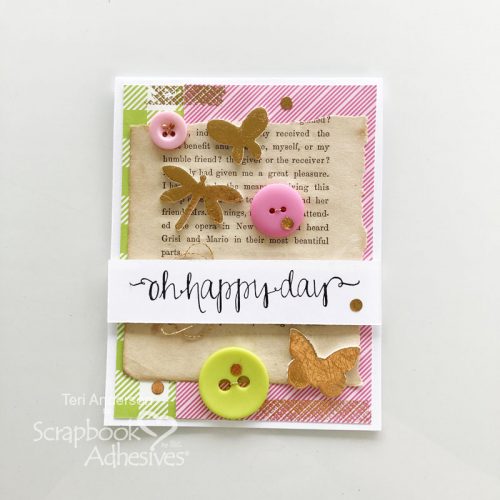
Start by creating a card base and adding a couple of pieces of patterned paper. Try to pick light colors, like pinks, greens, and anything pastel. Add a torn page from an old book. I used a page from a book that is over 100 years old. The page was fairly fragile so I put adhesive on the patterned paper and then put the torn page on top, rather than applying adhesive to the page and then placing it on the card.
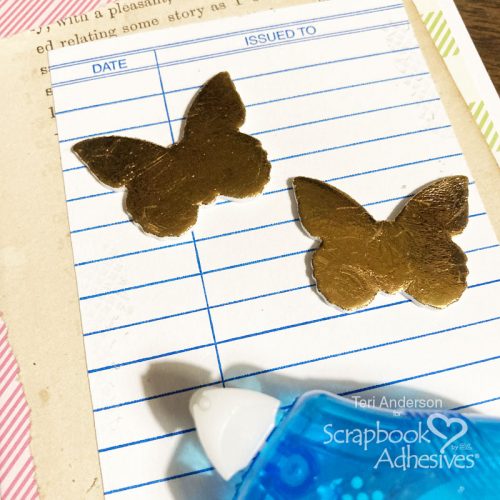
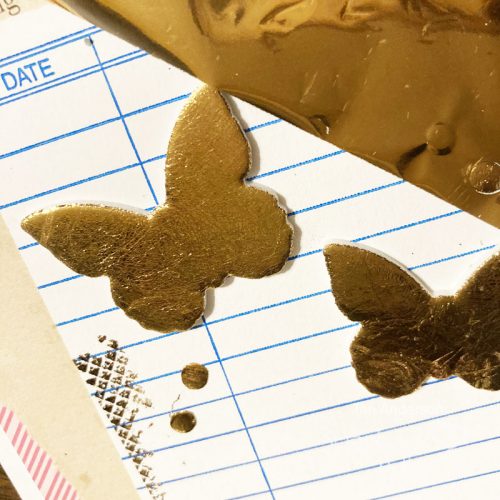
Add a library book card (or a tag) to the card. Add two 3D Foam Butterflies to it and gently burnish the foils from the Metallic Transfer Foil Sheets in Nature Color onto them. Make sure to face the foil color side up. Peel off the foil to reveal the color. Easy!
Roll some of the E-Z Runner® Petite Permanent Dots onto the edges of the card. Rub off some of the dots with your fingers for a distressed look. Once you’ve done this, apply foil using the same steps above to the dots.
You’ll also want to add some faux paint splatters. These are really easy to create with Adhesive Dots Micro. Simply place a few dots on your card and then add some foil to them. Be sure firmly burnish the foil onto them to make sure they are completely covered.
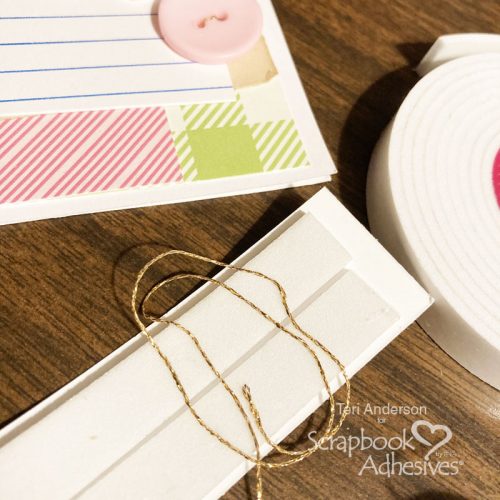
Create a sentiment for your card by stamping some words on cardstock. Add strips of Crafty Foam Tape to the back of it. Ball up a little metallic thread and place it under the tape.
Finish the card by placing a few buttons. Be sure to use buttons in Spring colors!
Take 2 on Another Spring Card
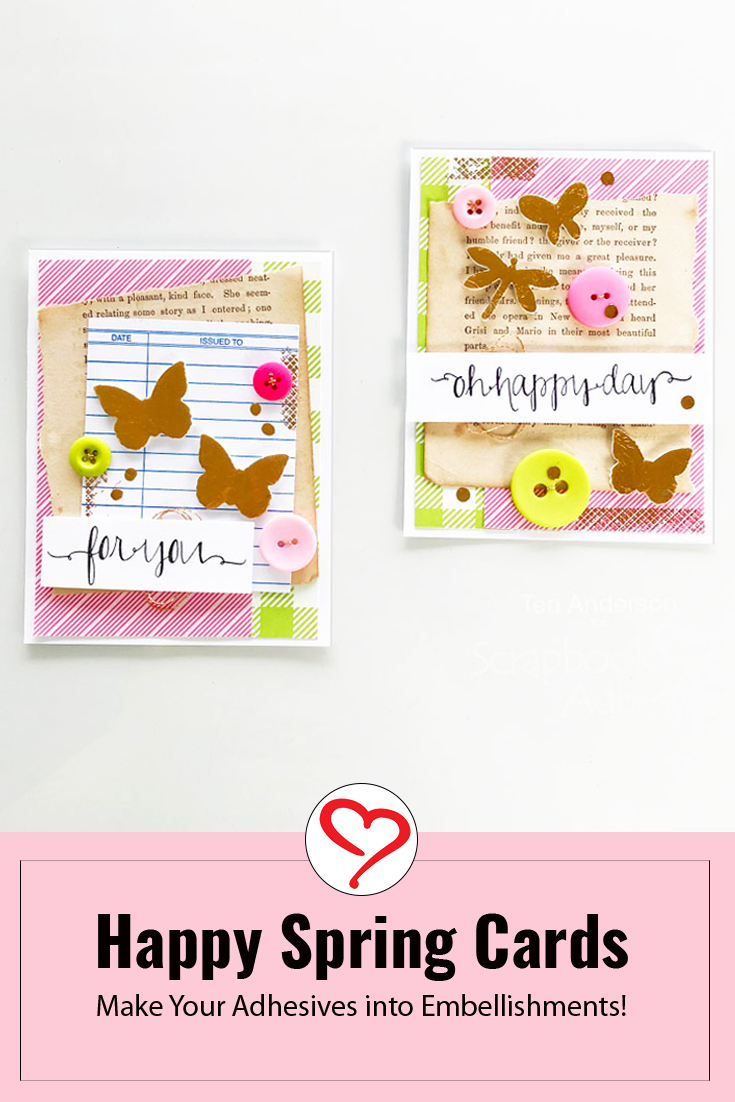
You can kick things a notch when making a second Spring inspired card. Stick with the same color scheme but embellish the card a little differently.
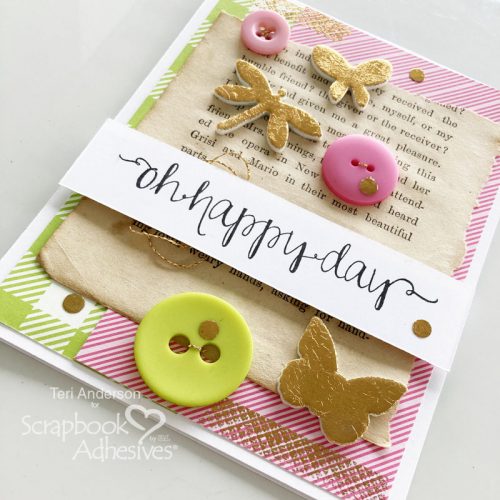
Instead of using a book card, go without it. Add faux paint splatters to your buttons. It works just like when adding them to paper. Simply place an Adhesive Dot Micro on your button and apply Transfer Foil on it.
I hope you are inspired to make a few Happy Spring Cards of your own!
Thanks for stopping by!
Teri Anderson
Creative Time: 60 Minutes
Skill Level: Intermediate
Materials Needed
Scrapbook Adhesives by 3L®
- E-Z Runner® Petite Permanent Dots Refillable Dispenser and E-Z Runner® Permanent Strips Refillable Dispenser
- 3D Foam Butterflies
- Adhesive Dots Micro
- Metallic Transfer Foil Sheets Nature Colors
- Crafty Foam Tape White
Other
White Cardstock: Neenah Paper; Patterned Papers: Lawn Fawn; Stamps: Avery Elle (Oh Happy Day Stamp Set); Black Ink Pad: Ranger Ink; Buttons: Buttons Galore; Gold Thread: Kreinik; Vintage Book Page; Library Book Card
Save to Pinterest!
Visit our Website and Blog!
Sign up for our Newsletter so you never miss a contest or giveaway!


