
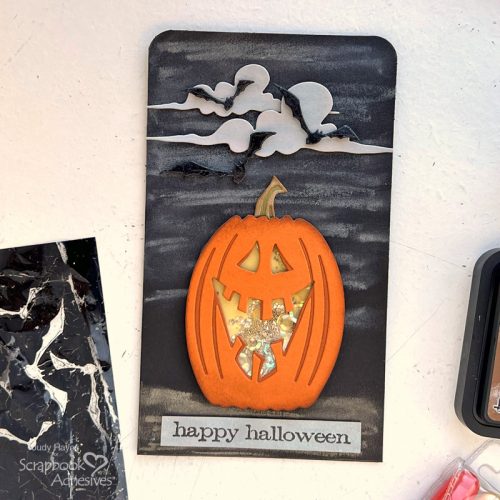
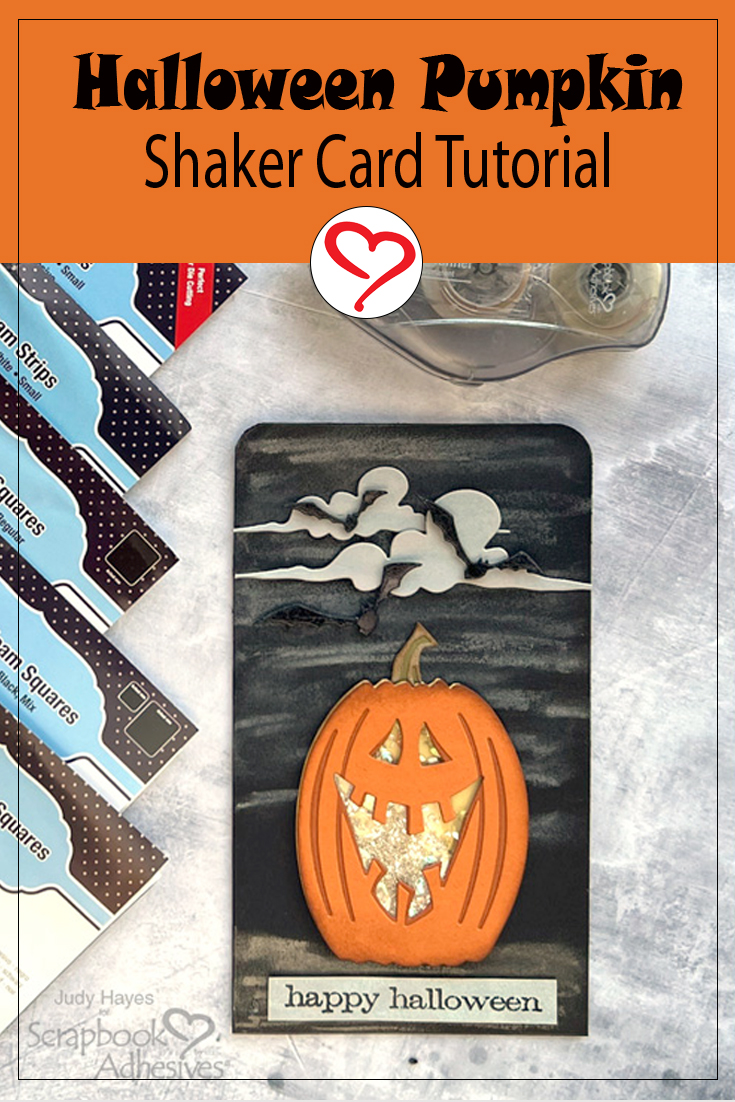
Hi, Judy here today! As it’s October and Halloween is coming, I’m sharing a fun Halloween Pumpkin Shaker Card. It just makes me smile to see those beads and sequins through the Jack ‘O Lantern face. I’ve added a few shiny bats flying in the cloudy sky. Keep reading to learn how I made it.
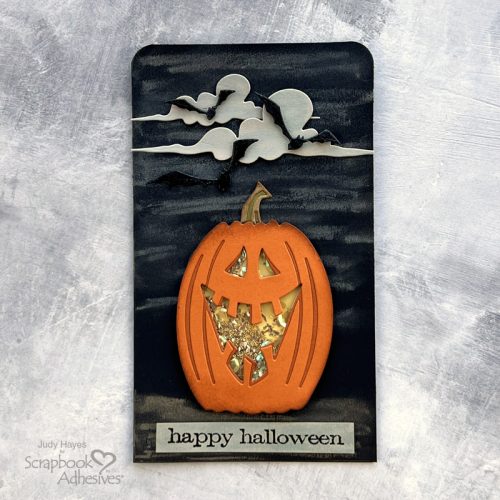
Make the Pumpkin Shaker
Apply Adhesive Sheets 4 x 6in. to the back of rust, orange, tan, and green card stock. Die-cut the pumpkins from rust and orange papers. Then die-cut stem pieces from green and tan cardstock. Then die-cut a yellow pumpkin from cardstock. Lastly, cut a piece of acetate slightly smaller than the yellow pumpkin without the stem.
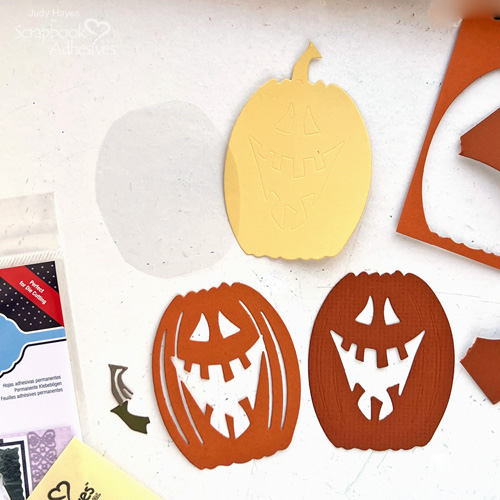
Peel the liner from the green stem piece and attach it to the stem of the yellow pumpkin. Then peel the liner from the tan stem piece and secure it over the green stem. Peel the liner from the back of the orange pumpkin and place it over the rust pumpkin.
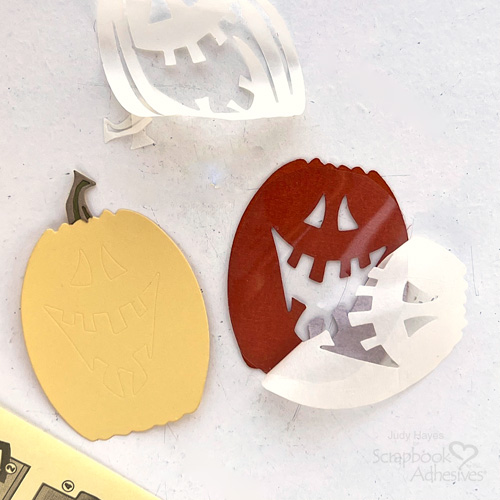
Then partially peel the liner from the rust pumpkin, with the sticky side up, place acetate on it, and continue to peel the liner and secure the acetate.
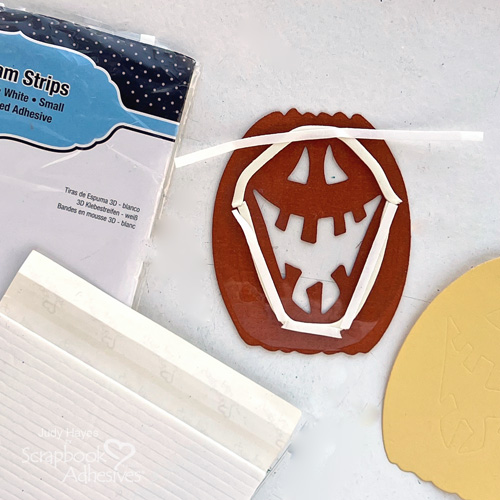
Attach 3D Foam Strips on acetate around the face to form space for the shaker. To curve 3D Foam Strips easily, temporarily peel liners away, tear or cut them, and replace the liners before filling the shaker.
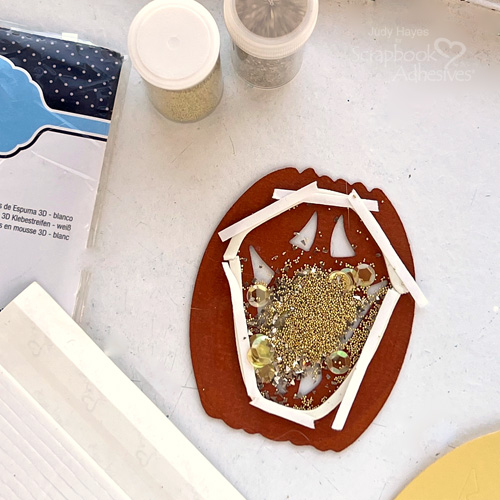
Add sequins, micro beads, and glass glitter to fill the shaker. Peel the liners and fasten the yellow pumpkin to cover the shaker.
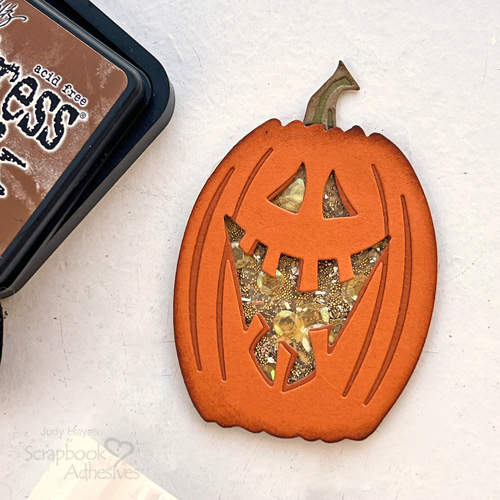
Apply shading around the edges of the pumpkin and stem using a foam applicator with Distress Vintage Photo ink.
Designer Note: This photo shows the shaker a bit too full. I removed some filling before finishing the card. It’s important to have space for shaker pieces to move.
Wear Your Adhesive on the Outside with Bat Shapes
Attach Adhesive Sheets 4 x 6in. to the front side of the black cardstock.
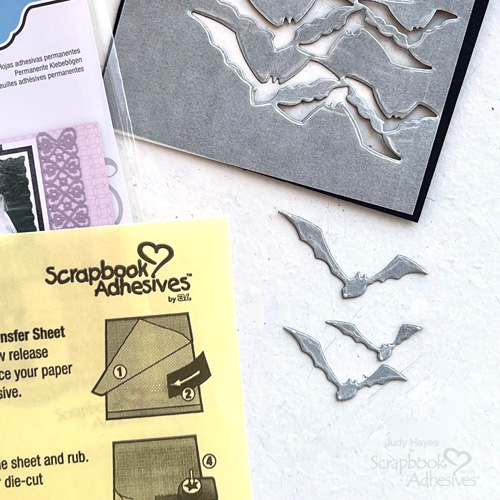
Use bat dies and die cutting machine to cut bats. Be sure dies are placed on the side of the Adhesive Sheets 4 x 6in. were applied.
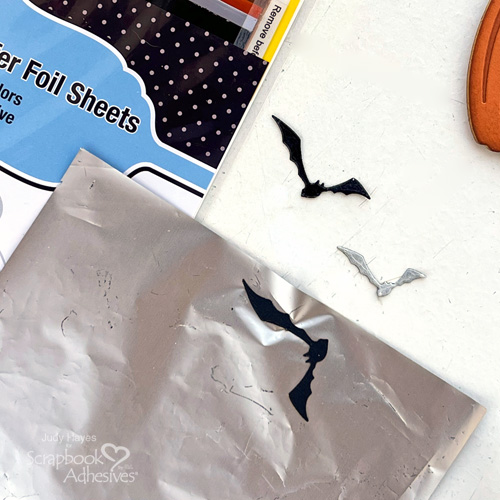
Peel the liner from the bat and place the adhesive side down on the back (dull side) of the black foil from Metallic Transfer Foil Sheets Nature Colors. Turn the foil over and rub well to transfer the foil to the bat. Repeat the foiling steps for all three bats.
The Card Details
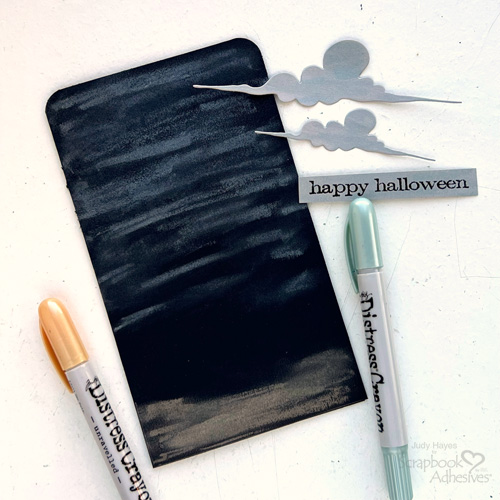
Stamp greeting on light gray cardstock with Versafine Black Onyx ink and heat emboss with clear embossing powder. Trim to about .5 inch wide strip. Die-cut small and large clouds from light gray cardstock. To make the card base, cut a piece of 7.75 x 6.75-inch black cardstock to form a 3.875 x 6.75-inch card. Use a 0.50-inch corner punch to round the top corners.
Distress the Card Front
Apply Distress Crayon Phantom Mist in streaks across the upper part of the card, moisten the finger, and rub to blend. Repeat as desired. Across the bottom use Distress Crayon Unravelled and blend with a wet finger.
Rub Distress Crayon Phantom Mist randomly over clouds and rub with a wet finger to blend. Also, apply the greeting strip in the same manner and use a cloth to buff the crayon from words.
Clouds and Pumpkin Placements
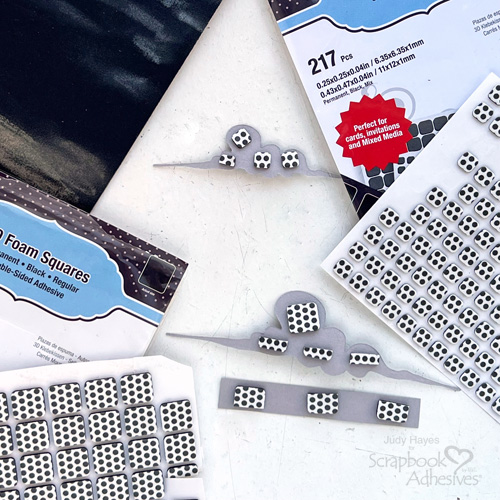
Place Thin 3D Foam Squares Black Mix on the back of the small cloud, and cut as needed to fit. Peel the liners and place the cloud near the top of the card.
On the back of the large cloud, apply 3D Foam Squares Black Regular, cut as needed to fit. Peel the liner, place it on the card below the small cloud, and overlap it slightly. Place 3D Foam Squares Black Regular on the back of the greeting strip, peel the liner, and adhere at the bottom of the card.
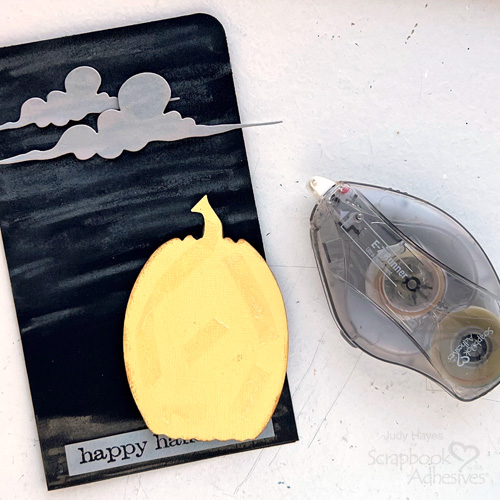
Apply E-Z Runner® Ultra Strong Refillable Dispenser to the back of the pumpkin shaker and attach on the card.
Designer Tip: E-Z Runner® Ultra Strong Refillable Dispenser has strong holding power making it an excellent choice for a shaker to keep it secure for shaking.
Fasten Bats
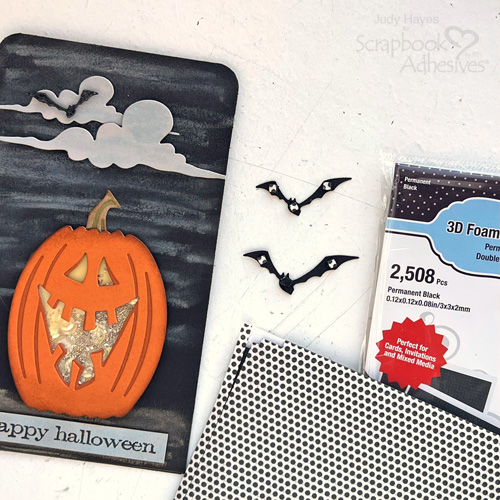
Use 3D Foam Squares Micro Black on the back of bats. Cut as needed to fit. Peel liners from bats and secure them over and below clouds. Place black foil from Metallic Transfer Foil Sheets Nature Colors over bats again as needed to fill any area where foil may have rubbed off during assembly.
Thanks for Visiting!
Judy Hayes
Creative Time: 30 mins
Skill Level: Intermediate
Materials Needed:
Scrapbook Adhesives by 3L®
E-Z Runner® Ultra Strong Refillable Dispenser
3D Foam Squares Black Regular, Thin 3D Foam Squares Black Mix, 3D Foam Squares Micro Black
Metallic Transfer Foil Sheets Nature Colors
Other: Crayons: Ranger Ink (Tim Holtz Distress Crayons (Phantom Mist, Unravelled); Stamp: Stampers Anonymous Tim Holtz (Simple Sayings); Ink: Ranger Ink (Distress Vintage Photo), Tsukineko (Versafine Onyx Black); Craft Dies: Sizzix (Tim Holtz Edison, Colorize, Moonlight); Yellow, Orange, Rust, Black, Light Gray, Olive Green, Tan Cardstock; Clear Acetate; Shaker Fill (Sequins (Yellow, Holographic), Gold Micro Beads, Stampendous Glass Glitter (Champagne)
Click Preferred Retailers List
Save to Pinterest!
Visit our Website and Blog!
Sign up for our Newsletter so you never miss a contest or giveaway!


