Welcome to Day 3 of the Blog Hop with Authentique Paper!
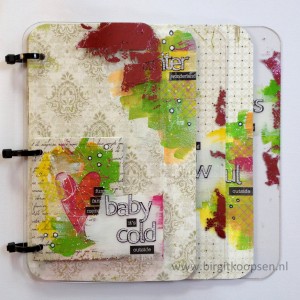
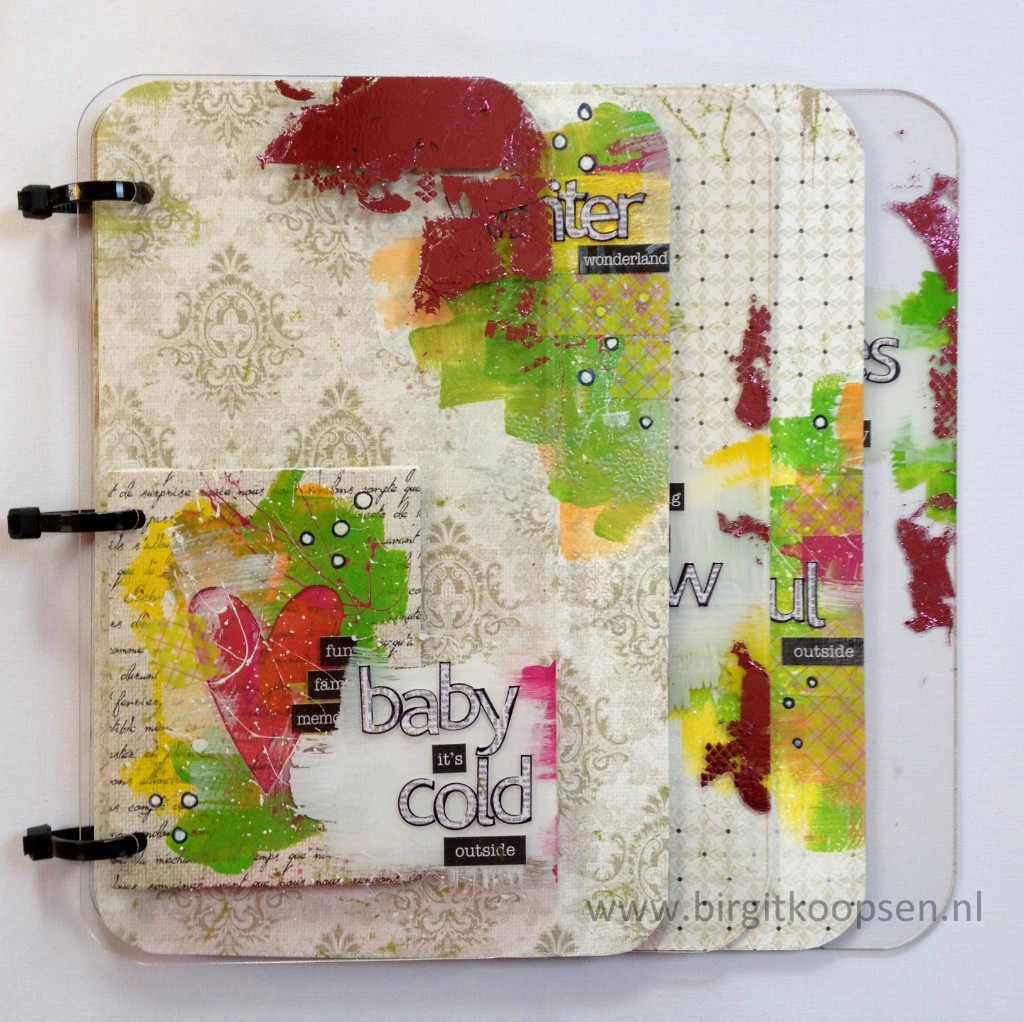
Birgit here today with a winter mini album featuring Authentique’s Peaceful line.
I’m usually not a big fan of themed papers. Too often they have specific colors that are not necessarily my favorites. I love bright colors, not only in summer but in winter too! So I’m not looking for wintery papers in blue, white, grey and brown. And that is exactly why I love this Authentique Peaceful line so much! The “black & white” paper with a tiny little touch of green gives me the opportunity of using patterned papers, yet choose my own colors to add!
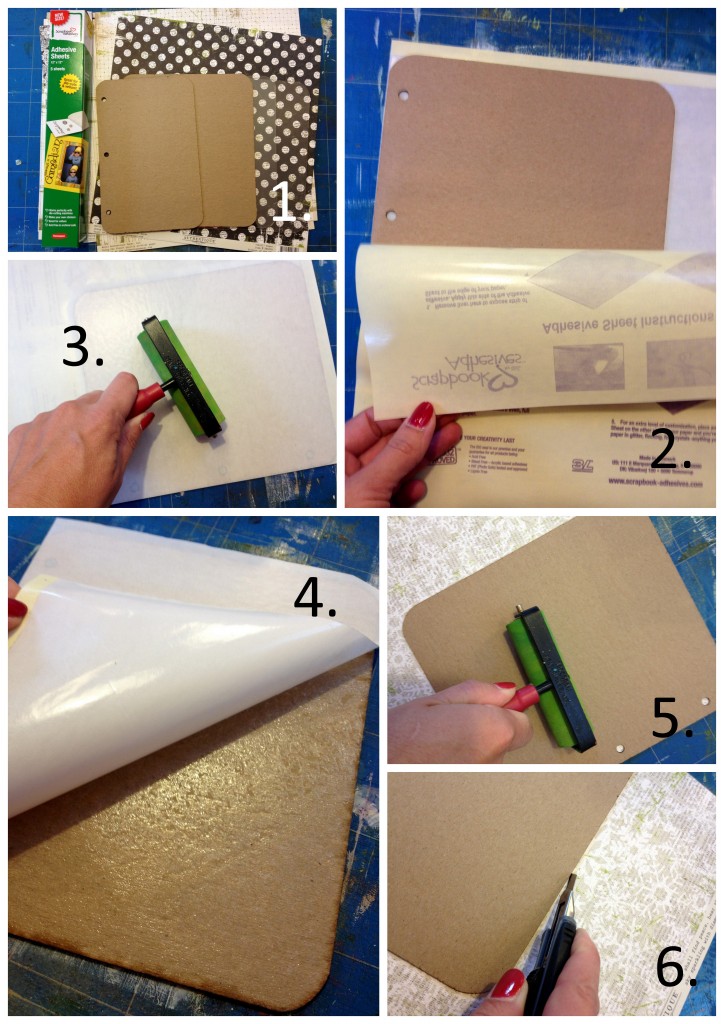
First I want to show you how to cover your chipboard pages with Adhesive Sheets:
1. Get your supplies together: chipboard album, patterned paper, Adhesive Sheets;
2. Lay a chipboard page between the adhesive side and the backing paper;
3. Role firmly with a brayer to apply the adhesive everywhere;
4. Lift up the adhesive sheet carefully, if necessarily put it down and role again, then remove;
5. Put the chipboard page on the backside of the desired patterned paper, adhesive side down, role again with the brayer to apply paper to the chipboard;
6. Go around the chipboard with a craft knife cutting the page in the right shape.
Now you have perfectly fitting paper on your chipboard page. A big pro now is that if you paint the paper they will stay nice and flat because it is glued down everywhere!
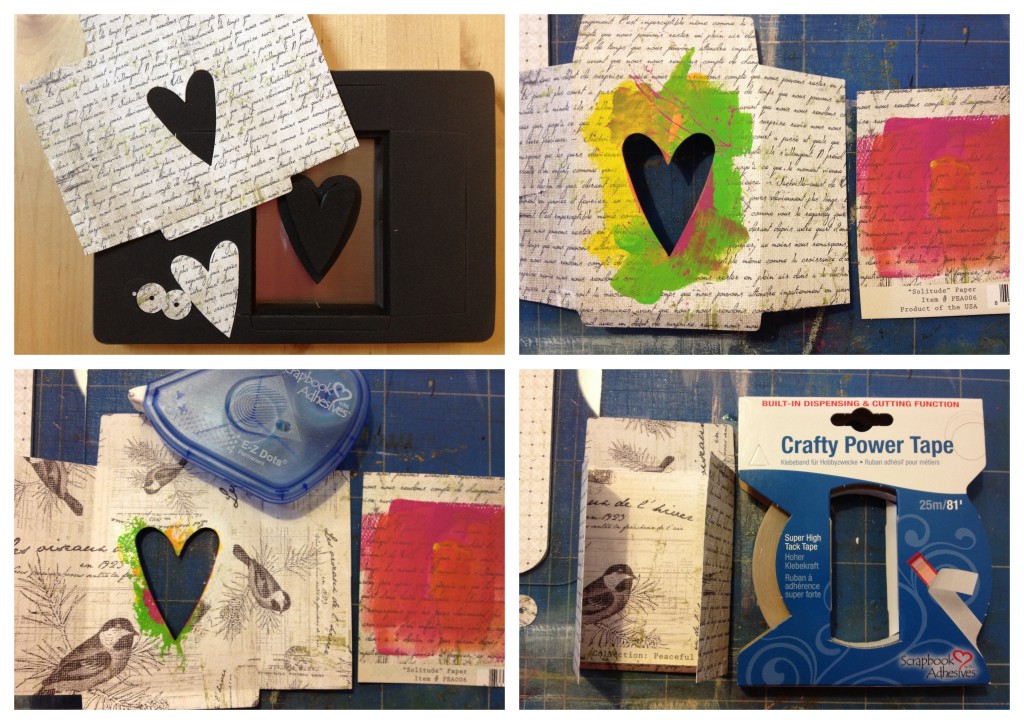
Then create the little envelope:
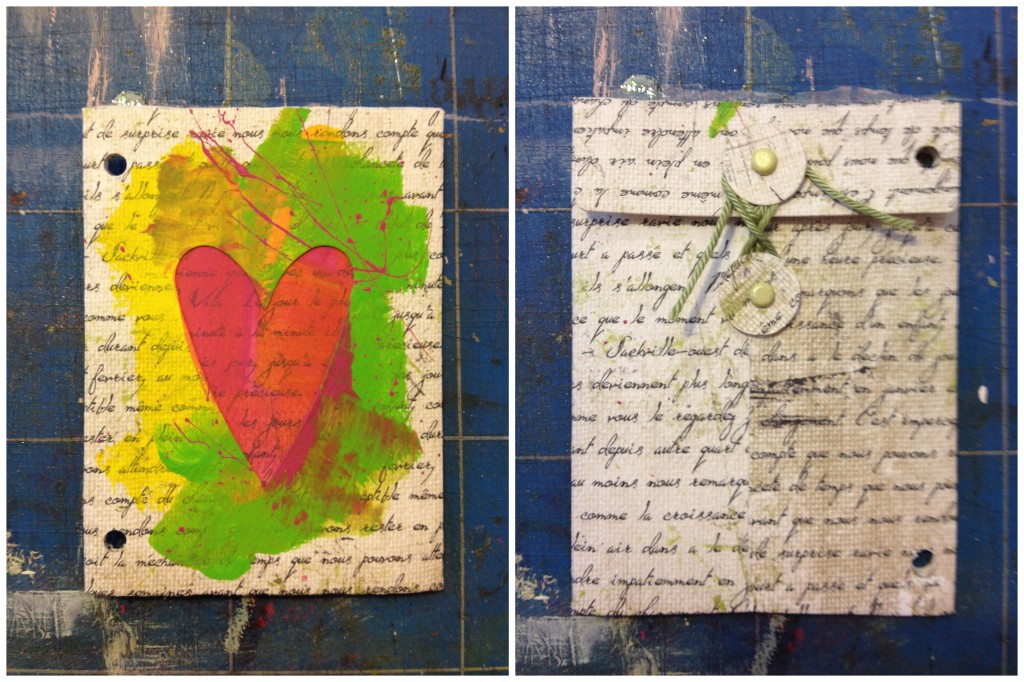
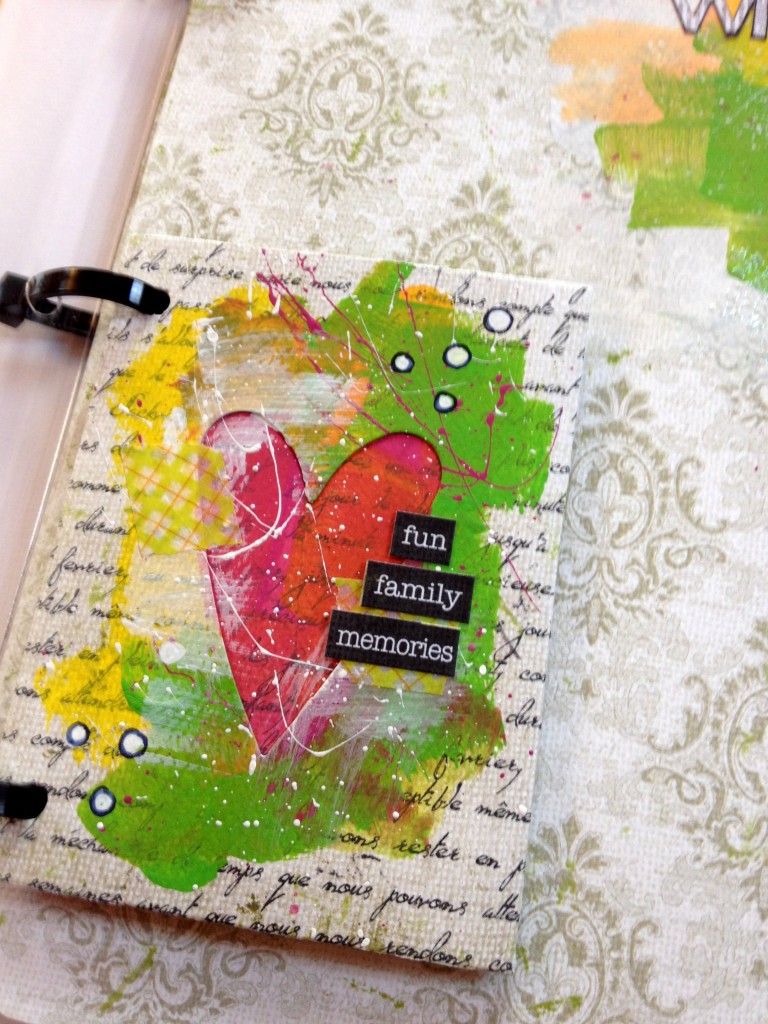
Cut out the envelope with a die. Color around the cut out heart and on a piece of paper that fits inside the envelope. Apply the piece of paper to the inside using E-Z Dots Permanent, then close the envelope using Crafty Power Tape.
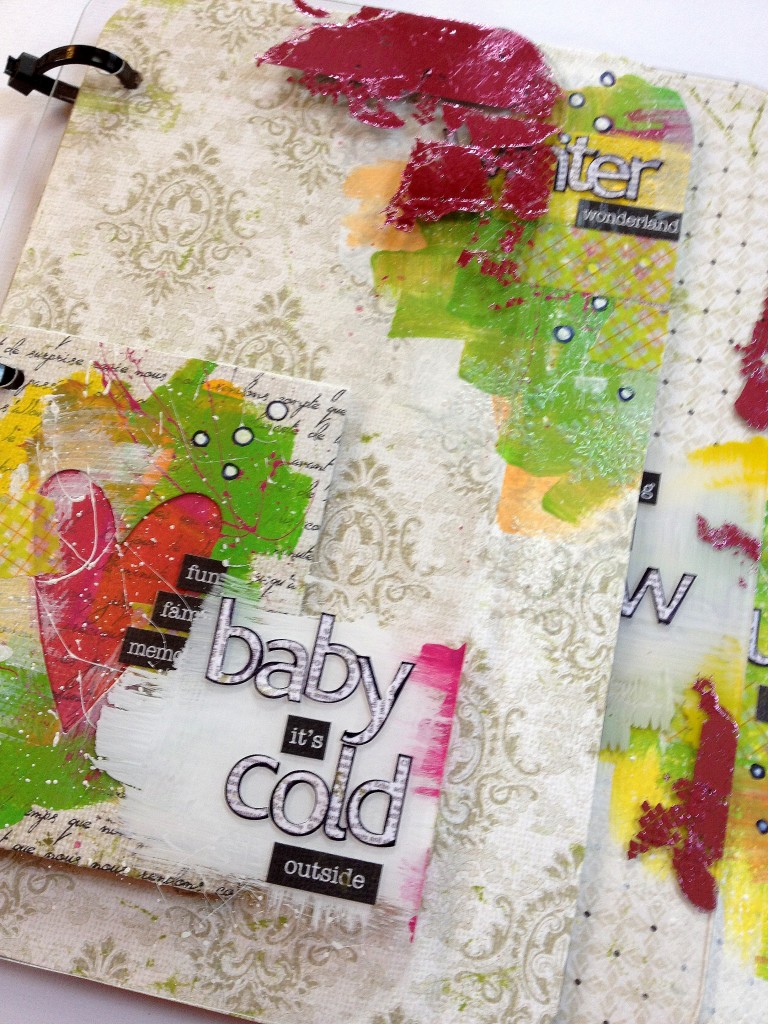
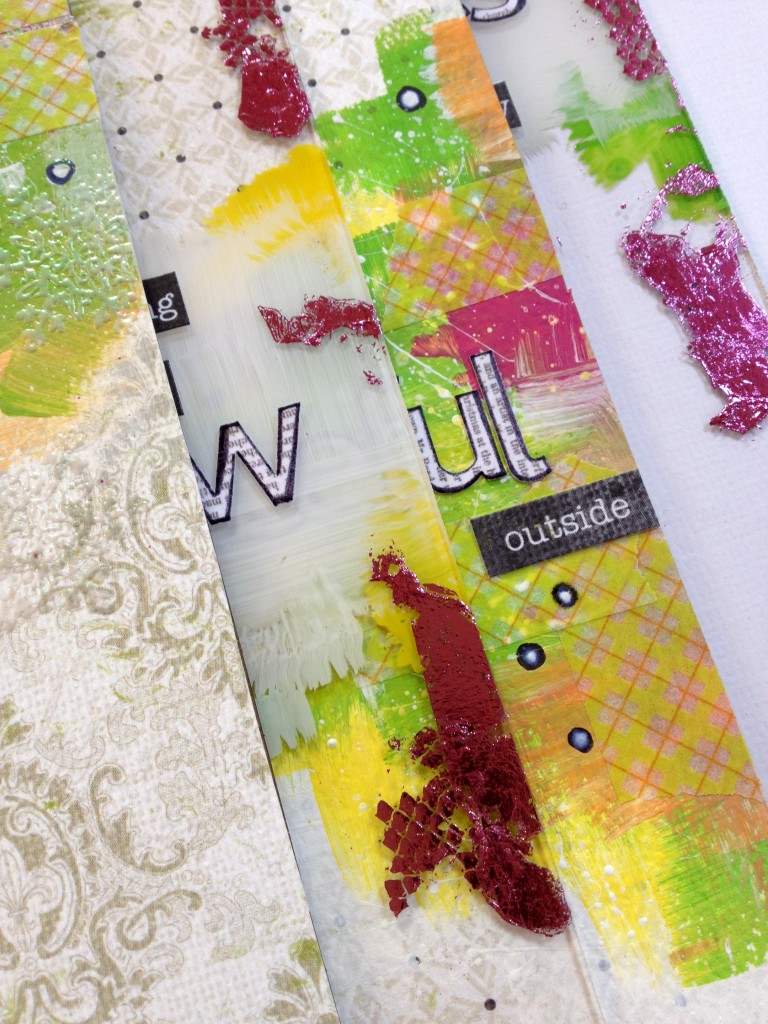
Paint on the covered pages and the clear pages and add text using stickers and sticker letters coordinating with the paper line.
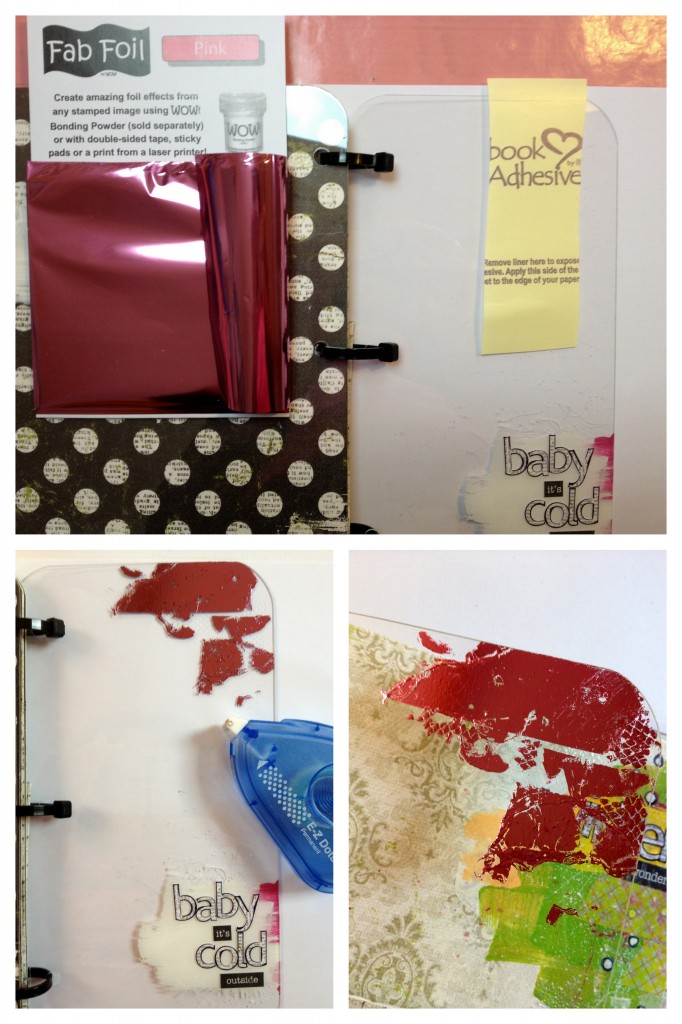
Bind the book using tie ribs. Then add frosty sparkle to the clear pages using Adhesive Sheets, E-Z Dots Permanent and Foil.
Take a little piece of Adhesive Sheet and randomly apply it to the clear page. Keep the edges curled up to avoid square blocks. Then add some E-Z Dots and put a piece of Foil on top, shiny side up. Rub a little and then remove the foil.
Now you’re colorful winter mini is ready to be filled with pictures and stories 🙂
Thank you for stopping by today!
Happy crafting!

By Pam October 17, 2012 - 8:37 am
I love to make mini albulsm! This one is so cute and I would not thought to use foil. Thanks for the idea!
By Brenda B. October 17, 2012 - 8:43 am
Wonderful! Love, love, love the papers and the way you used the adhesive sheets to add the foil and patterned paper. Less messy than other methods and amazing results.
By Sheri October 17, 2012 - 8:47 am
What a cute mini album! I would have never thought to use adhesive sheets to cover the album so much easier then using a tape runner! Thanks for the great tip!
By Sue D October 17, 2012 - 8:54 am
Great album–I like the splashes of color.
By Miriam Prantner October 17, 2012 - 9:34 am
LOVE the idea of using adhesive sheets to cover the mini, and the foil looks amazing!
By Caryn S. (Scrapnsing) October 17, 2012 - 10:13 am
Thanks for sharing this tutorial! I haven’t used acrylic pages before although I love the look of them. Really like how you used them. really need some of these adhesive sheets, I can think of a million uses for them!
By Carla Hundley October 17, 2012 - 10:33 am
Great album. Love the tutorial on how you did the pages.
Carla from Utah
By Pam Spradlin October 17, 2012 - 10:44 am
I have never used the adhesive sheets…so I learned something new today and also find out I was missing out on something that makes covering mini albums a whole heck of a lot easier.
By Phyllis Couch October 17, 2012 - 10:44 am
Thanks so much for the explicit instructions and photos. The album is unique and so interesting.I so want to use adhesive sheets. I have had some for a while and now I know how to use them!
By Donna Conrad October 17, 2012 - 11:18 am
I love the adhesive sheets and am never without. Doing some of these albums for Christmas gifts this year.
By Kim Parsons October 17, 2012 - 1:28 pm
I need to get these adhesive sheets for my next project. Love how this clear album turned out!
By Jessica October 17, 2012 - 1:38 pm
Such a great album. love it.
By Linda Carson October 17, 2012 - 1:55 pm
Fabulous artwork! I’ve learned a lot about your products in this post! Thanks!
By Jenny McGee October 17, 2012 - 1:59 pm
WOW, What a great project. Thanks for sharing.
By Cathy Homan October 17, 2012 - 4:09 pm
Great giveaway — I need it all, making things for my sons wedding in January. PLEASE PLEASE let me win!
By Gingera Earley October 17, 2012 - 4:49 pm
I love the album! Great inspiration!!
By jade santoro October 17, 2012 - 5:40 pm
I haven’t tried the adhesive sheets for covering chipboard yet, only for small diecuts. It looks like it works great.
By ava October 17, 2012 - 6:19 pm
thanks for sharing all the tips with the adhesive. The sheet adhesive looks like something i need on my next shopping trip. Great creative artistic project!!!
ava g
By Jeanette October 17, 2012 - 7:18 pm
Never thought to use the adhesive sheets to cover chipboard! Thanks for the great inspiration!
By Maria October 17, 2012 - 8:24 pm
Gorgeous mini album!TFS
By Lucy October 17, 2012 - 8:29 pm
I MUST get some of those adhesive sheets. I can think of so many applications (no pun intended) for them. The foil technique is a great touch. I’ve never made an acrylic album, but that may change. It’s really effective. I like the zip ties to hold it together. Lovely!!!
By Pam Bray October 17, 2012 - 9:08 pm
Love the album, looks great with the Authentique Original collections, Great look using the paint to add texture to the album. I use scrapbook adhesives all of the time, thanks for making a great product. TFS and a chance to win. pammejo1@yahoo.com
By Julie Gastelum October 17, 2012 - 9:30 pm
Great projects. I would love to try the scrapbook adhesive sheets. They look interesting.
By Pam Sohan October 17, 2012 - 9:35 pm
What a great idea ! I love using “non traditional” colors. Very nice mini album.
By Carole October 17, 2012 - 9:36 pm
Wonderful tutorial and I love how beautiful the album turned out. You have definitely tempted me to try this idea. Thank you.
By Pam H October 17, 2012 - 11:48 pm
so excited to see so many uses of these adhesive products. Thanks for sharing!
By Dorina D October 18, 2012 - 12:22 am
Love non-traditional colors this time of year and your album is so cute. Great tutorial, especially on using the adhesives. Someting new for me to try. thanks for sharing the fun.
By Grace October 18, 2012 - 12:43 am
What a great project. Love the textures created with the adhsives.
By Frauke October 18, 2012 - 3:45 am
I love the non-traditional colors, too. Beautiful minibook !
By Carol B October 18, 2012 - 8:40 pm
Cool mini album!
Carol B
ciaoitalia2007(at)gmail(dot)com
By Kim H October 18, 2012 - 9:04 pm
great mini album, love how you added some of the sheet adhesive then randomly rubbed the foil to make an interesting texture of shine. thanks fo rsharing and the chance to win.
By rush October 19, 2012 - 2:07 am
love your little album…so much textural interest! thank you for sharing.
By Elena Kaufman October 19, 2012 - 2:27 am
This is a lovely little album & something we can do! thank you for the tutorial!
By Emma October 19, 2012 - 3:53 am
Stunning mini album and so my hints and tips, i love the use of the foil, got to try that one. Emma
By Allison M. October 19, 2012 - 7:04 am
Great mini! Neat ideas!
By Beatrice Lawson October 19, 2012 - 10:17 am
Must get adhesive sheets. What a great solution! And you are right, themed collection do limit you… but the way you used basic neutrals and kicked it up with a colour, that is great.
By Lillian Child October 19, 2012 - 12:47 pm
Okay, I absolutely MUST get my hands on some of that Fab Foil! LOVE the ease of application and the amazing look it gives!! Your albums is so very lovely!!
By Julie A. Shearer October 20, 2012 - 4:54 pm
Great mini album. I love those adhesive sheets….Im sure I need some of those. TIS and a chance to win.