
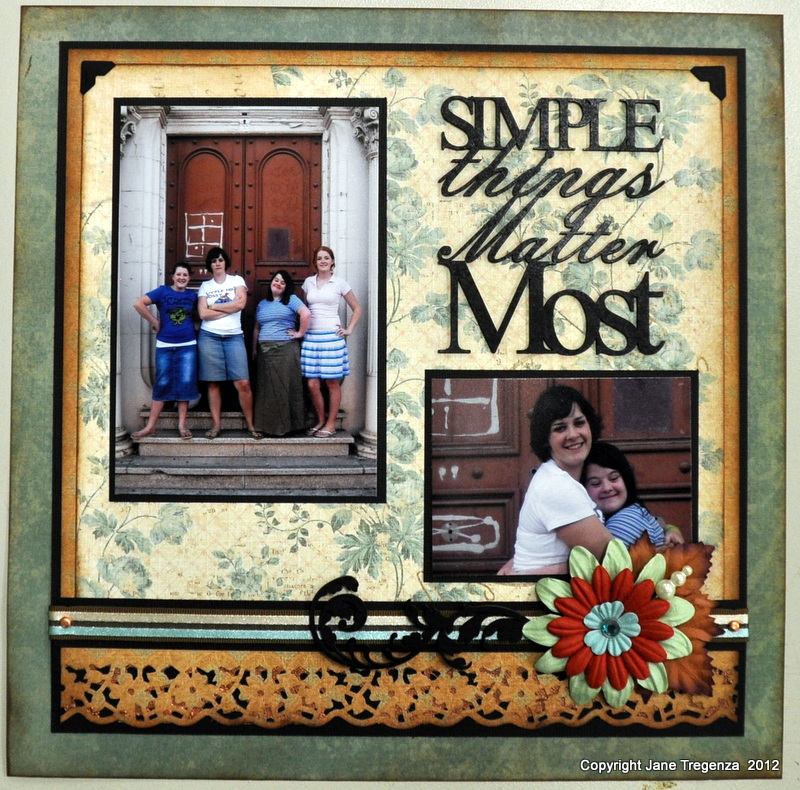
 Today I have a layout I have done for my girls. Each month I teach an ancestry class and have done so for over three years. The ladies attending this class each month bring along with them a pad of print papers from K&Company Ancestry range. These papers are double sided and the palette of colours are beautiful. They all mix and match so well. For this project you need:
2 Black cardstocks
Three Print Papers
Ranger Copper Embossing Powder
Paper Flowers
Imaginarium Designs Chipboard Title and Flourish
Ribbons
Bling brad
Tim Holtz Distress ink – Vintage photo
Martha Stewart Deep Edge Punch
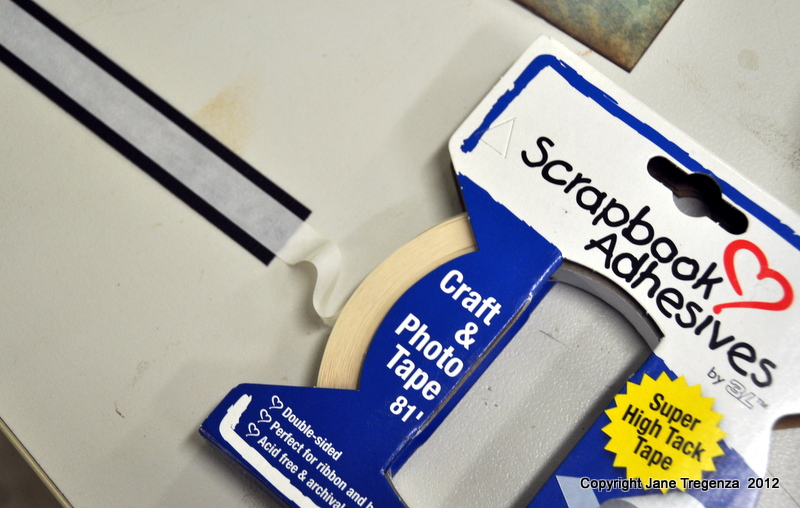
And from Scrapbook Adhesives by 3L®
- Crafty Power Tape-81/25M
MyStik Permanent Tape Dispenser
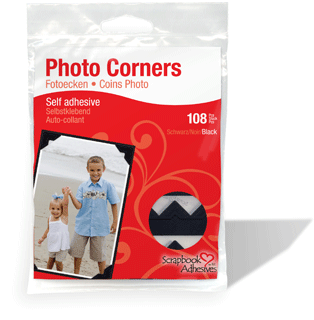
Photo Corners-Classic style, Black
DOTZ-3D
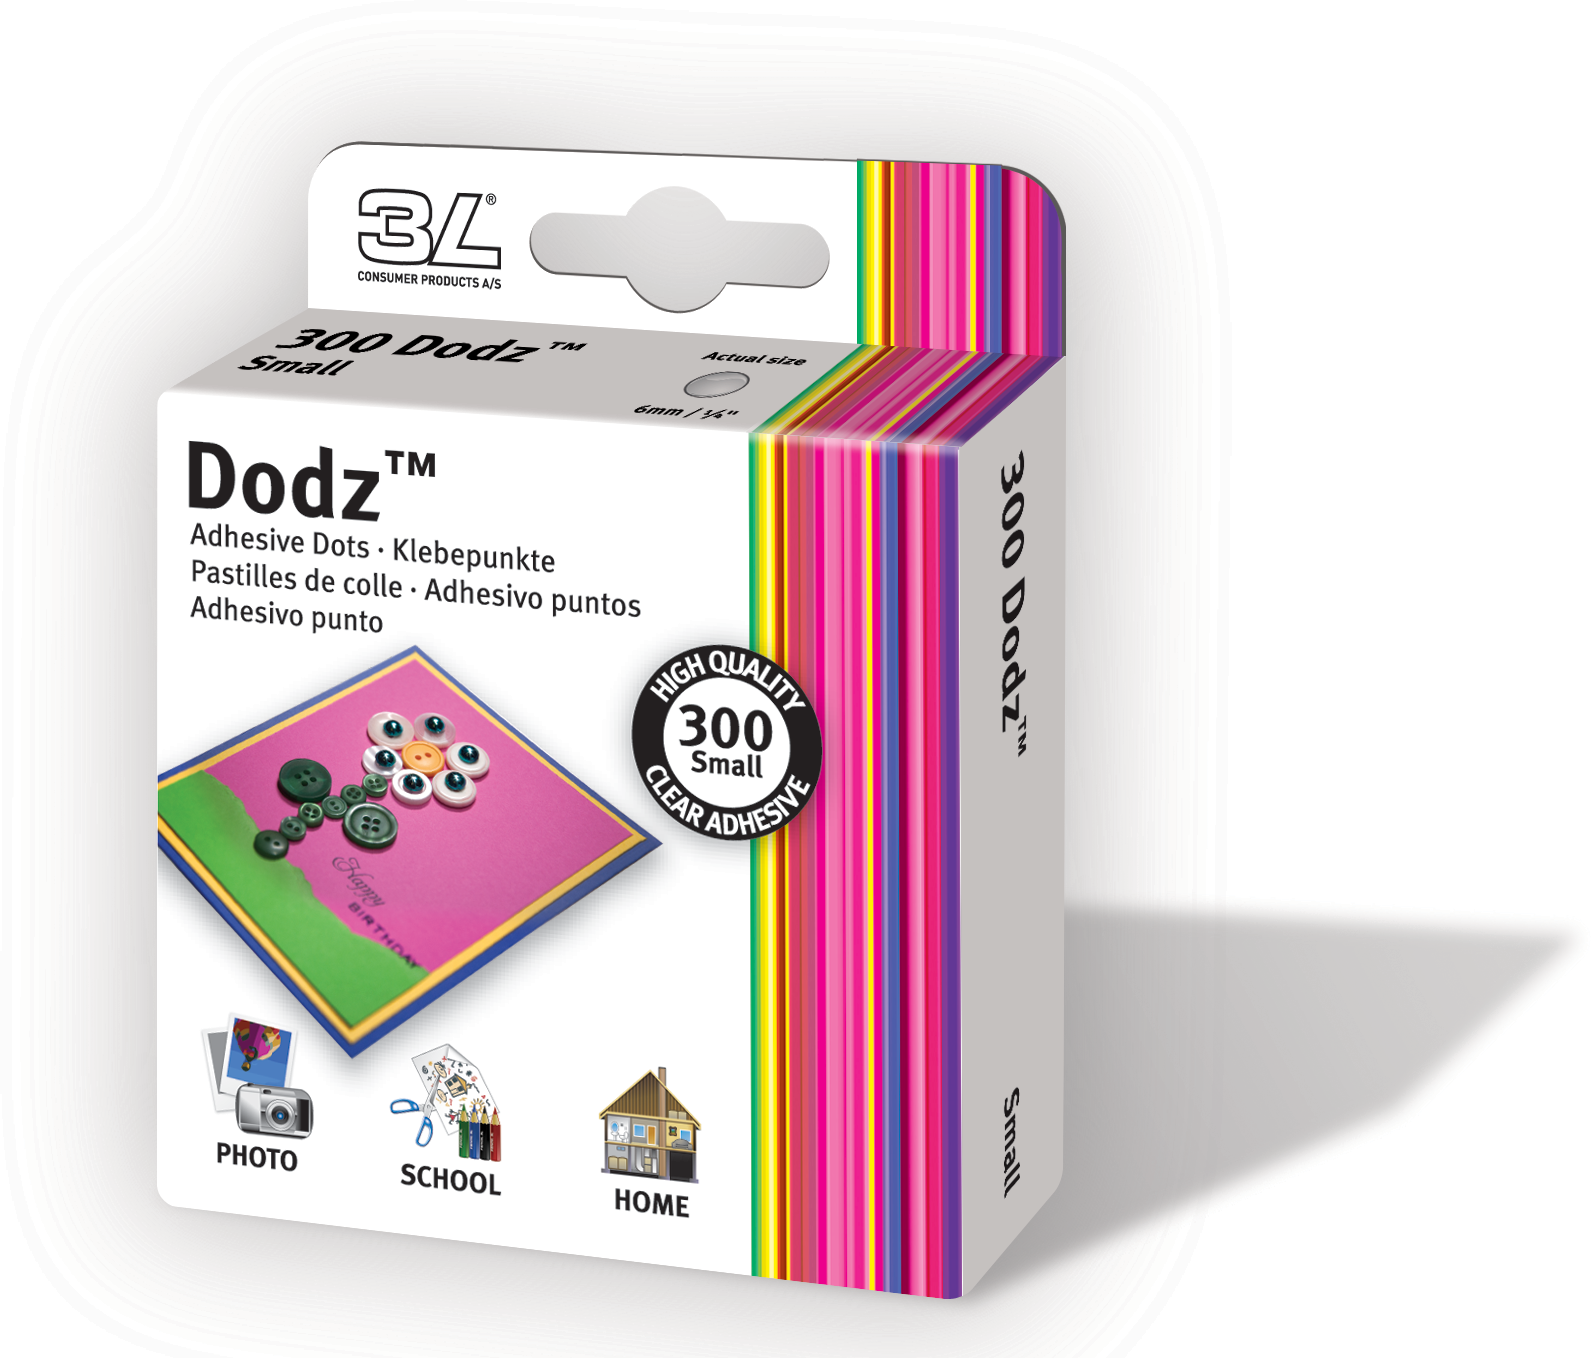
DOTZ-Small
Adhesive Sheets – 12 x 12
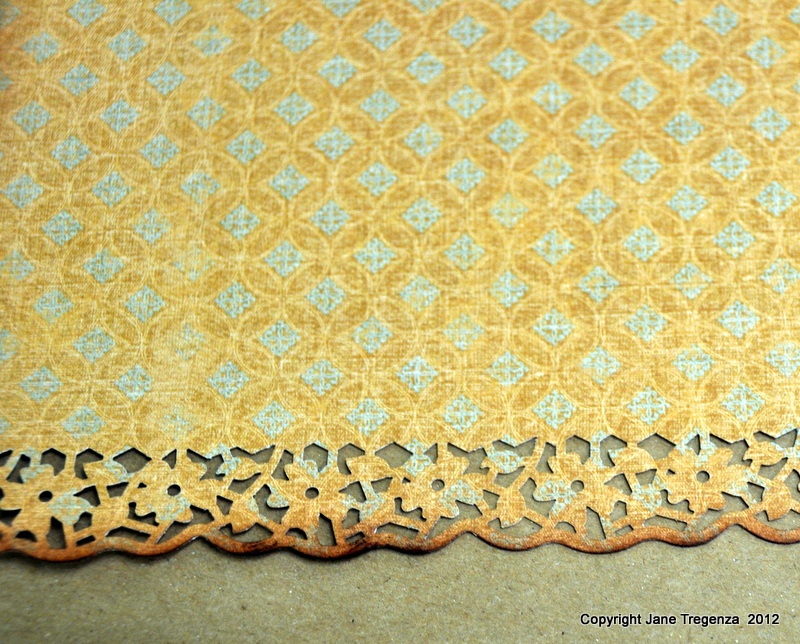
Choose one of your three prints to be the foundation page for your layout, ink around the edges and put it to one side. Chose a second print, this need to go on top of the foundation print, so make sure it looks nice and does not blend in too much or clash. Cut this piece to be 10 1/2 inches wide, but don’t cut the high yet. Use your deep edge punch to punch along the bottom edge. Once you have punched the edge, trim the piece back so it is 10 1/2 inches high as well as wide. Ink around the edges.
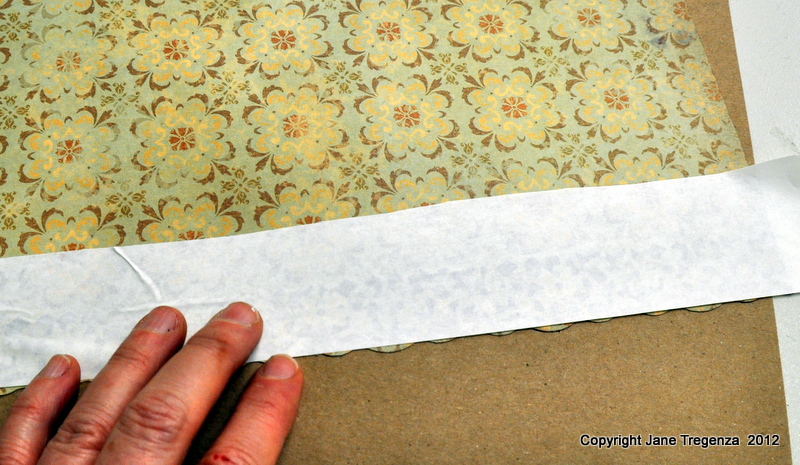
Cut a piece off your Adhesive Sheet, it needs to cover the punched border. Peal off the backing of one side and make sure you place it on the back of your print paper and not the front.
Use a pair of scissors and trim the excess adhesive sheet from the edge of your punched border.
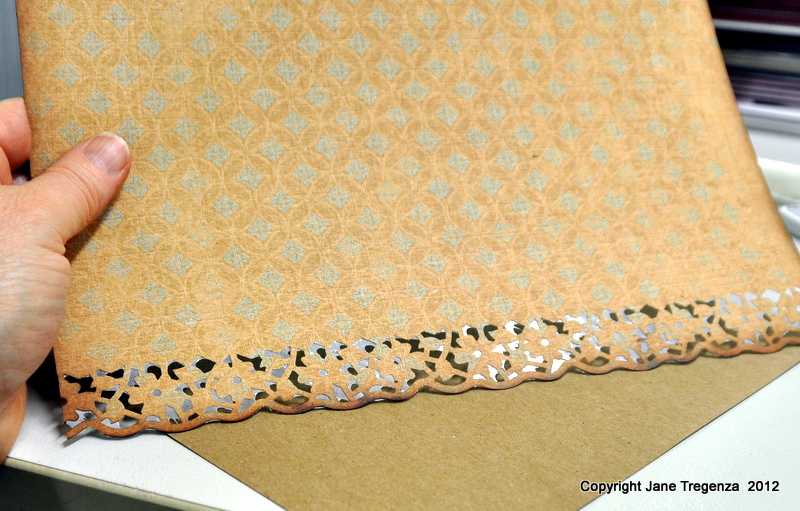
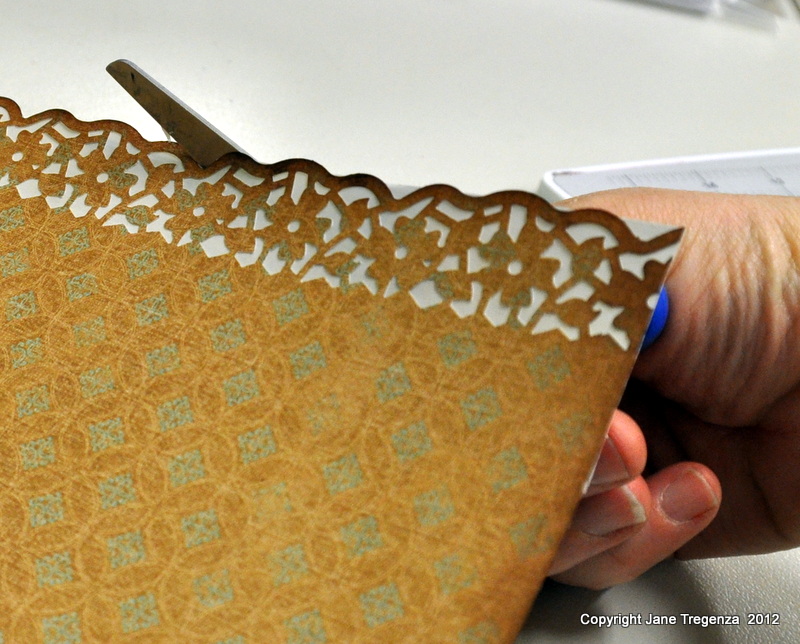
Peel the backing paper of your adhesive sheet and turn your punched piece over and have a look at the border. The punched out area does not need to be completely filled in with the adhesive sheet, mine is a bit patchy. If too much adhesive has been removed then redo this step again.
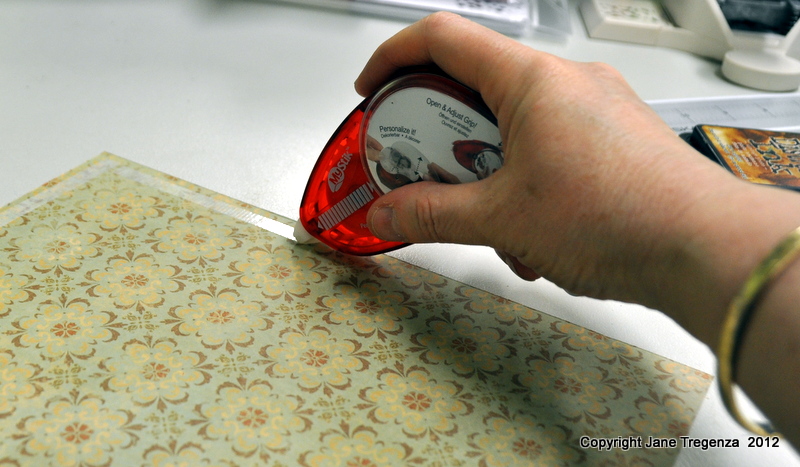
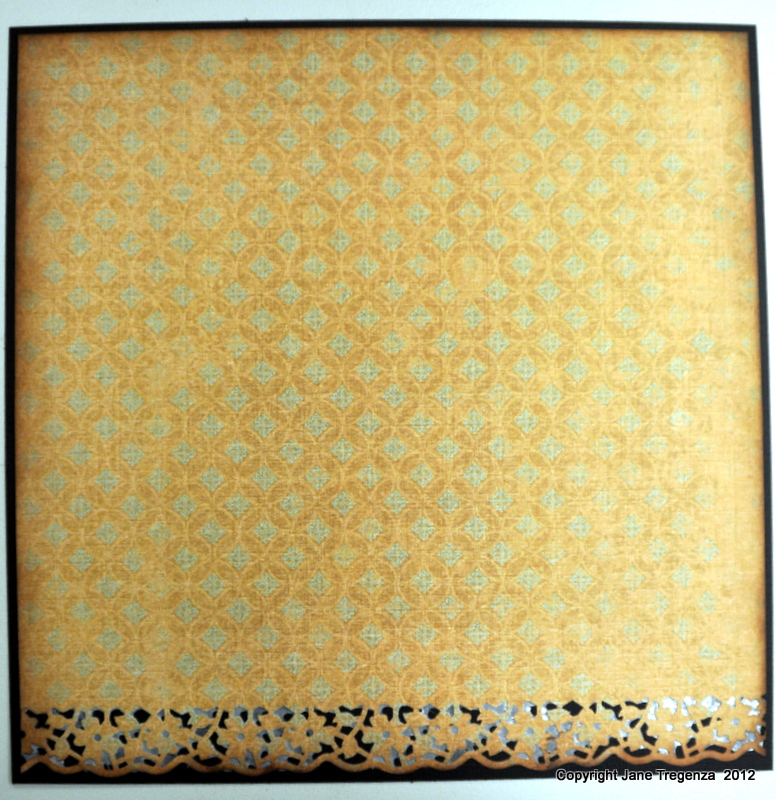
Cut a piece of black cardstock to 10 3/4 x 10 3/4 inches wide. Add more tape around the edges of the punched piece. It would be a good idea to add a couple strips in the middle of the print paper. Adhere it to the black cardstock. I used MyStik Permanent Strips Dispenser for this. It always makes the job so much quicker. Carefully press the punched out bit of your print paper onto the black cardstock. Try not to remove any of the adhesive between the punched out area.
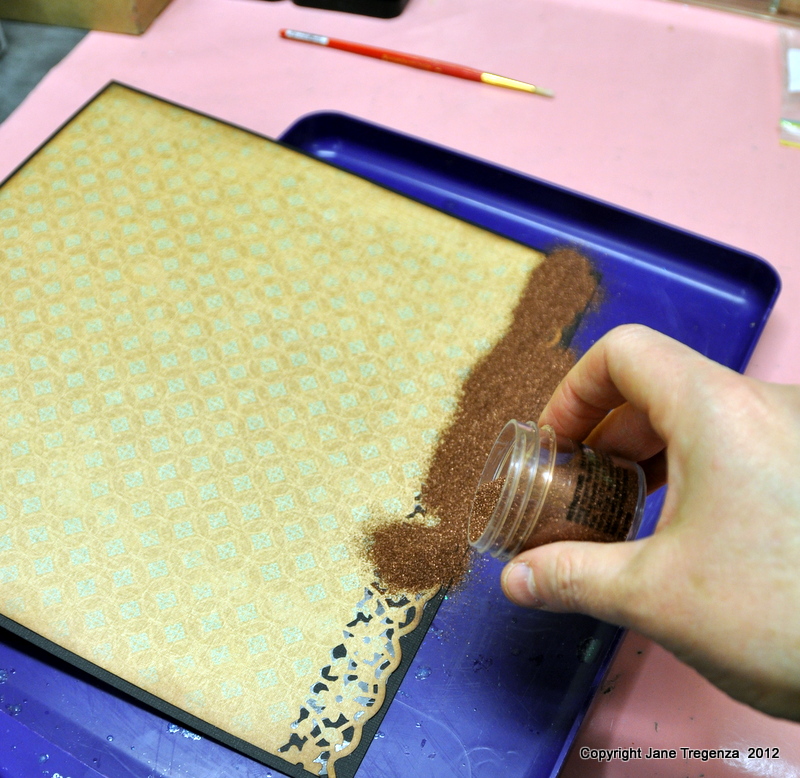
Pour embossing powder over the punched area. Tip off the excess powder.
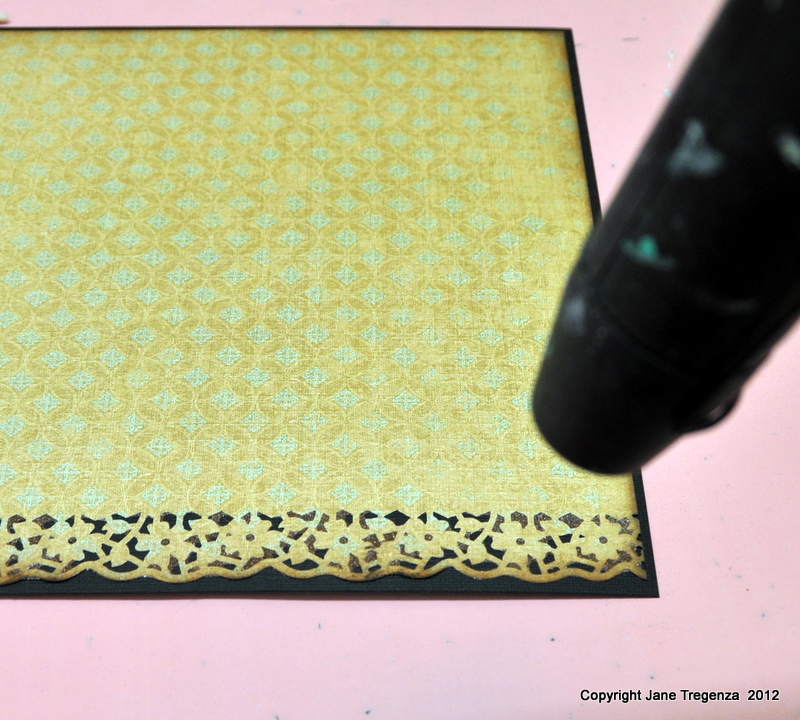
Carefully heat the powder with a heat gun. You should find that the Adhesive Sheet holds the powder while you heat it. The Adhesive Sheet works well in holding the powder in the punched out areas of your border. It gives a distress look to the border as the powder is caught in the punched out areas of your print paper and no where else. As the Adhesive Sheet does not completely fill in the gaps, some of the black cardstock shows through. If you want to have the whole area filled in with embossing powder, then you need to place the adhesive sheet on the black stock and place the punched out print on top of it. Use your finger to rub away any excess adhesive sheet showing past the print paper. This way you should get a complete covering of adhesive between the punched area.
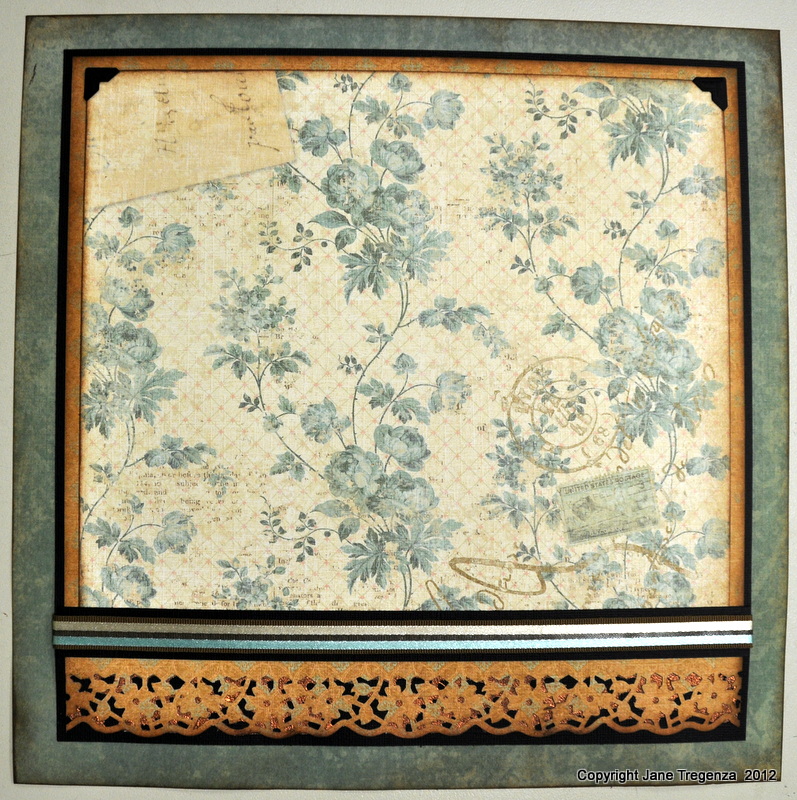
Cut your third print to be 10 inches wide x 9 inches wide. Adhere your piece of black cardstock with the punched print paper to your foundation page. Make sure at this stage you don’t tape it all the way around as you will need to adhered some ribbon on the page of which the ends need to be wrap around to the back of the black cardstock. Adhere your third print paper to your layout. You can adhered this piece down all the way around

Add two Photo Corners-Classic Style, black to the top of your third print paper. I love these photo corners and I use them all the time of everything I do. Now it is time to do the ribbon.
Cut a piece of cardstock to be 3/4 of an inch wide and 10 3/4 long. Add a strip of Crafty Power Tape. I find the built in Dispenser works so well. The tape needs to go along the middle of the black cardstock piece. Add a strip of ribbon to the tape. Turn the piece over and add another piece of the Crafty Power Tape to the middle of it. Add it to your page just above the punched border piece and wrap the ends around to the back of your 10 3/4 x 10 3/4 inch black cardstock piece.
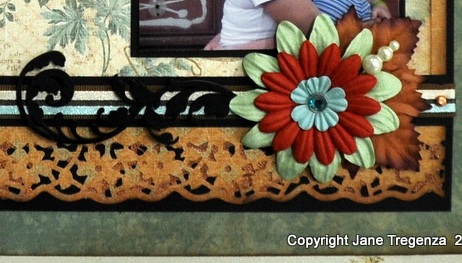
Now its time to add the embellishments. I chose a selection of paper flowers and leaves to match my papers. I used my large Dotz-3D to attach the leaves to my page. These work like a treat, as they are 3d and highly sticky. Layer your three flowers together and use a bling brad to attach them together. I added them to my page with another one of my large DOTZ-3D.
I inked my chipboard black and used DOTZ-Small to adhered them to my layout. The flourish needs to be tucked under the flower. Cut two photo mats and add them to your page. Finally add your title above your photo, all you need to do is add your journaling.
This page went together so easy, using MyStik Permanent Strip Dispenser, Adhesive Sheets, DODZ both 3d and small, Crafty Power Tape with it’s built in Dispenser and of course my favorite, Photo Corners in the Classic Style and in Black. The Scrapbook Adhesives by 3L products always makes the job quite quick.
So have a go at using Scrapbook Adhesives by 3L Adhesive Sheets and embossing powder and see what you can come up with.
hugs
Jane Tregenza


By Brenda B November 6, 2012 - 7:44 am
This is a stunning layout. Love your attention to detail. Thanks so much for the tutorial.
By Kim H November 6, 2012 - 2:56 pm
love the layout and the tutorial, thank you for sharing the technique, will definitely be using it soon.