
Hi! Kimberly here and I have a confession. I love enamel dots. I collect enamel dots. I hoard enamel dots. And I STILL do not have all the colors I “need.” Leave it up to Scrapbook Adhesives by 3L to have a product to help my addiction!
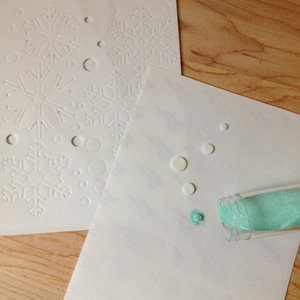
As I was looking at my sheets of the the Designer Shapes, I noticed all these 3D Foam circles, perfectly sized like enamel dots! I knew they could be heat embossed, so off I went to experiment.
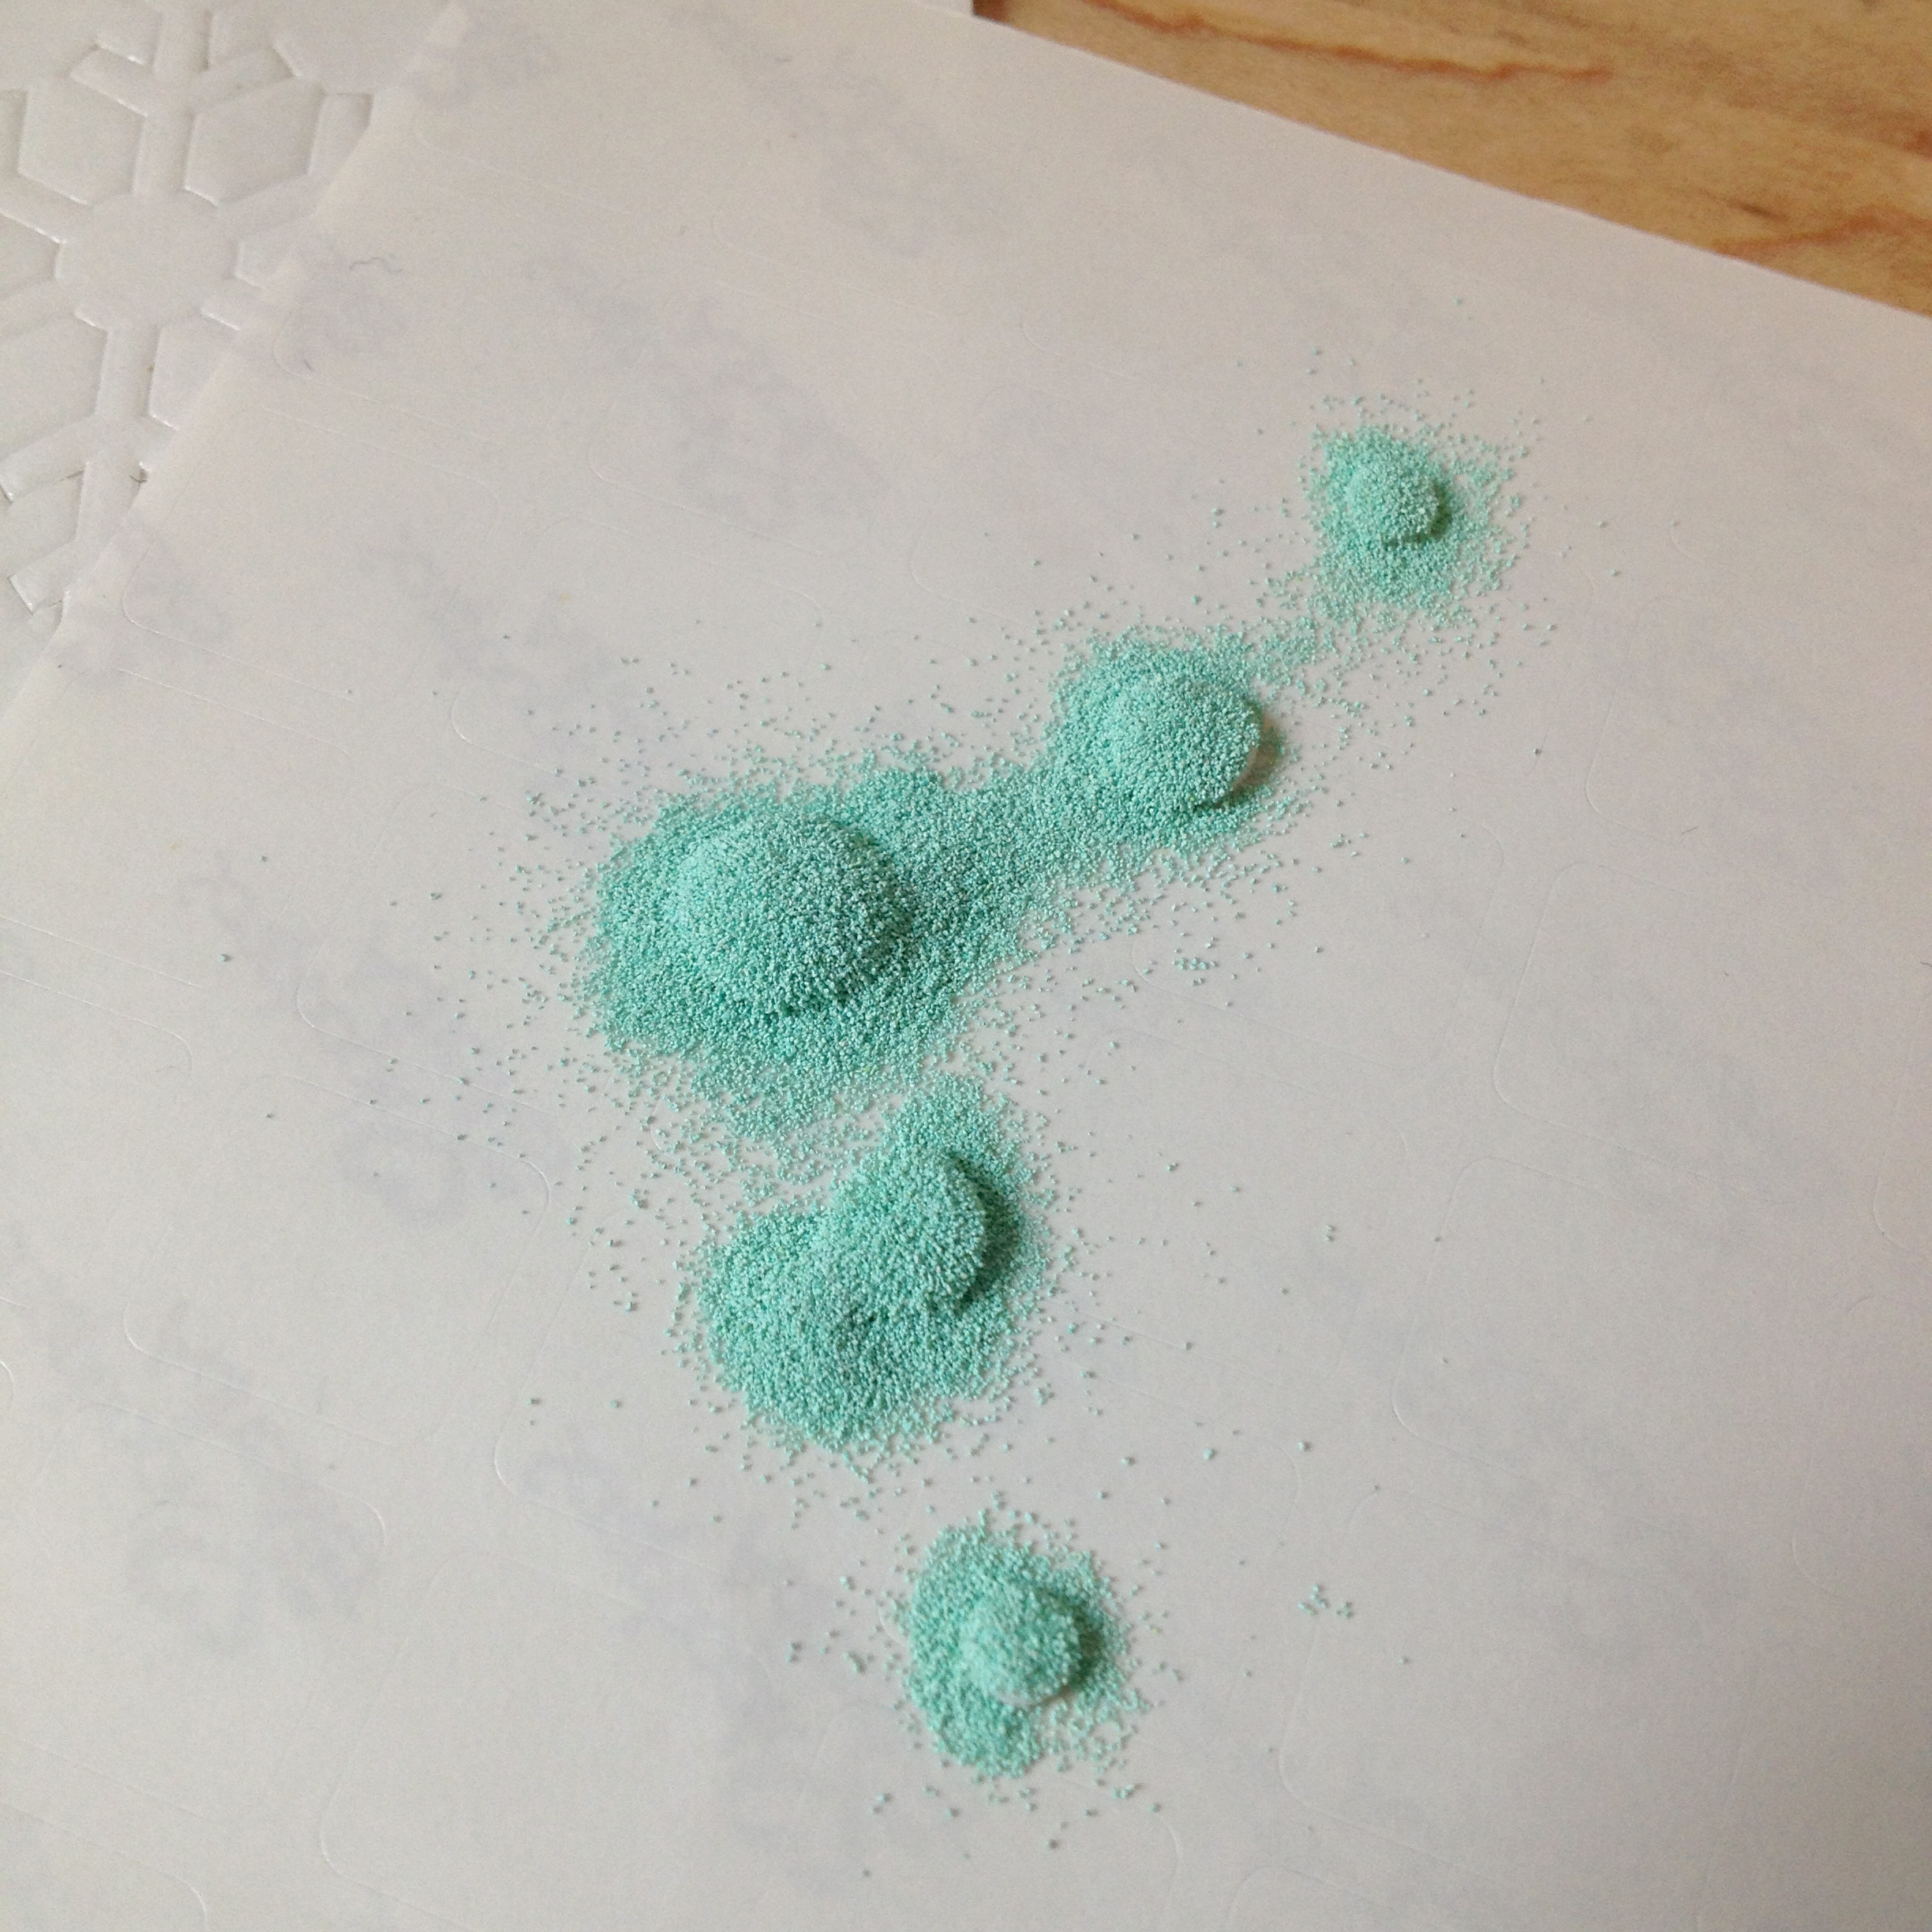
I started by placing the foam circles onto a left-over backing piece from 3D Foam Squares. (Keep those backing sheets, I use them ALL the time!) Then I generously poured embossing powder over the top of each foam circle. The excess was tapped off and returned to its container. Heat emboss each foam circle. The surface won’t be entirely smooth, and how textured they will be depends on the type and color of embossing powder you choose. But it worked! I love them!
What do you think? Will you give it a try?
thanks for stopping by!
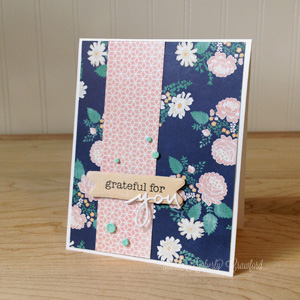
Supplies: Adhesives-Scrapbook Adhesives by 3L (E-Z Runner® Strips Permanent Refillable, E-Z Dots® Permanent Refillable, 3D Foam Squares White Small), Patterned paper-Carta Bella (Hello Again 6×6), Stamps-Technique Tuesday (I Give Thanks), Dies-Technique Tuesday (Banners, Say It Love You), Embossing Powder-Stampendous! (Wintergreen), Ink-Tsukineko (Memento; Tuxedo Black)
By Kelly Klapstein September 9, 2013 - 9:56 am
Really clever! Love this idea!
By mamichelle September 9, 2013 - 10:45 am
Great idea! Yes, I will give it a try!! I am always looking for embellishments that can go through the mail without extra thickness. Thank you!
By Michelle Marks September 9, 2013 - 10:55 am
Great idea!!! I’ll definitely be trying this!!!!
By ~amy~ September 9, 2013 - 8:17 pm
super idea! Love your card!!