
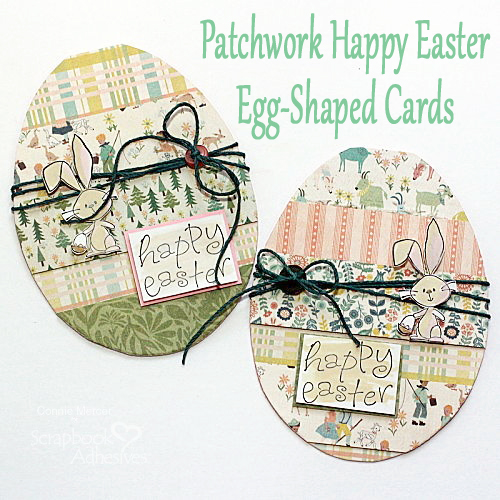
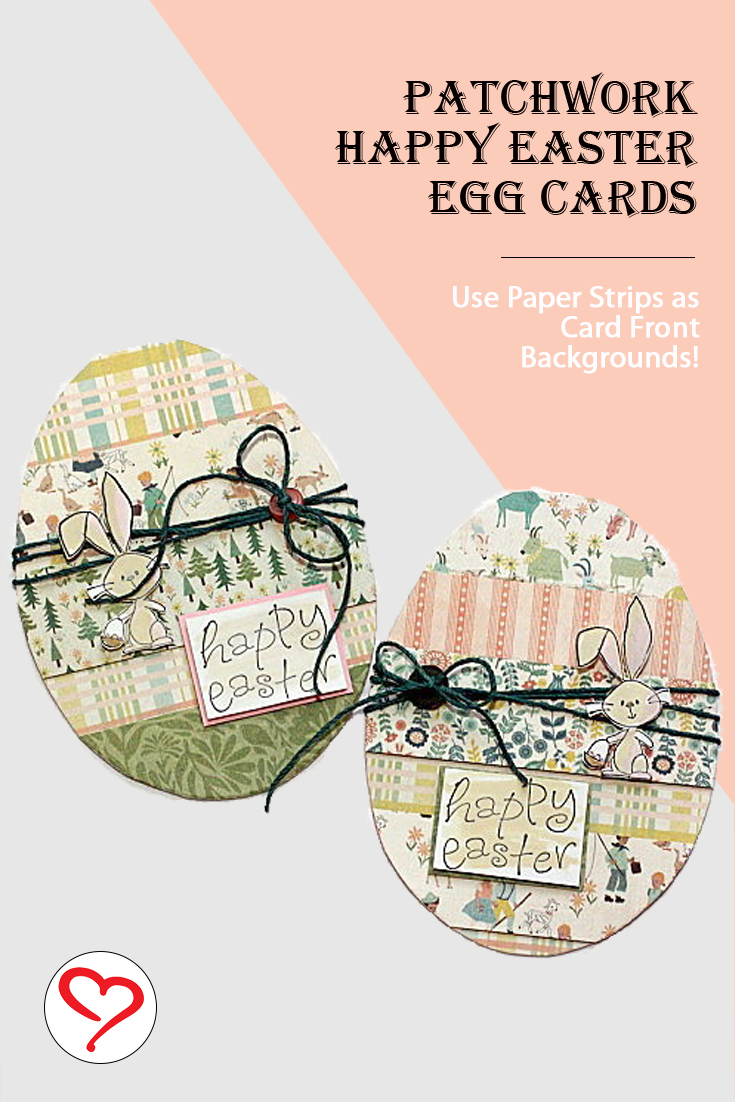
Hi, Connie here with a wonderful Patchwork Easter Egg Cards, pieced together with paper strips! Not only do you use up paper scraps but I show you how to create a shaped card.
I was inspired by fellow DT, Teri Anderson, and her Faux Paper Tape Technique post. Hmm, paper strips for a card front so why not on an egg-shaped card front? That is where I started…
Patchwork Easter Egg Cards Supplies
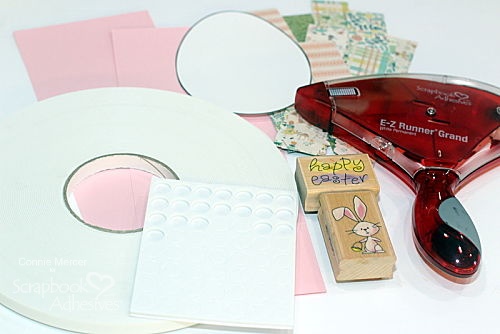
Let’s get the supplies I need first. For my adhesives, I am using the newly released, Crafty Foam Tape 108ft.! This roll will last me a good long while. LOL! In addition, I’ve added another newly released E-Z Runner® Grand Dots Repositionable. Along with the 3D Foam Circles White Mix and E-Z Runner® Grand Refillable Dispenser. To round out my supplies, I have cardstock, patterned papers, stamps (or you can use stickers) and an egg shape pattern.
Egg Card Instructions
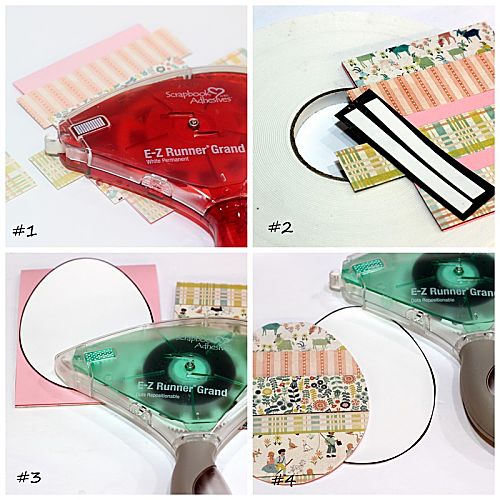
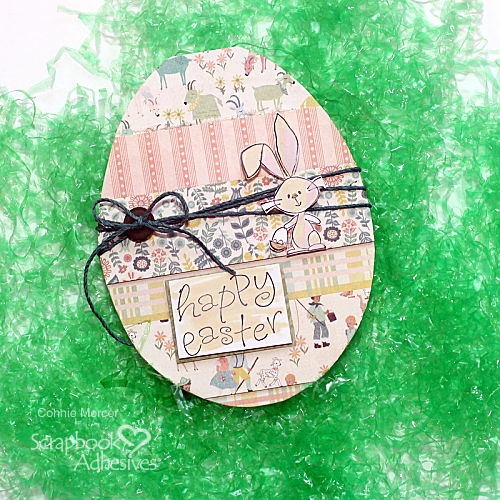
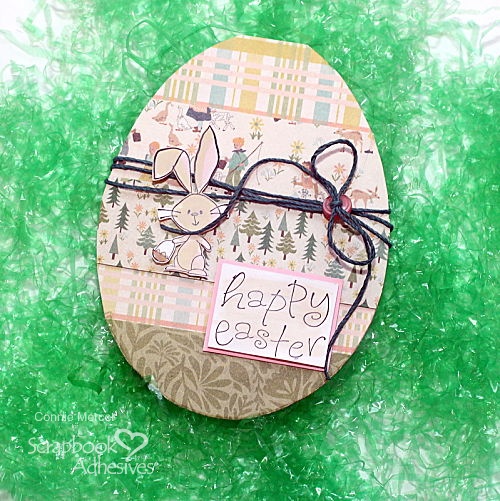
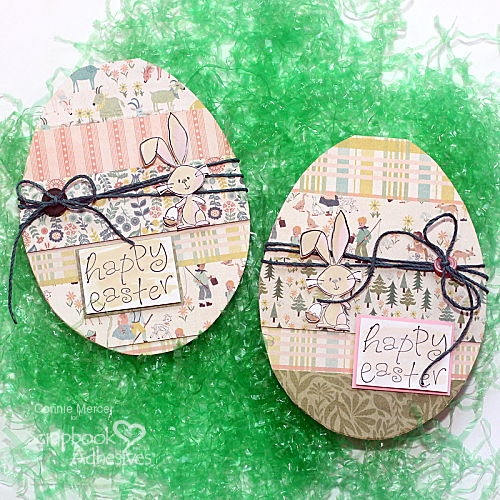
- Cut patterned papers into 4 x 1″ strips. Layer them on the front of a 4 x 6″ top-fold card base.
- Adhere the strips to the front of the card alternating between E-Z Runner® Grand Permanent Strips and Crafty Foam Tape 108ft. for interest and dimension.
- Apply E-Z Runner® Grand Dots Repositionable to the back of the egg shape pattern. It will keep the pattern from shifting while you are cutting the egg shape. Designer’s Tip: the egg pattern can be hand-drawn or you can find a shape online.
- Cut around the egg pattern, leaving a small overhang on the top. You should have an egg-shaped top fold card when done cutting. Simply rub off the adhesive dots when finished.
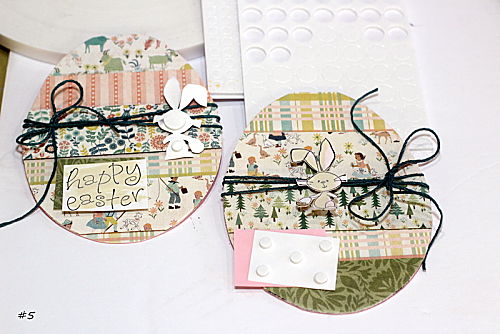
- To embellish the cards, stamp the bunny images and sentiments on a piece of white cardstock. Then color the bunnies and sentiment backgrounds. Trim them out.
- Wrap twine around the card front and tie a bow secured with a button and Adhesive Dots Small. Next, place 3D Foam Circles Mix White on the backs of the stamp images and adhere them to complete the Easter cards.
Don’t you love how these Patchwork Easter Egg Cards came out? I hope you try this!
Wishing you have a wonderful Easter and enjoy your family time.
Thanks for stopping by~
Connie Mercer
Creative Time: 45 minutes
Skill Level: Beginner
Materials Needed:
Scrapbook Adhesives by 3L®
3D Foam Circles Mix White
Crafty Foam Tape 108ft.
E-Z Runner® Grand Dots Repositionable
Adhesive Dots Small
E-Z Runner® Grand Permanent Strips
Other
Patterned Paper: Authentique Papers; Cardstock; Twine; Buttons; Stamps; Black Ink; Distress Oxide Inks
Save It to Pinterest!
Visit our Website and Blog!
Sign up for our Newsletter so you never miss a contest or giveaway!


