
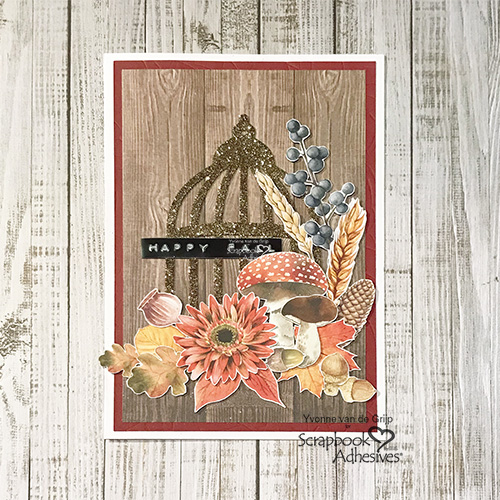
Hi everyone, Yvonne here. With the trees changing colors and the leaves falling, I was inspired to make this happy fall card to celebrate the season’s beautiful colors. For a pop of glamour, I added a glittered cage!
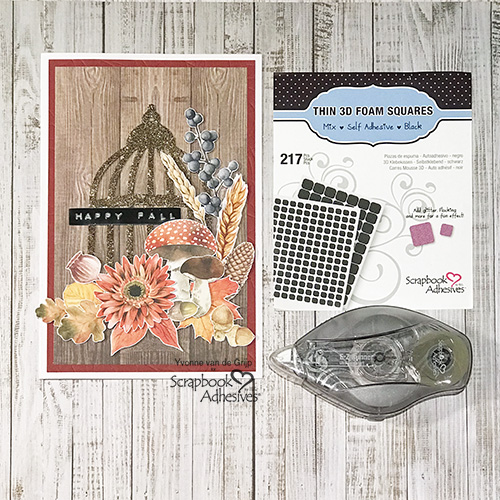
Layering the fall images is made simple using Thin 3D Foam Squares Black Mix. But the unexpected surprise is adding a glittered element.
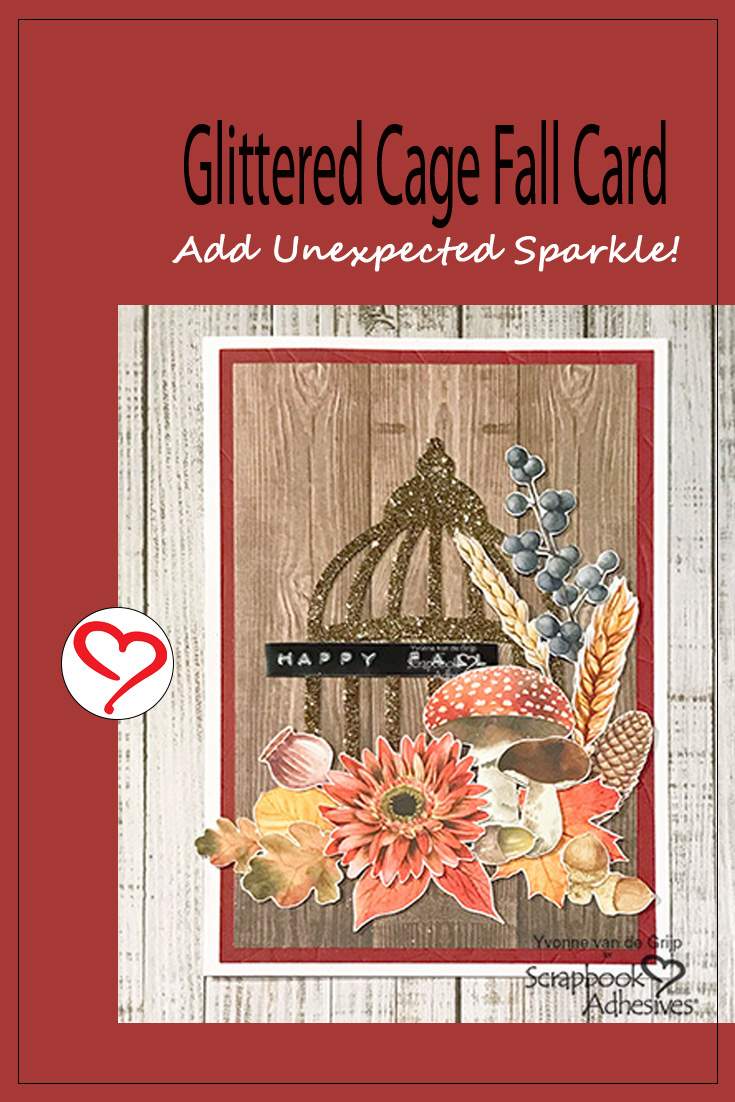
Glittered Cage Card Base
First, choose the colors you want to use for your fall themed card. How wonderful to choose such a beautiful fall color palette!
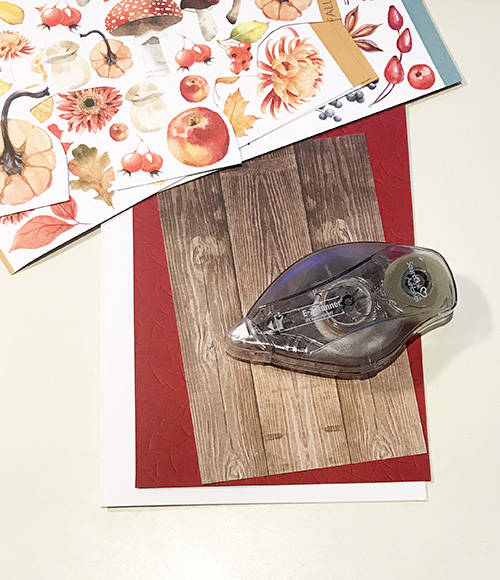
For my card, I used a white card base and paired it with a burgundy card panel as a second layer. Adhered together using the E-Z Runner® Ultra Strong Refillable Dispenser. Next, mat with a piece of wood panel patterned paper. Again use the E-Z Runner® Ultra Strong Refillable Dispenser to adhere to the card base and this panel layering part is done.
Add Sparkle Accent
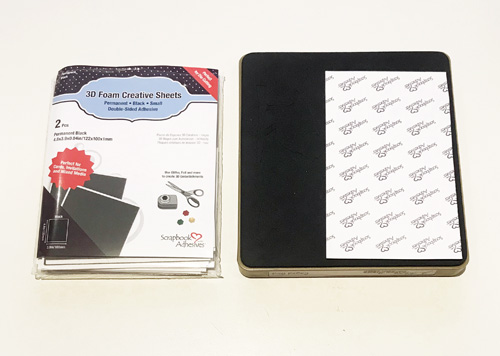
Now for the fun part! Start with die-cutting a bird cage shape from 3D Foam Creative Sheets Small, Black. This foam sheet is so easy to use and cuts like butter! No foam residue on the die.
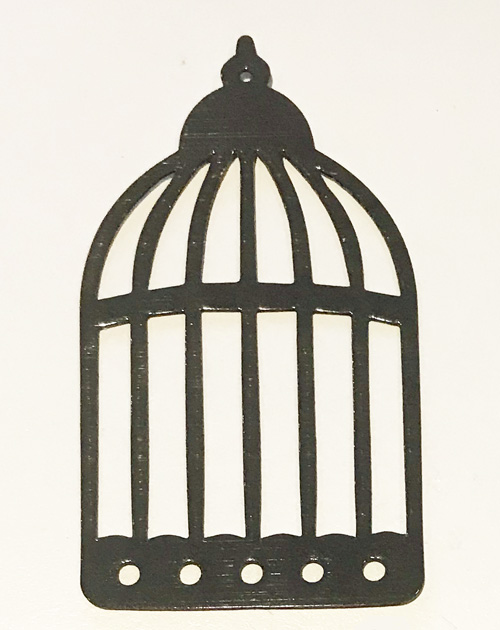
Pull off the liner of the cage die cut and adhere it to the centre of the card.
Next, carefully pull off the top liner of the cage shape. Grab a fall color glitter and sprinkle on top of the exposed adhesive. Press the glitter into the cage shape to secure and then tap off the excess.
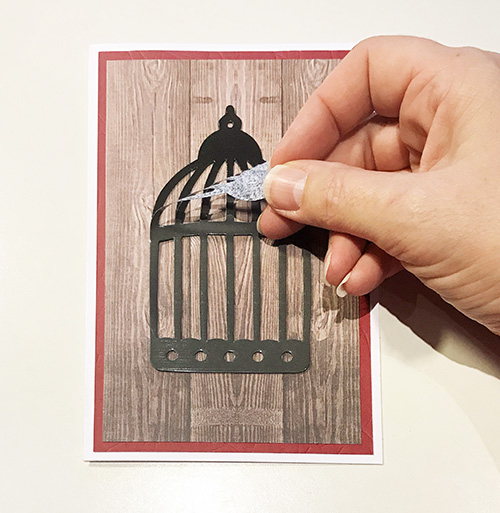
Now you have this amazing glittered element and the extra surprise? It is also dimensional! We call this technique Wear Your Adhesive on the Outside. Instead of hiding the adhesive under layers of paper, it shines on the outside as an important element of my card.
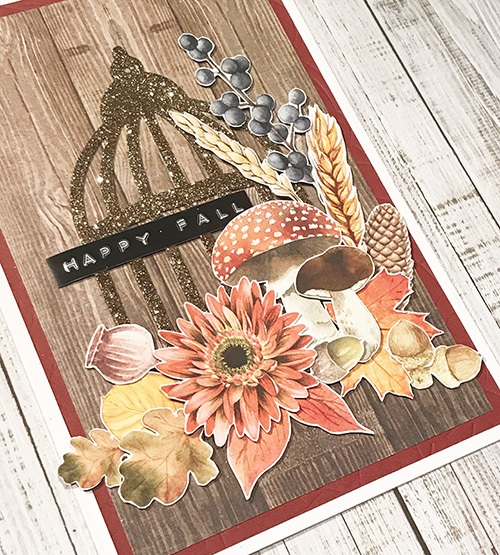
Card Embellishing
Let’s embellish more! Start with fussy cutting images from a piece of patterned paper. Use a pair of small scissors to work around the details. Then adhere the images to the card using Thin 3D Foam Squares Black Mix.
Finally, using my label maker, punch out the happy fall sentiment and adhered it to the card.
Voila…your Glittered Cage Fall Card is ready to celebrate autumn. I hope you enjoyed this tutorial and wish you happy crafting!
Yvonne

Creative Time: 40 minutes
Skill Level: Intermediate
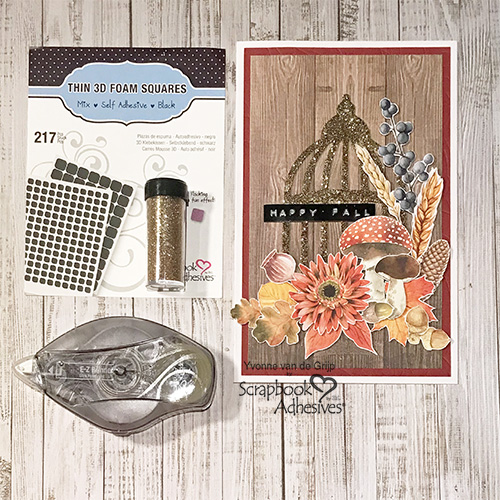
Materials Needed
Scrapbook Adhesives by 3L®
E-Z Runner® Ultra Strong Refillable Dispenser
Thin 3D Foam Squares Black Mix
3D Foam Creative Sheets Small, Black
Other
Etched Dies: Sizzix (Caged Bird by Tim Holtz); Die Cutting Machine: Spellbinders® Paper Arts (Platinum 6 Machine); White, Burgundy, and patterned Cardstock (Joy Crafts: Wood Texture Paper Bloc); Fall images (Mintay papers: Flora Book 3, Fall & Winter edition); copper Glitter; Dymo Omega Label Maker; Scissors; Paper Trimmer
Save It!
Visit our Website and Blog!
Sign up for our Newsletter so you never miss a contest or giveaway!


