
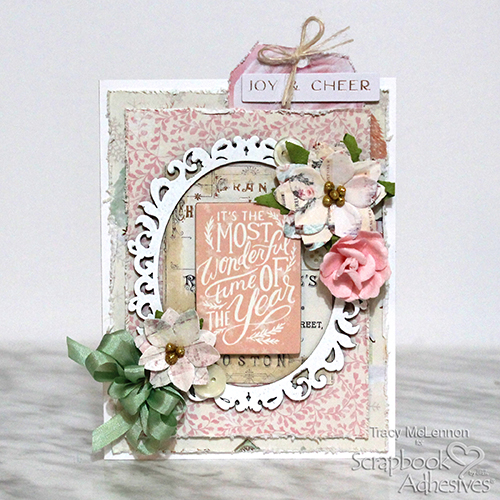
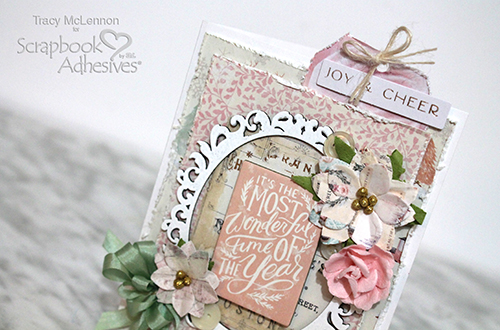
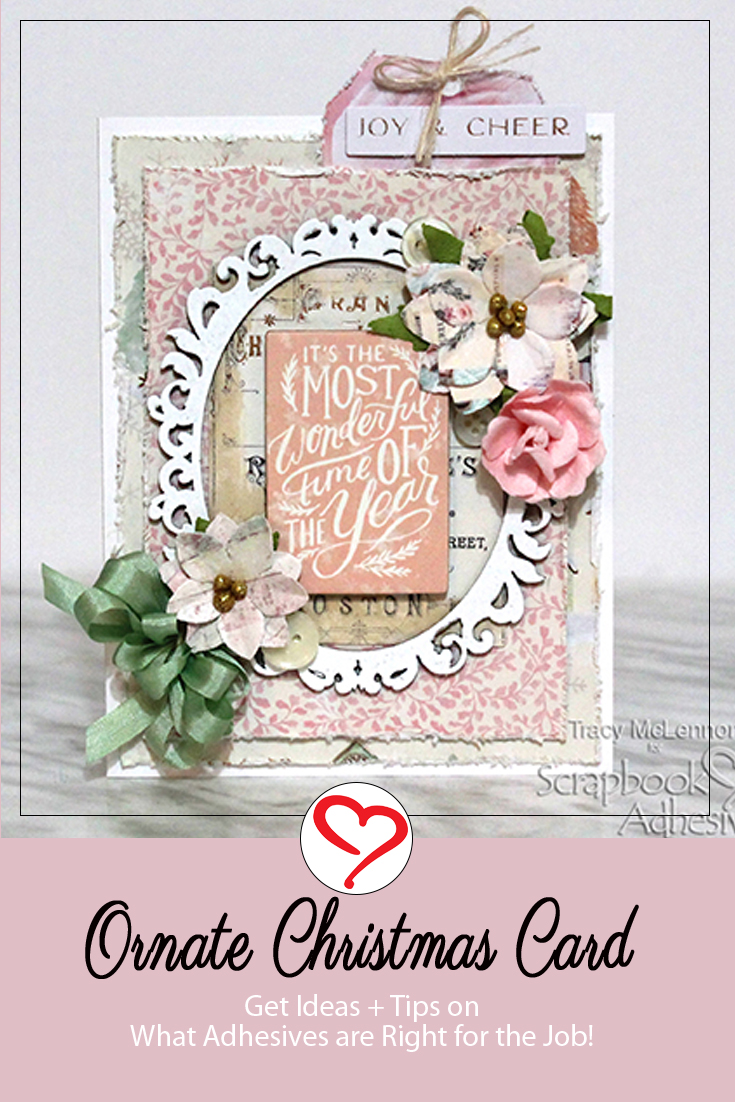
Hello crafty friends! Tracy here, and today I am sharing a pretty little ornate Christmas card, and all of the fabulous stickiness that made it happen. Here are the details.
Tips + Tricks That Sticks
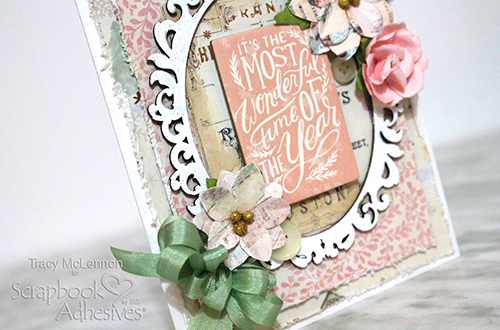
Anytime that I create an ornate Christmas card or project that may carry some weight, I turn to my trusty E-Z Runner® Ultra Strong Refillable Dispenser. This will make sure that all of my tricky layers will stay put.
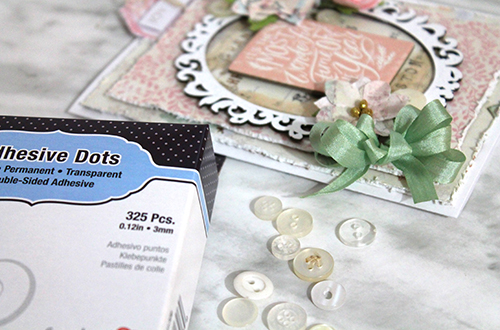
The top patterned paper layer is added to the card using Crafty Foam Tape White for a little extra dimension between layers. Then I added the chipboard frame and buttons using Adhesive Dots Micro.
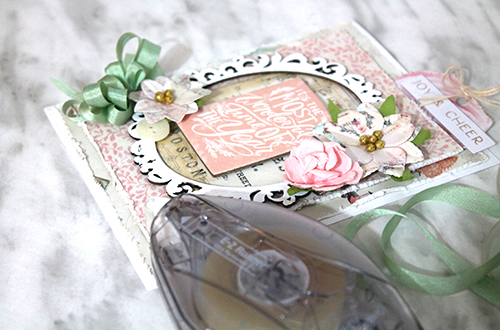
My Adhesive Dots Micro came in handy for attaching the silk ribbon bow also. I upgraded to the Adhesive Dots Medium when adding the dimensional flowers.
I used Crafty Foam Tape White again to add the chipboard sticker sentiment to my ornate Christmas card. The “Joy & Cheer” ephemera piece is added to the top tag using Thin 3D Foam Squares White Mix.
Adding dimension and texture to a project is easy. It’s making that stick last is what’s tricky. Hope these tips help with your next Ornate Christmas Card project.
Thanks so much for stopping by!
Tracy
Creative Time: 30 minutes
Skill Level: Beginner
Materials Needed
Scrapbook Adhesives by 3L®
Crafty Foam Tape White
Thin 3D Foam Squares White Mix
Adhesive Dots Micro
Adhesive Dots Medium
E-Z Runner® Ultra Strong Refillable Dispenser
Other
Prima Sugar Cookie Christmas Collection (paper, flowers, ephemera, chipboard stickers); Cardstock (White); Buttons; Green Silk Ribbon; Ivory Burlap String; Creative Embellishments Chipboard- Ornate Oval; Paper Distresser; Embossing Pad; White Embossing Powder
Save It!
Visit our Website and Blog!
Sign up for our Newsletter so you never miss a contest or giveaway!


