
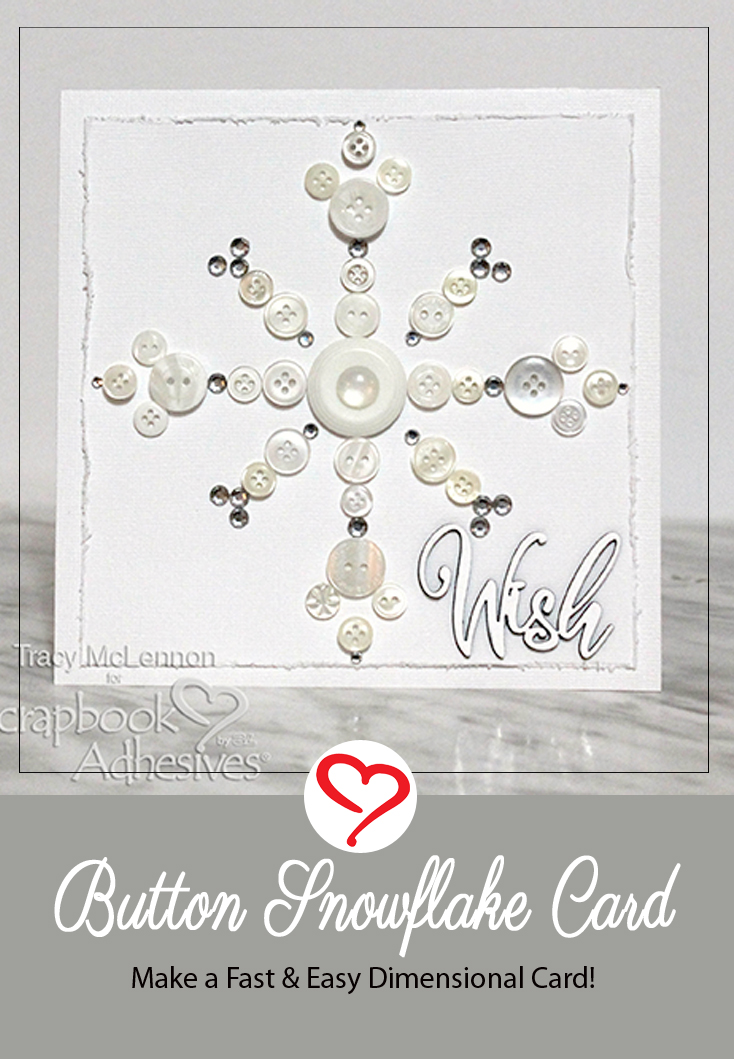
Hello holiday crafters! Tracy here, and today I have a fun little tutorial to share on how to create this simple Button Snowflake Card. This card features products that you probably already have in your craft room. Here are all of the fun details.
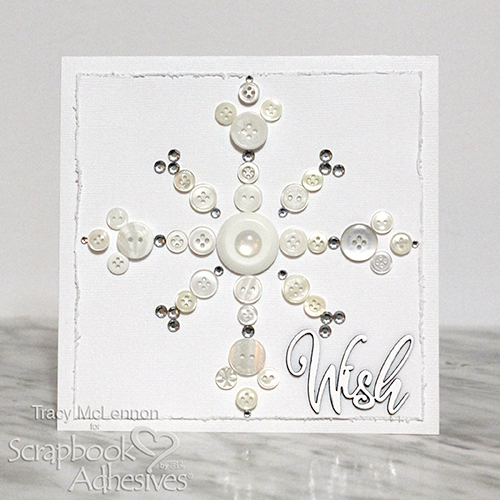
Button Snowflake Card Made Simple
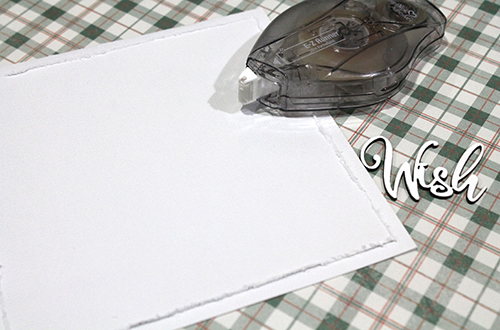
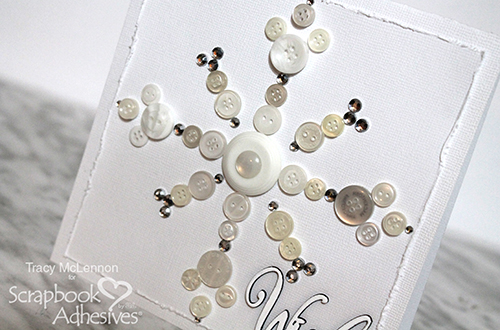
Start your creation by making a simple layered background using white cardstock. Cut a 6 x 6-inch card base from a 6 x 12-inch cardstock. Then cut a 5.5 x 5.5-inch layer and distress all four sides. Use the E-Z Runner® Ultra Strong Refillable Dispenser to adhere the layers together. This will create a good solid base for the buttons and gems for this Button Snowflake Card.
Cover the chipboard sentiment using white embossing powder and set it aside for now.
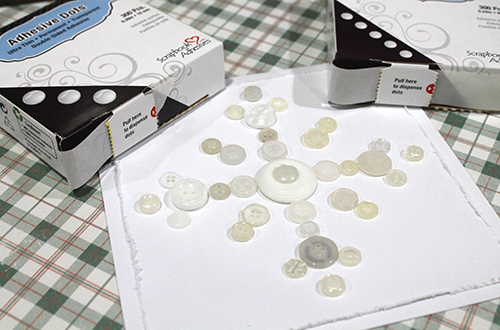
Snowflake Button Design
Dig into your button collection to find the buttons you want to use for the button snowflake card design. Lay the buttons out on the card front. Start adding the buttons using Adhesive Dots Mini and Adhesive Dots Medium Ultra Thin.
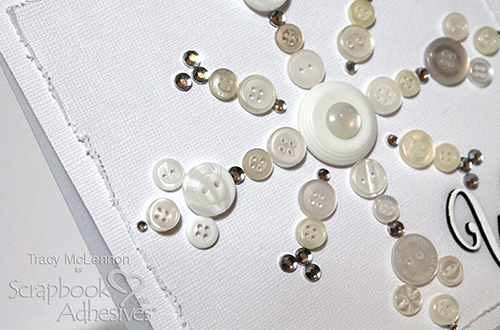
Once I had started adhering the buttons, I realized I also wanted to add a little sparkle. Then I began adding some gems also.
Once the Button Snowflake Card front has fully adhered, I added the chipboard sentiment using Adhesive Dots Micro. Now it’s ready to send!

Thanks so much for stopping by!
Tracy McLennon
Creative Time: 30 minutes
Skill Level: Beginner
Materials needed:
Scrapbook Adhesives by 3L®
Adhesive Dots Mini and Adhesive Dots Micro
Adhesive Dots Medium Ultra Thin
E-Z Runner® Ultra Strong Refillable Dispenser
Other
Cardstock- White; Paper Distresser; Gems; Buttons; Creative Embellishments Chipboard Word; Embossing Pad; White Embossing Powder
Save It!
Visit our Website and Blog!
Sign up for our Newsletter so you never miss a contest or giveaway!


