
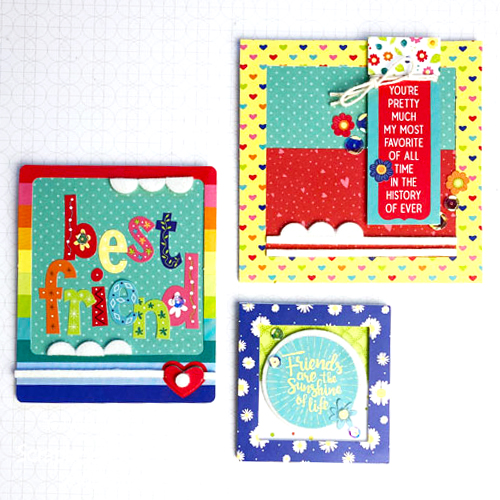
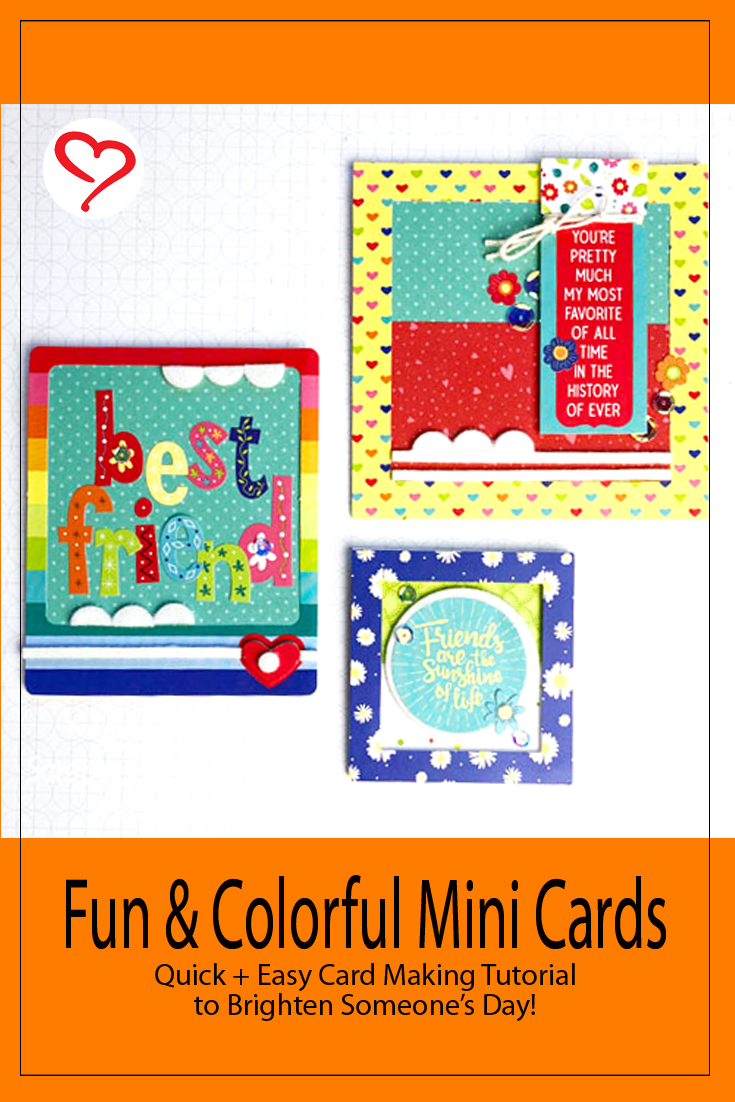
Hi, everyone! There’s just something about leaving a note for someone special and letting them know you care for them! Teri here with some colorful mini cards to do just that!
These cards came together quickly by using pre-cut frame die-cuts. Don’t have any frame die-cuts? You easily make your own frames from patterned paper by cutting rectangles or squares and slicing rectangles or squares out of the insides.
Frame and Build Colorful Mini Cards
Start by creating a base for your frame by folding a piece of cardstock in half and trimming it to fit under the frame. Add a piece of patterned paper (or two) behind the frame and adhere it the card.
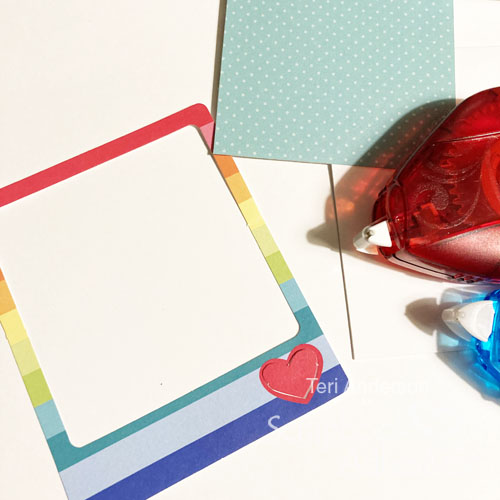
Decorate the inside of your frame with stickers or die-cuts. Also, my frame for this card had a small heart die-cut built into it so I adhered it to the frame with a foam square.
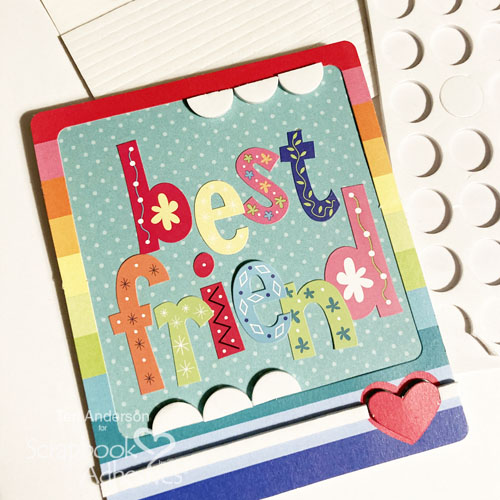
You’ll also want to decorate your frame. Consider using foam strips to add lines to your card, plus try using foam circles to make dots. You can also create a scalloped border by cutting foam circles in half and then lining them next to each other.
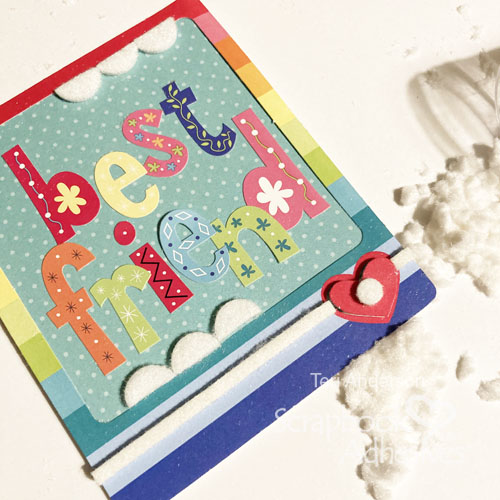
Once you’ve adhered your pieces of foam to your colorful mini card, dump flock onto them. Be sure to burnish the flock completely to the foam so there’s there is not sticky adhesive exposed.
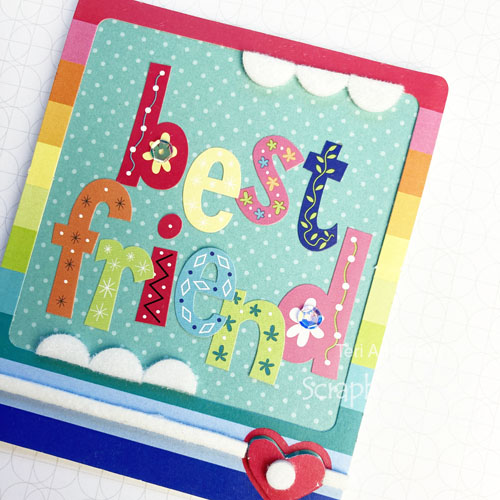
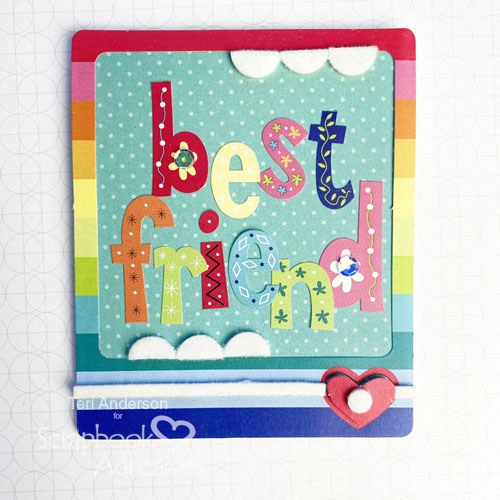
Complete your card by adding a few gems or sequins to the design.
Two More Takes on Colorful Mini Cards
I created this card a little differently.
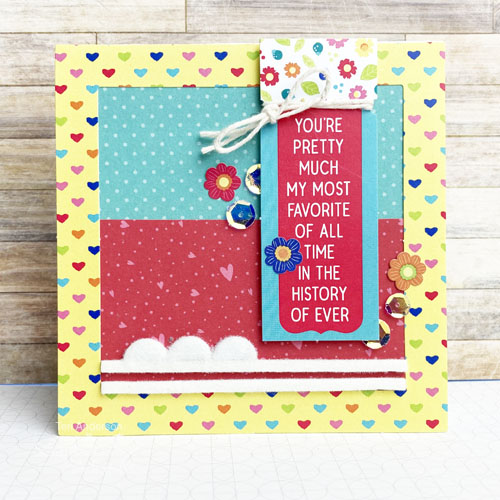
While I still designed it around the frame, I added two strips of foam inside the frame. I also added a small scalloped border to one of the strips.
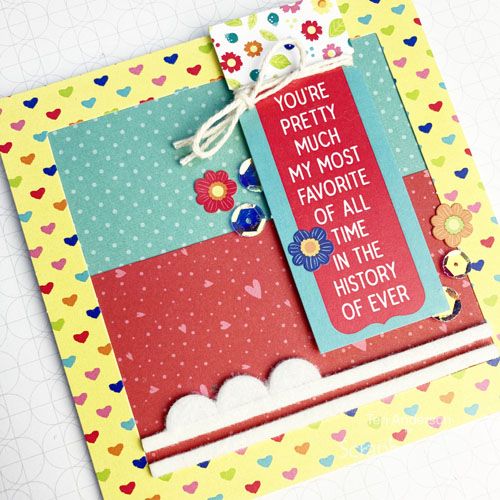
For added pop, I tied some twine around the die-cut sentiment and affixed it the card with 3D Foam Squares.
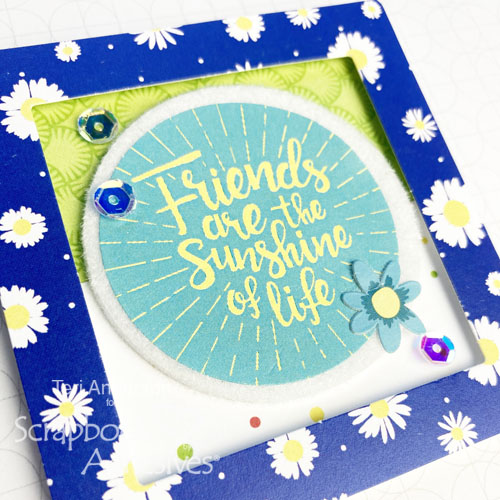
This colorful mini card was also created differently. Once again, I built the design around the frame die-cut. To give the card pop, I adhered the frame to the card with foam strips.
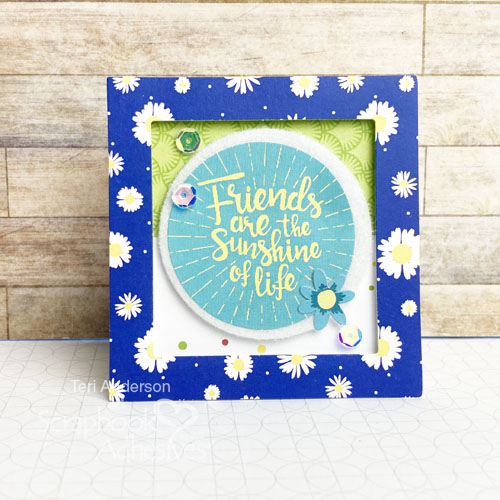
I added a 3D Foam Circle Frame to the middle of the card and put sticker sentiment on top of it. (Creative tip! To keep the sticker from collapsing in the middle, I added a couple foam squares to the middle of it!) Then I applied foam onto the circle frame. I love how it gives this mini card a hint of texture!
I sure hope these fun and colorful mini cards will make their intended recipients smile, and my fingers are crossed they do the same for you!
Happy creating,
Teri Anderson
Creative Time: 45 Minutes
Skill Level: Beginner
Materials Needed
Scrapbook Adhesives by 3L®
- Adhesive Dots Micro
- 3D Foam in White Circles Mix, Circle Frames, Strips, Foam Squares White Mix
- E-Z Runner® Permanent Strips Refillable Dispenser
- E-Z Runner® Petite Permanent Dots Refillable Dispenser
Other
White Cardstock: Neenah Paper; Patterned Papers and Stickers: Photo Play Paper Co. (Best Friends Collection); Sequins: Pretty Pink Posh; White Flock: Stampendous; Twine: The Twinery
Save to Pinterest!
Visit our Website and Blog!
Sign up for our Newsletter so you never miss a contest or giveaway!


By ava gavloski April 26, 2021 - 2:45 pm
Cute cards.