
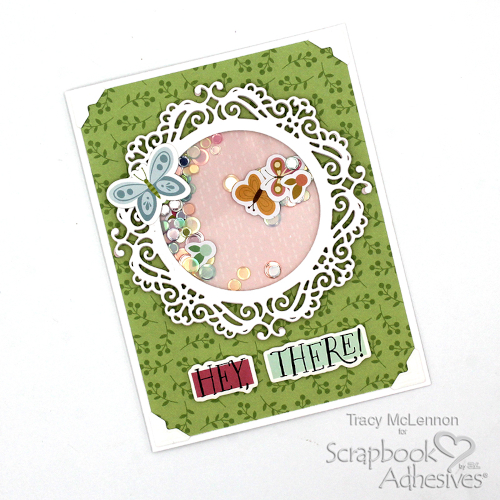
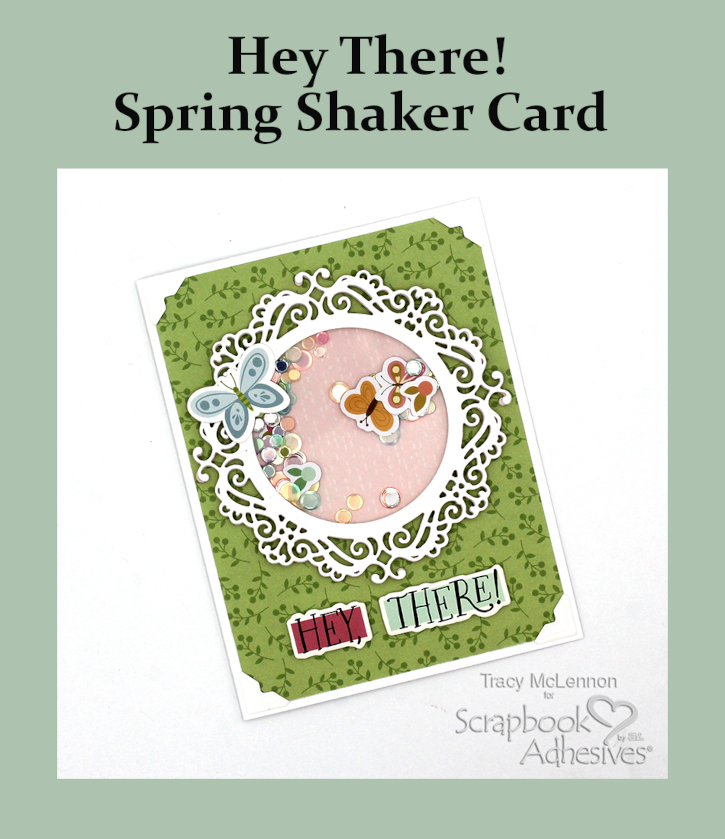
Hello crafty cardmaking friends! Tracy here, and today I have a pretty little Hey There Spring Shaker Card to share. Here are all of the nitty gritty details on how I created it.
Let’s Get Started!
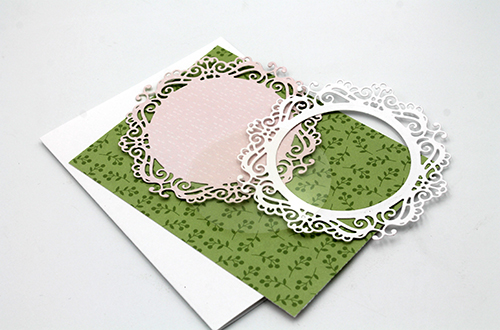
Firstly, I cut the white cardstock card base, a patterned paper card front, and using a decorative die I cut the pink patterned shaker base for the Spring shaker card. Then I cut a white cardstock shaker front with the front cut out. and finally the acetate circle.
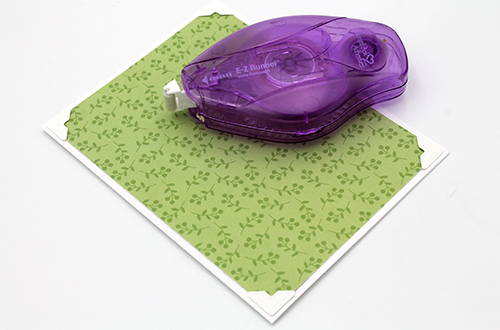
Add the patterned card front to the white cardstock card base using a combo of Creative Photo Corners White and the E-Z Runner® Micro Refillable Dispenser. You want a solid card base when creating a shake card.
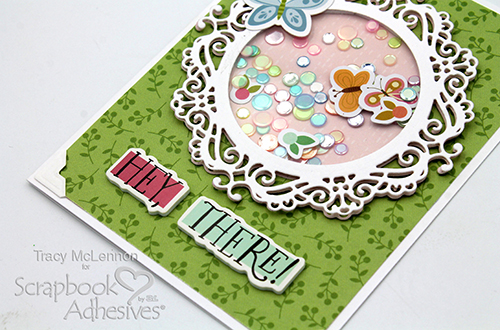
Using the Dual Tip Glue Pen I adhered the acetate circle to the die cut white cardstock shaker top. Then using 3D Foam Strips White, I created the Spring shaker card embellishment area.

I used a combination of small die cut pieces and coordinating sequins to fill my shaker. Remove the 3D Foam Strips White backing and add the pink patterned die cut base.
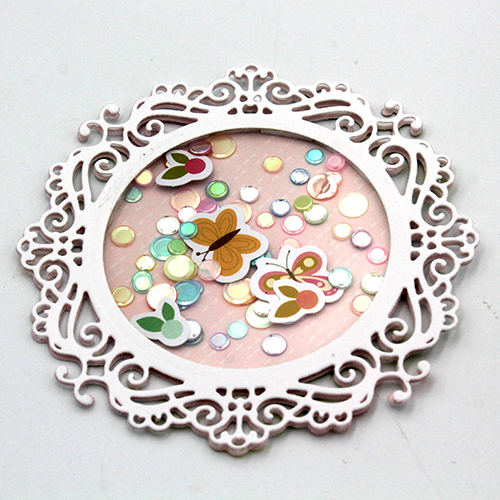
Adhere the shaker piece to the card front using the E-Z Runner® Ultra Strong Refillable Dispenser. A strong adhesive will ensure it stays in place no matter what your shaker fillings are.
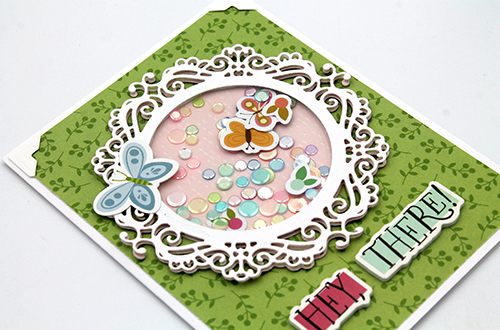
The final touches for this Spring shaker card were to add the foam sticker sentiment to the bottom and a cardstock sticker to the top of the shaker piece.
Thanks so much for stopping by!
Tracy
Creative Time: 40 mins
Skill Level: Intermediate
Materials Needed:
Scrapbook Adhesives by 3L®
E-Z Runner® Micro Refillable Dispenser
Creative Photo Corners White
Dual Tip Glue Pen
3D Foam Strips White
E-Z Runner® Ultra Strong Refillable Dispenser
Other: Patterned Papers: Simple Stories (Spring Collection) Craft Dies: Heartfelt Creations; White Cardstock; Acetate, Sequins Mix
Save to Pinterest!
Visit our Website and Blog!
Sign up for our Newsletter so you never miss a contest or giveaway!


