
Hi, everyone! Sewing on handmade cards is really popular these days! But have you tried making a card with embroidery floss and thread without ever doing a single stitch? Teri here to show you how to do just that. Let’s started on these Faux String Art Celebrate Cards!
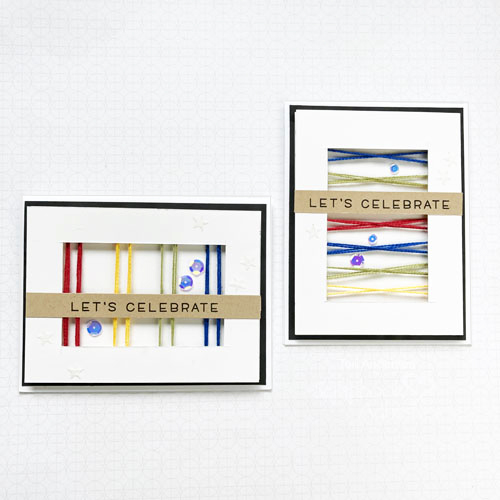
My faux string art technique is so fun and so easy! All you need is floss, 3D Foam Circles and a few basic paper crafting supplies to create some really amazing cards.
Faux String Art Mechanics
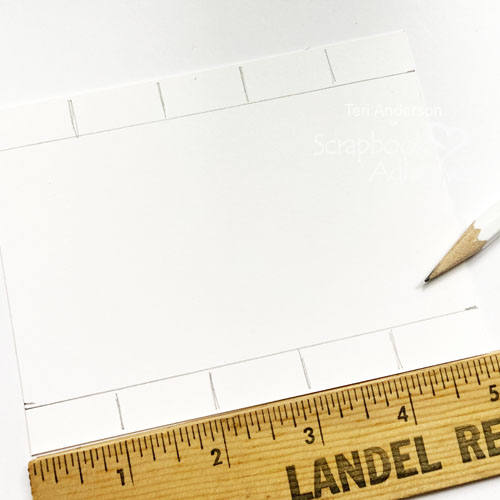
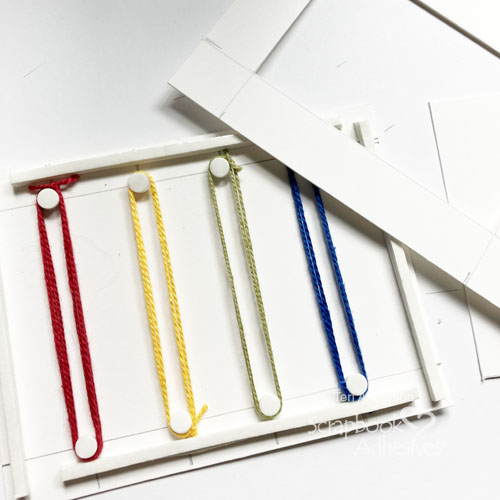
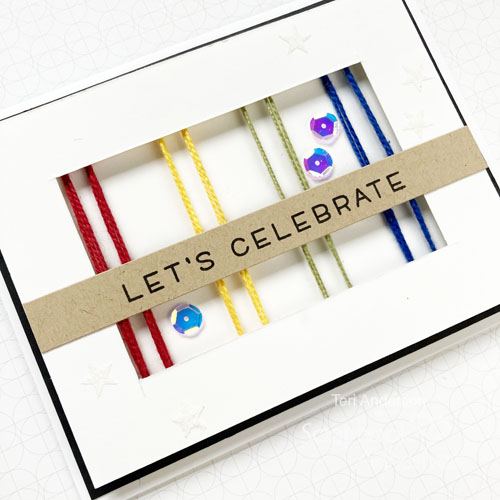
Start by cutting two rectangles of cardstock. Mine are 5″ x 3 3/4″ each. Set one aside and set the other on your work surface. Use a pencil and ruler to mark rows along the side of the panel. You want to mark about 1/2″ in from the sides of panel and put marks at every inch mark.
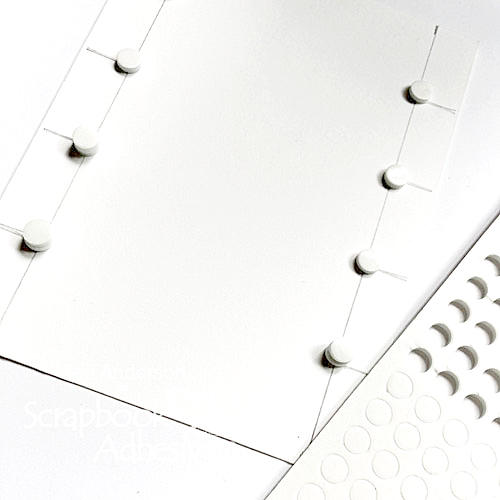
Take two 3D Foam Circles, stack them up and adhere them at every inch mark.
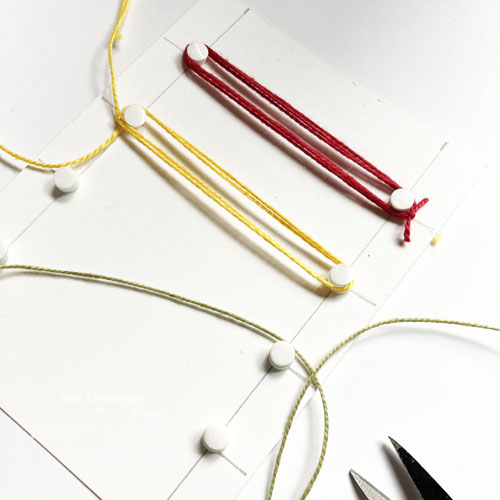
Take pieces of floss or twine and wrap them around the circles. I used a rainbow color scheme but you can use any color combination you like.
Once you’ve wrapped as much floss as you’d like around the circles, add foam strips around the panel’s borders. Be sure to use two layers worth of strips so they are as tall as your circles.
Take your second paper panel and cut a rectangle out of it so you have a frame. Adhere it on top of the foam strips.
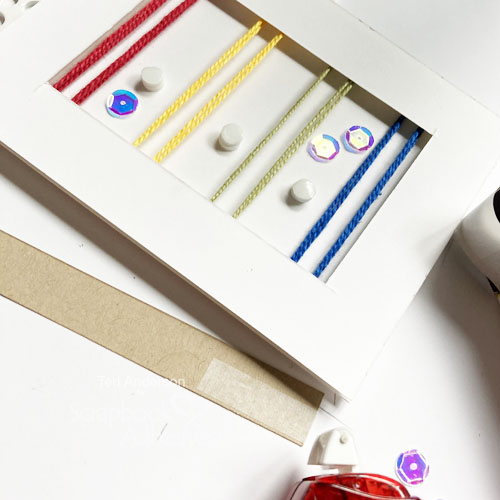
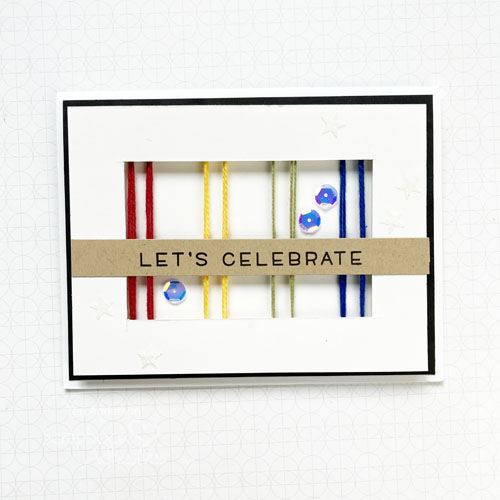
Embellish your string art by adding a few sequins or gems to it. Also, stamp a sentiment onto a strip of cardstock and add it to the panel.
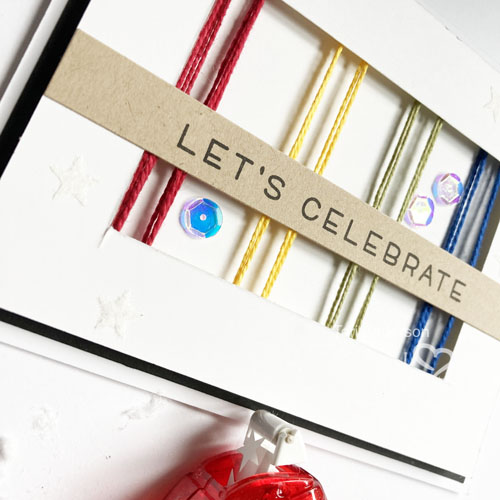
Mat the panel on cardstock and then add it to a card. I felt my card was a little plain so I went one step further by applying a few adhesive stars and dumping white flock onto them. I love faux-embossed look it gives the panel.
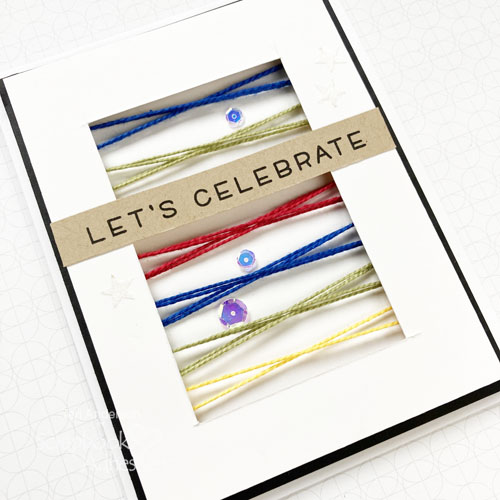
Switch Up the Design by Adding More Rows
A fun twist on this technique is to add more rows of floss to your design.
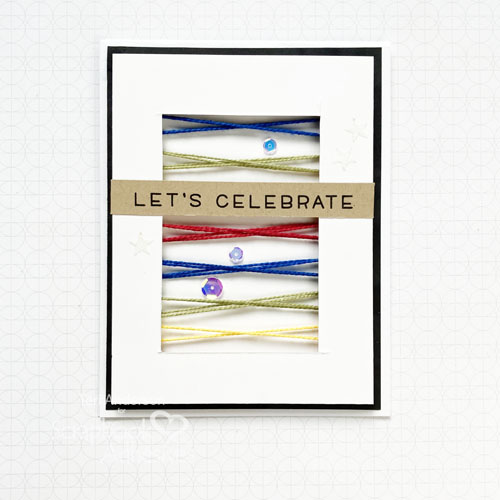
For this card, I also wrapped the floss around the foam circles so it crossed itself. I think the look is really interesting.
I hope you are inspired by this faux string art technique to give it a try! Please leave a comment for me to stop by your blog and check your projects! See you again soon!
Happy creating,
Teri Anderson
Creative Time: 60 Minutes
Skill Level: Intermediate
Materials Needed
Scrapbook Adhesives by 3L®
- Adhesive Dots Micro
- 3D Foam in White Circles Mix, Strips
- E-Z Runner® Permanent Strips Refillable Dispenser
- E-Z Runner® Stars Refillable Dispenser
Other
White, Kraft and Black Cardstocks: Neenah Paper; Stamp: Lawn Fawn (Simply Celebrate Stamp Set); Black Ink Pad: Ranger Ink; Sequins: Pretty Pink Posh; White Flock: Stampendous; Floss: DMC
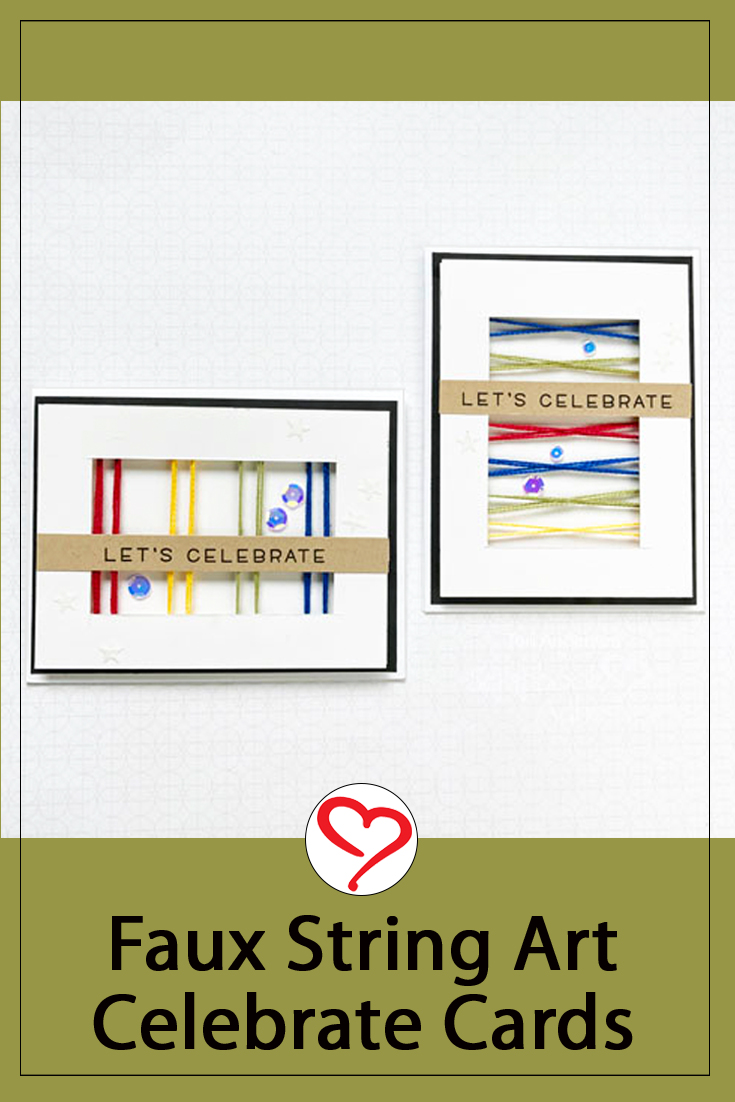
Save to Pinterest!
Visit our Website and Blog!
Sign up for our Newsletter so you never miss a contest or giveaway!


By Judith May 21, 2021 - 12:48 am
Thank you for the great idea and great tutorial. I especially like the card with the floss that crossed itself.