
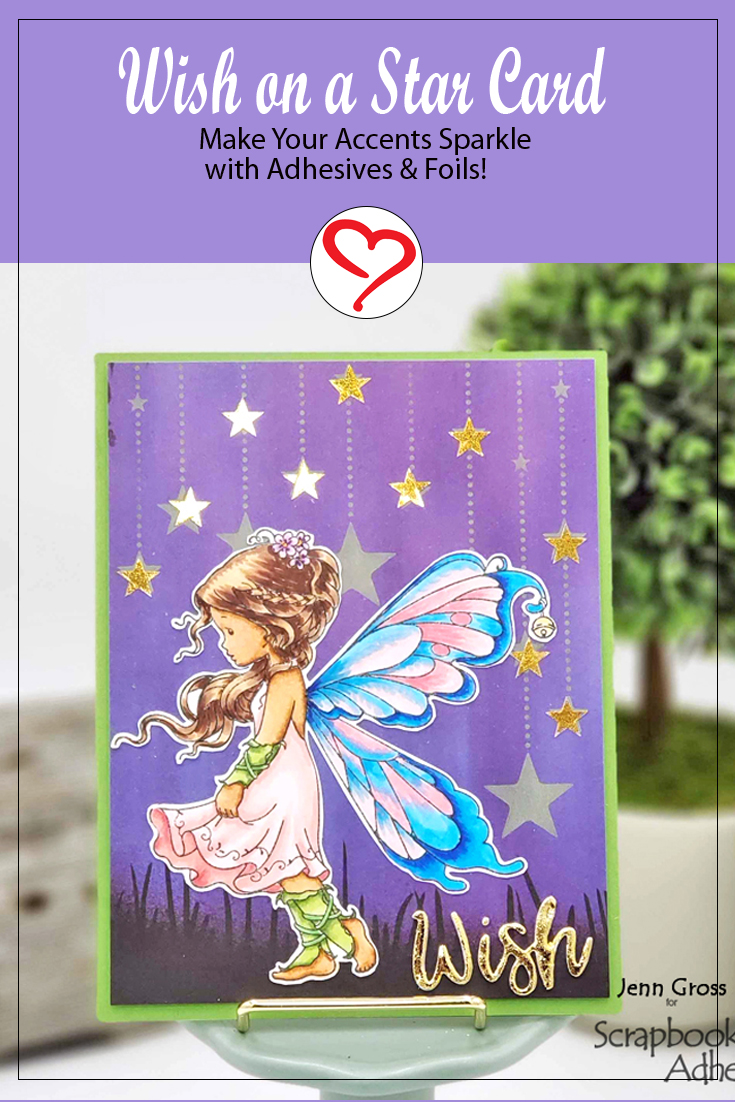
Wish on A Star! Hello, my crafty friends. Jenn Gross here as a guest designer with Scrapbook Adhesives by 3L. They offer some amazing products and I am using their E-Z Runner® Stars and the Metallic Transfer Foil Sheets for today’s project. These products will be used to make bling on this sweet card, Wish on a Star. You may recognize this card from the Whimsy Stamps Instagram Hop they did recently.
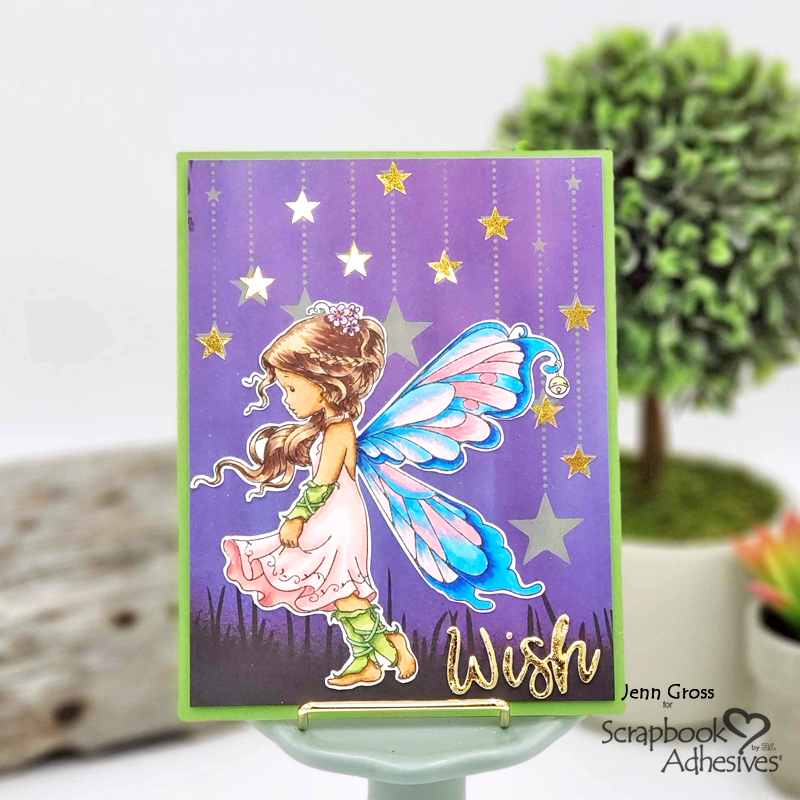
Wish on a Star Card Front
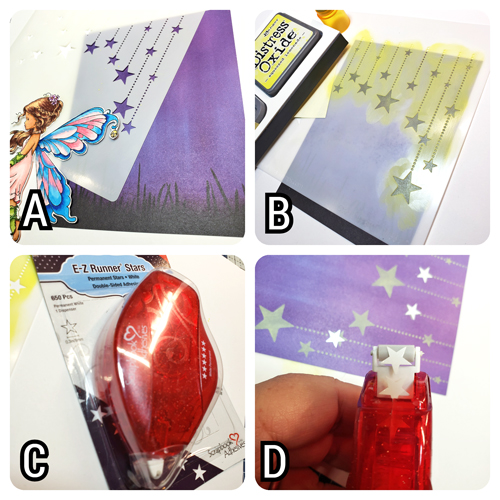
In step A, I stamped the Silver Fairy stamp on a piece of coloring cardstock. Then I colored using a combination of TriBlend and Copic alcohol markers.
Image B shows a piece of 4 x 5.25-inch dark night sky patterned paper with the Star Dangle stencil over the top. Then use Squeezed Lemonade Distress Oxide ink to stencil. Set it aside to dry.
In steps C and D, I positioned a star shape from the E-Z Runner Stars at the end of the runner and ran it over one of the stenciled stars. Ten stars were used on the stenciled card front.
Wear Your Adhesive on the Outside
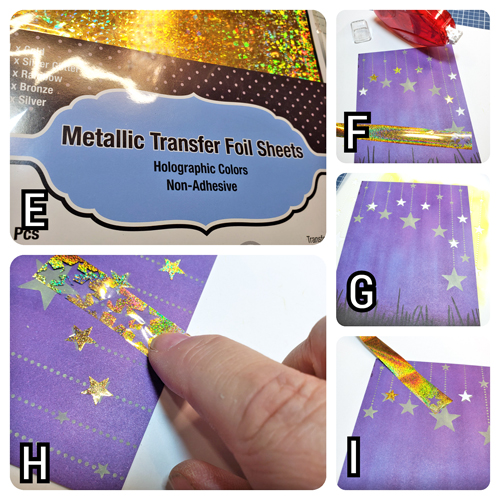
In steps E, F, G, H, and I, I share my foiling steps. From the Metallic Transfer Foils Sheet in Holographics, I chose the Fine Gold Glitter sheet. To make it easier to foil, I cut a strip. With the color side UP, place over one of the E-Z Runner Stars on the card front. Use your fingertip to rub and transfer the color to the star. Simply peel off to reveal a newly foiled star. Easy – no tools! Repeat this step with the remaining stars.
Layering Your Card Base
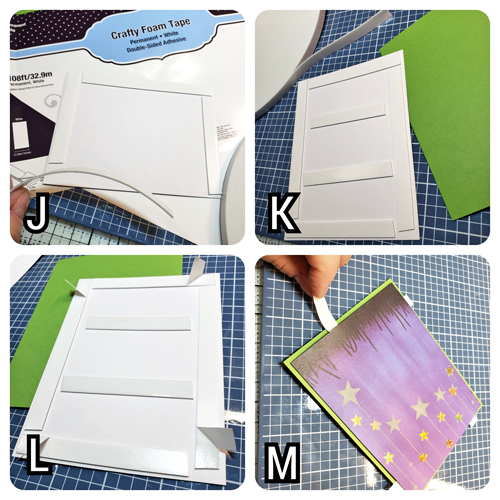
Images J, K, and L, I used Craft Foam Tape 108ft in White on the back of the card panel. Designer’s Tip: apply two strips in the middle and remove the release papers. Then apply foam tape to the four sides and turn back the corners of the release papers as shown in L. This makes it easier to center the card front onto the green A2 card base as you see in image M. Just press the card panel in the middle and peel back the release paper to secure the card front.
The Wish Sentiment
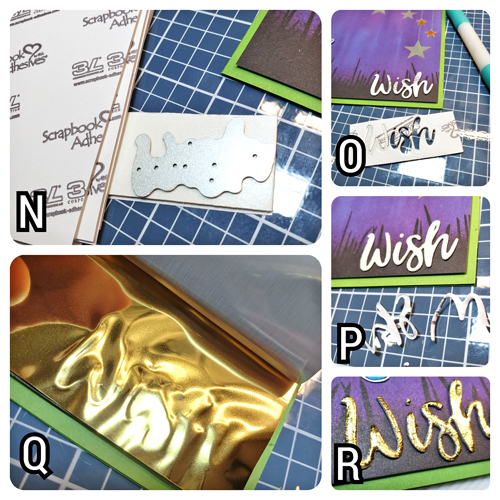
In steps N through P, I die-cut WISH using 3D Foam Creative Sheet from the 3D Foam Creative Embellishment Kit. It cuts like butter and with no residue on the metal die. Next, I gently removed the foam word and its release paper backing. Then placed it on the front lower right of the card pressing it in place.
Images Q and R, remove the top release paper, place a piece of gold foil from the Creative Embellishment Kit over it. Don’t forget – color side up! Repeat the same foiling step as the stars. Gently lift the foil revealing the gilded word “Wish.”
Finishing the Wish on a Star Card
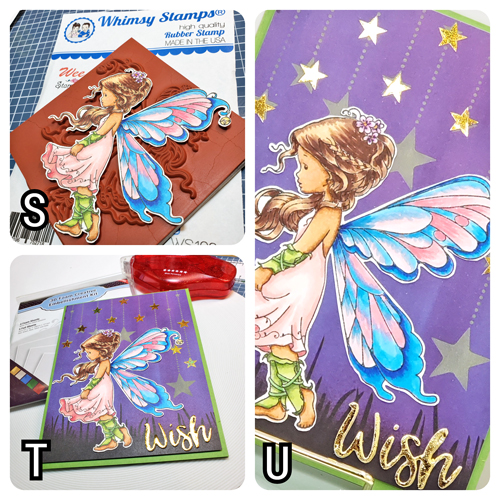
As you see in images S, T, and U, attach the stamped Silver Fairy to the card front using E-Z Runner Permanent Strips. It’s ready to be sent out!
Thank you for stopping by! I love hearing from you. Let me know what techniques you enjoyed most from today’s Wish on a Star Card?
Be Creative ~ Stay Inspired!
Jenn Gross
Creative Time: 35 minutes
Skill Level: Intermediate
Materials Needed:
Scrapbook Adhesives by 3L®
Crafty Foam Tape White 108ft
Metallic Transfer Foil Sheets in Holographics
3D Foam Creative Embellishment Kit
E-Z Runner® Permanent Strips
E-Z Runner® Stars
Other
Stamps: Whimsy Stamps; Alcohol Ink Markers: Copic; Cardstock; Patterned Paper
Save to Pinterest!
Visit our Website and Blog!
Sign up for our Newsletter so you never miss a contest or giveaway!


