
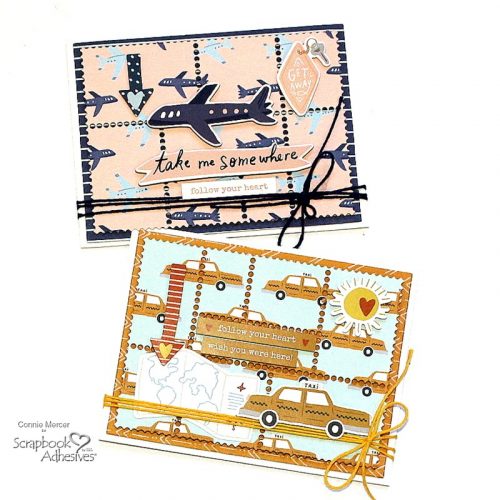
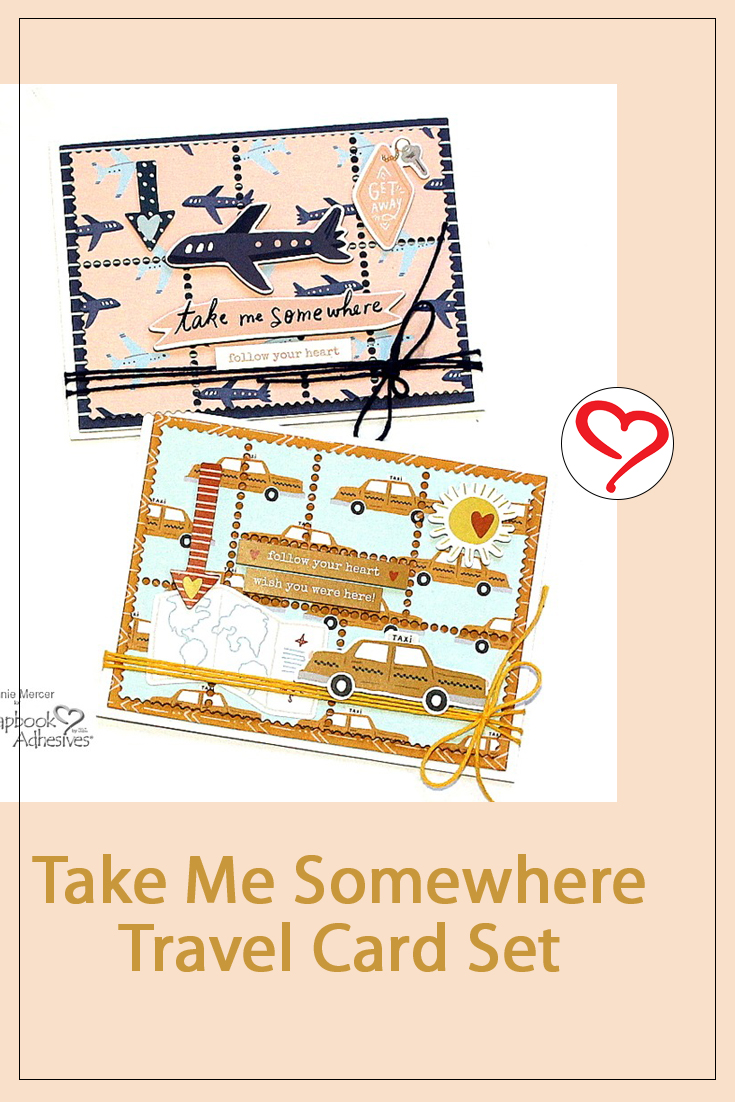
Hi, Connie here with a fun travel card set featuring the 3D Foam Strips Large White. It’s perfect for this project! It pairs well with the snail mail die. Doesn’t it look like a sheet of postage stamps? The 3D Foam Strips fit perfectly on the perforated sections of the card front.
Prep for the Travel Card Set
Just a little bit of prep work to make the process run smoothly. First, trim the patterned papers to fit the die and run them through the die-cutting machine. Coordinate a patterned paper mat and fold white cardstock into card bases. Pick out accent and sentiment stickers.
Assembling the cards
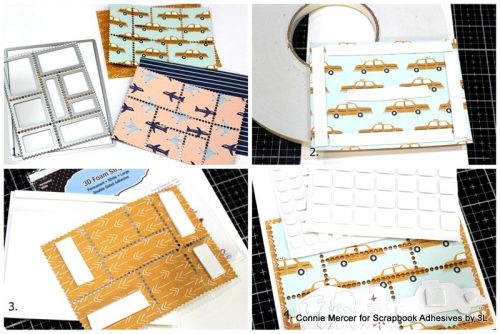
- 1. Cut the mat and use the cutting die to create the snail mail card cover.
2. Add Crafty Foam Tape 108′ to the back of the mat and adhere to the white cardstock base.
3. Apply the 3D Foam Strip White Large behind each perforated section as shown in the photo.
4. Place the stickers on the card front with 3D Foam Squares White Mix. Add the sentiment stickers using the 3D Foam Strips. Designer Tip: use the E-Z Runner® Grand Refillable Dispenser to keep the twine from moving once it was tied to the card.
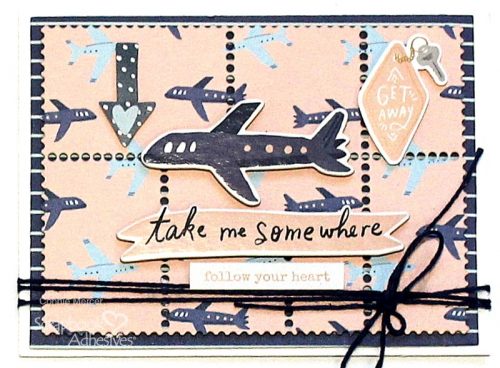
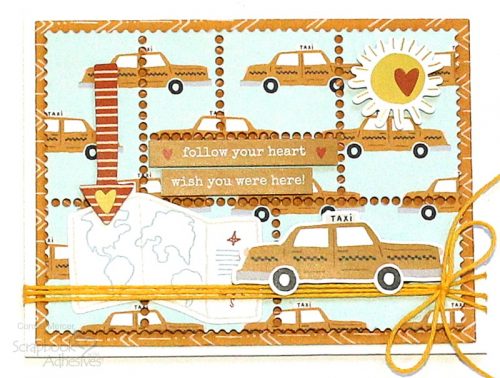
I loved how this travel card set turned out! With the 3D Foam Strips White Large behind each perforated section, it gives the card front a pop of dimension. So fun! Hope you give these strips a try.
Thanks for stopping by!!!
Connie Mercer
Creative Time: 40 Minutes
Skill Level: Beginner
Materials Needed:
Scrapbook Adhesives by 3L®
3D Foam Squares White Mix, 3D Foam Strips White Large, and 3D Foam Strips
E-Z Grand Runner Refillable Dispenser
Crafty Foam Tape 108′
Other: Patterned Papers: Simple Stories (Travel Collection); Craft Die: Sizzix (Snail Mail by Eileen Hull); Twine
Save to Pinterest!
Visit our Website and Blog!
Sign up for our Newsletter so you never miss a contest or giveaway!


