
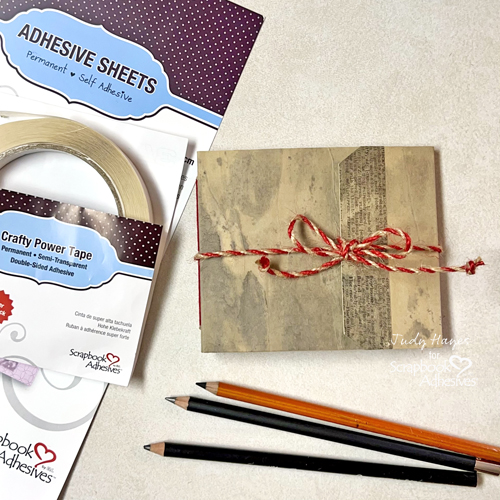
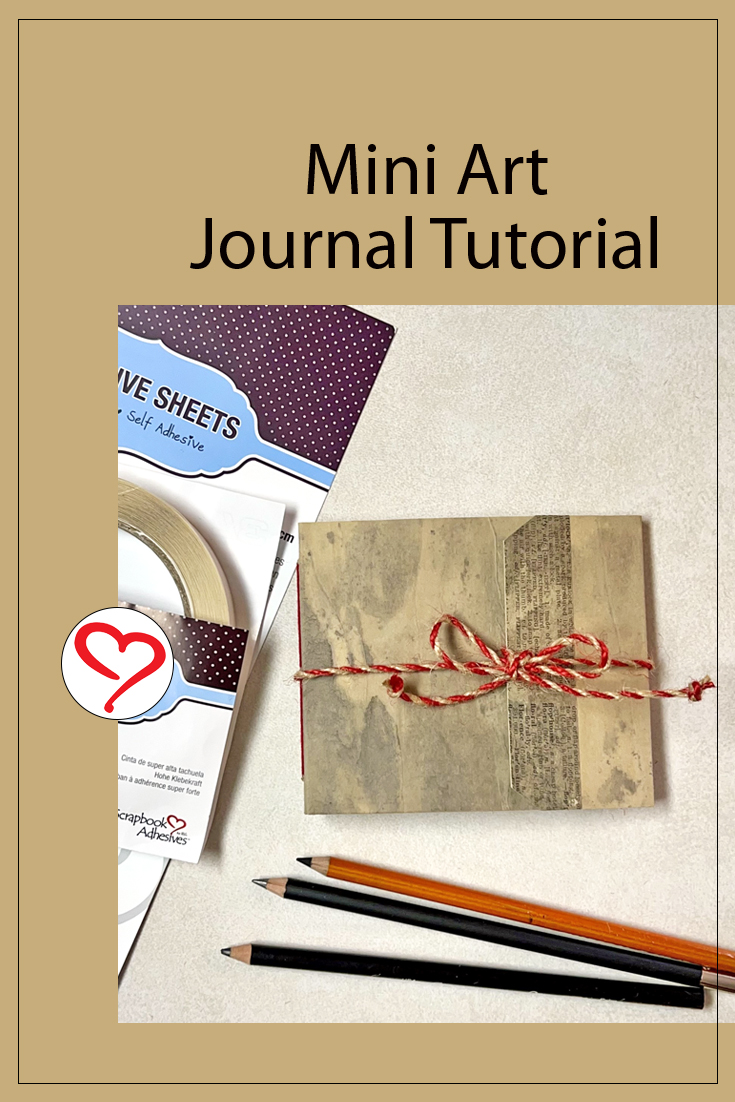
Hi, Judy here today! I love making journals, especially art journals. My project today, Mini Art Journal, was inspired by a journal made by Karen Elaine, on Instagram @KarenElaineCreative. My Mini Art Journal has a cover with paper dyed with coffee and pages of drawing paper. I plan to make these for small gifts with some using printer paper pages for a writing journal.
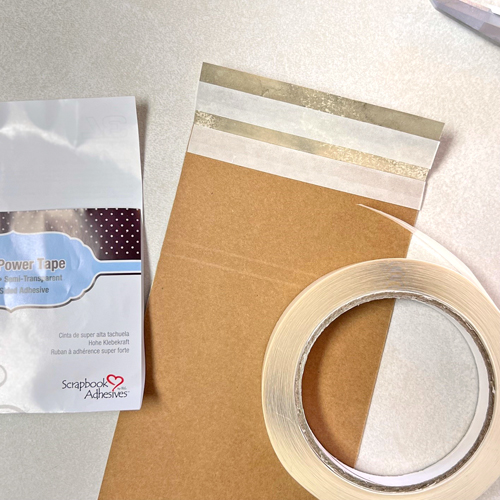
Mini Art Journal Papers
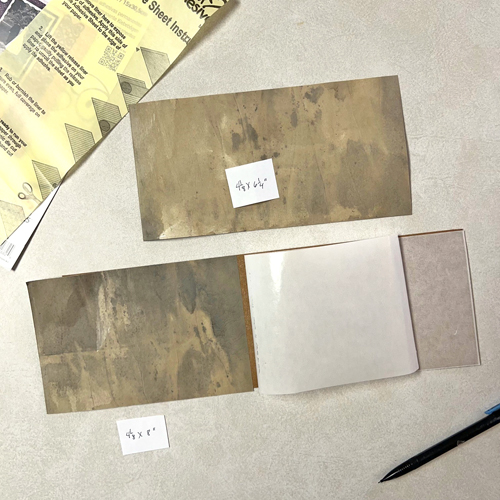
Cut the Kraft cardstock 4 x 12 inches. Make score lines at 4.75, 5, 9.75, and 10 inches, do not fold. From coffee-dyed paper, cut two pieces: 4.125 x 8.5 inches and 4.125 x 5.5 inches. Designer Tip: Cut these pieces a little wider than needed and then trim them. Next, cut six pieces of drawing paper to 3.875 x 9 inches
Apply Adhesive Sheets
Cut an Adhesive Sheet 6 x 12in. to 4 x 12 inches. Peel away the narrow strip of liner. Kiss that end of the Adhesive Sheet to the end of Kraft cardstock (make sure to align the edges), and press well. Carefully lift the Adhesive Sheet, gradually peel the remaining liner, and press in place to cover the entire back of the Kraft cardstock. Use a bone folder to rub the Adhesive Sheet well to transfer the adhesive to the cardstock.
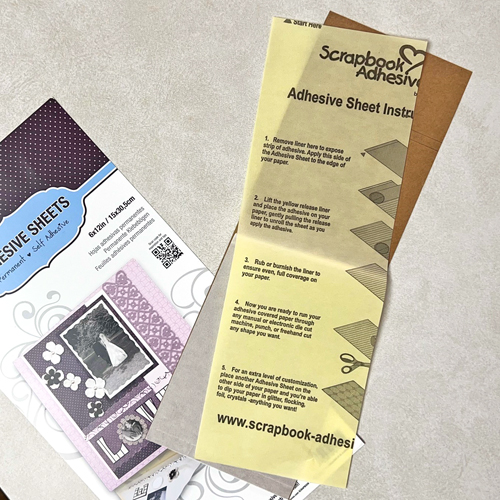
View the How to Use Adhesive Sheet Video
Adding the Coffee-Dyed Paper
On the back side of the smallest coffee-dyed paper, draw a pencil line 1 inch from one end and leave it face down on the work surface. From the end of the Kraft cardstock with score lines farthest from the end, peel back the liner partially, align the end with a pencil line on coffee-dyed paper, and press to secure. Turn over the Kraft cardstock with coffee paper, remove the liner, and press the coffee paper in place. Trim away excess coffee-dyed paper along the long edges. Do not trim away at ends.
Apply Crafty Power Tape Polybag 81ft. along one end of the remaining coffee-dyed paper (the longer piece), press well, and remove the liner. Align that end about 0.25 inch over the previously applied coffee paper, press in place, and continue to press it over the remainder of the Kraft cardstock. At this point, the coffee-dyed paper will extend about 1 inch beyond the Kraft cardstock on both ends.
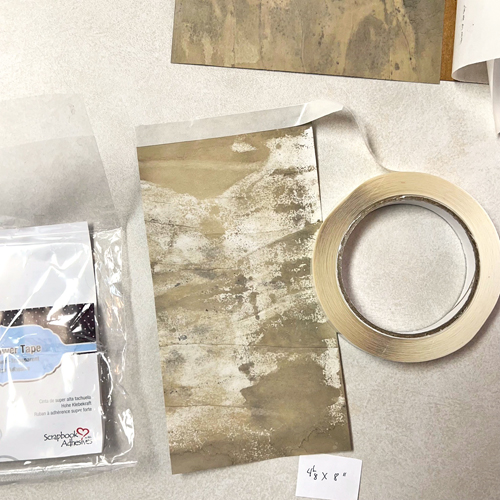
Apply Crafty Power Tape Polybag 81ft. along the back side of one extended end of the coffee-dyed paper. Next, apply a strip of Crafty Power Tape Polybag 81ft. at the end of the Kraft cardstock and another next to it. Peel all liners and fold the coffee-dyed paper over the end of Kraft cardstock. Repeat at the other end.
Fold the journal cover on all score lines so that the coffee-dyed paper is outside.
Use an Old Book Page
At the flap end of the Mini Art Journal cover that has score lines closest to the end, place three rows of Crafty Power Tape parallel with the end. Crafty Power Tape Polybag 81ft. is placed on one edge of the liner to make tape placement accurate, and make the liner easier to remove. Peel the liner off and apply the next strip to align each row with the other. Peel the last remaining liner for the next step.
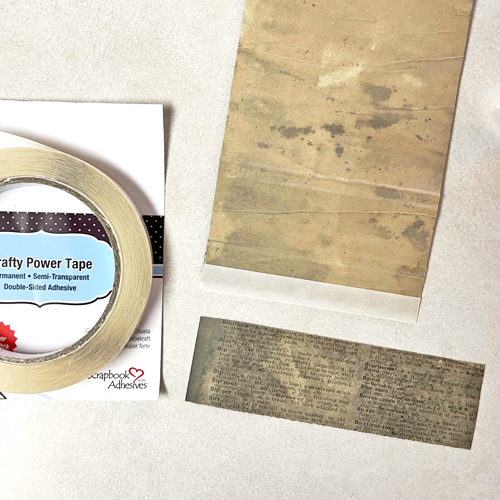
Cut a piece of old book page about 1.5 x 5 inches. Align the long edge of the old book page over the Crafty Power Tape and press in place. The old book page will extend on the sides and the front edge so use scissors to trim the excess.
Binding the Mini Art Journal Pages
Cut off the corners of the flap at an angle. Designer’s Tip: use a tag as a guide. Mark a position for the hole centered across the flap and punch with a hole punch. Align all pieces of drawing paper, hold ends together, and fold in half. Use a bone folder to crease the fold well. Pages are sewn to the journal cover with pamphlet stitch (find detailed instructions online). Punch three holes with a needle tool on the inside crease, at the center about 0.5 inches from each edge. Place folded pages centered on the inside spine and mark the position of holes with a pencil. Punch holes in the center of the spine with a needle tool.
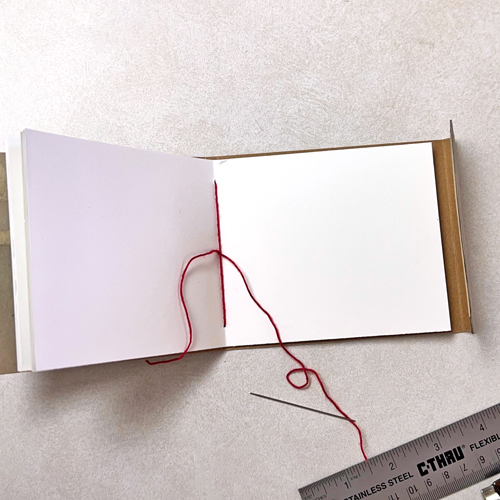
Thread a sewing needle with a light string or heavy thread. Designer’s Tip: I used a red string recycled from a sack of cat food. Hold pages in the journal cover with holes aligned, insert the needle with thread through the center hole to the outside leaving about 2 inch tail, and return through the top hole. Then insert needle in the bottom hole on the inside and come back through the center hole on the opposite side of the thread tail. Pull the thread snug and tie in a square knot. Trim the string ends to 0.5 inches.
Create the Closure
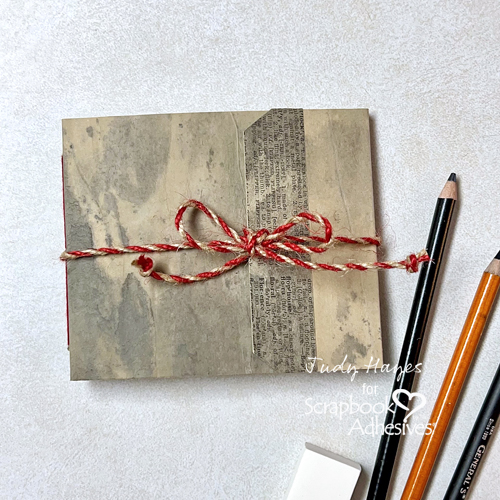
Measure about 24 inches of twine. Fold so that one end is about 8 inches. Push the folded loop through the hole in the journal flap, thread the ends through the loop, and pull the twine tightly.
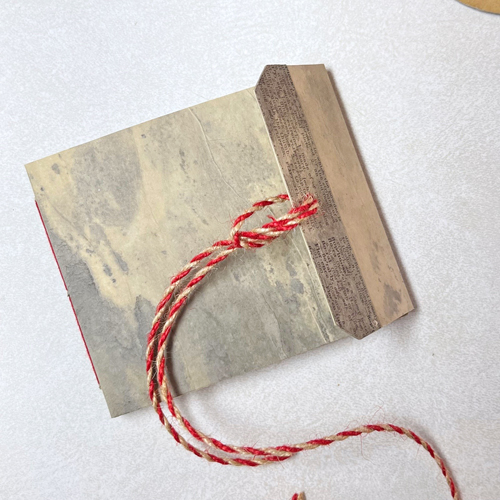
To close the Mini Art Journal, wrap long twine around the journal and tie a bow with short end of the twine. Trim off ends as desired. Option: knot each end of the twine.
Thanks for stopping by!
Judy Hayes
Creative Time: 35 mins
Skill Level: Intermediate
Materials Needed:
Scrapbook Adhesives by 3L®
Crafty Power Tape Polybag 81ft.
Other: Kraft Cardstock; Drawing Paper or Sulphite Paper; Coffee Dyed Printer Paper; Old Book Page; Red String; Red/Tan Twine
Click Preferred Retailers List
Save to Pinterest!
Visit our Website and Blog!
Sign up for our Newsletter so you never miss a contest or giveaway!


