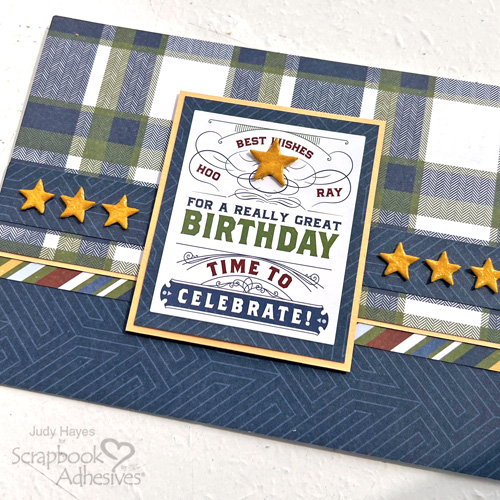
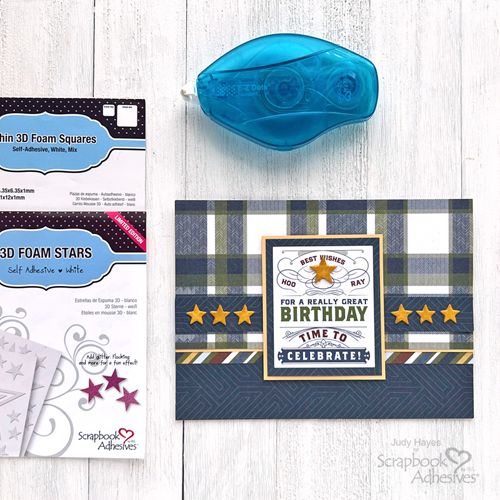
Hi, Judy here today! Here’s a Time to Celebrate Birthday Card using PhotoPlay Paper’s Birthday Bash Collection featuring the 3D Foam Stars. So fun to add color to the 3D Foam Stars with embossing glaze!
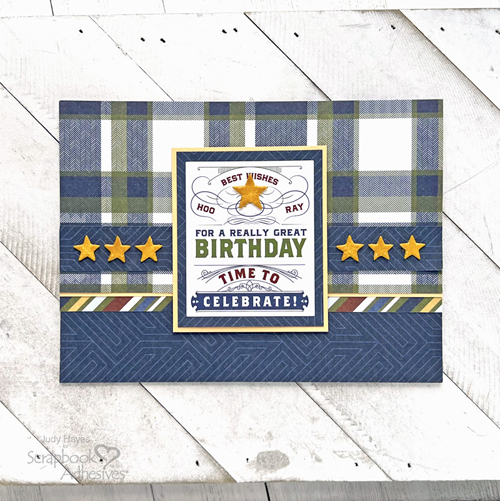
Time to Celebrate Birthday Card Layers
Let’s cut the paper pieces for the card. For the card base, fold a piece of 9.5 x 6.5-inch white cardstock in half to make a 4.75 x 6.5-inch top fold card.
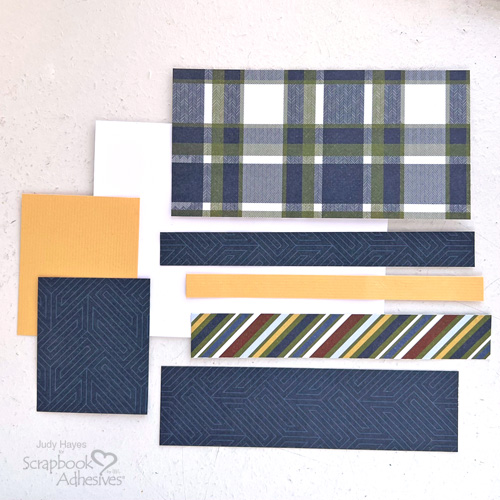
Cut the following patterned papers: Navy Looking Good paper – 2.5 x 3 inches, and 1.75 x 6.5 inches; 1 x 6.5 inches; Plaid You’re a Classic paper – 3.25 x 6.5 inches; and Stripe Get Your Party On paper – 1 x 6.5 inches. Lastly, cut the yellow cardstock to 2.625 x 3.125 inches and 0.5 x 6.5 inches.
Assemble the Card
On the white cardstock card base, apply the E-Z Dots® Permanent Refillable Dispenser to the back of the navy 1.75 x 6.5-inch piece and secure it across the bottom.
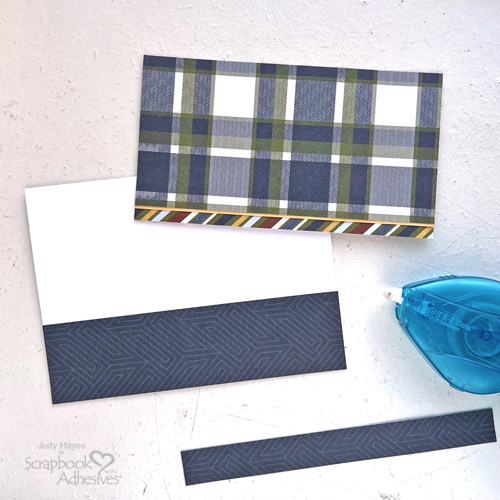
Use E-Z Dots® Permanent Refillable Dispenser to apply adhesive to the bottom back edge of the plaid piece and attach it to the yellow cardstock strip leaving a narrow edge to show. Continue with the E-Z Dots® Permanent Refillable Dispenser to use it to adhere the stripe piece with a 0.25-inch reveal. Then add the piece to the card front overlapping the navy piece.
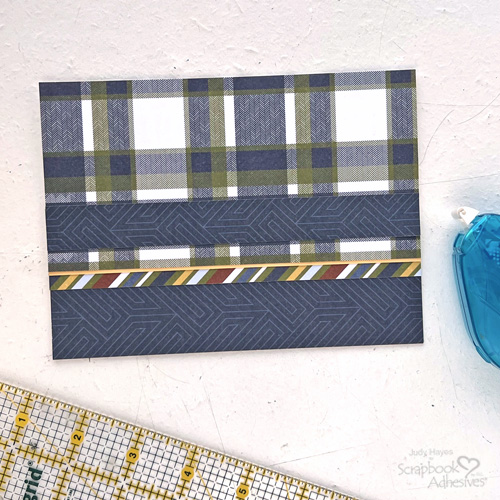
Attach the 1 x 6.5-inch navy piece with the E-Z Dots® Permanent Refillable Dispenser about 0.375 inches above the bottom edge of the plaid paper.
Mat the Sticker Sentiment
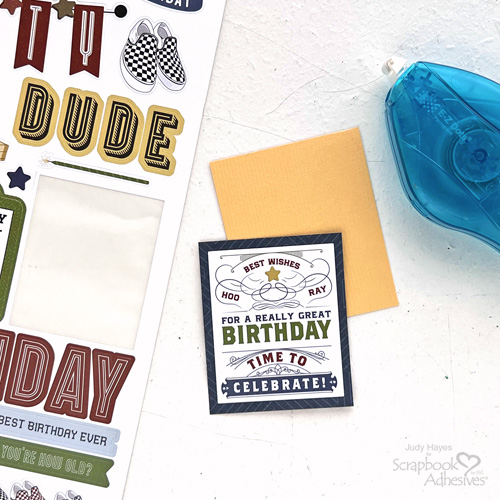
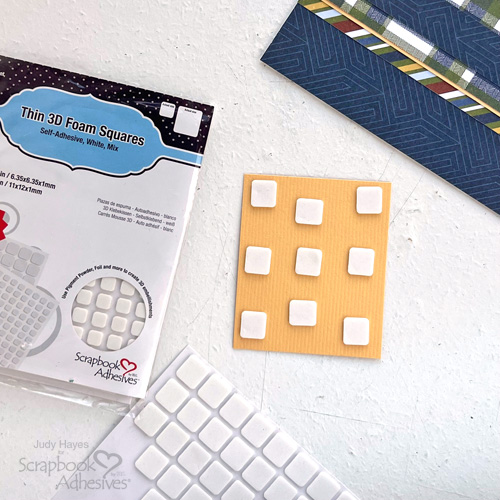
Peel sticker from Photo Play Birthday Bash Element Stickers sheet and attach to navy paper. Use E-Z Dots® Permanent Refillable Dispenser to apply adhesive to back and fasten on yellow cardstock. Place Thin 3D Foam Squares White Mix on the back of the matted sentiment, peel liners, and place on the card front.
Wear Your Adhesive on the Outside with 3D Foam Stars
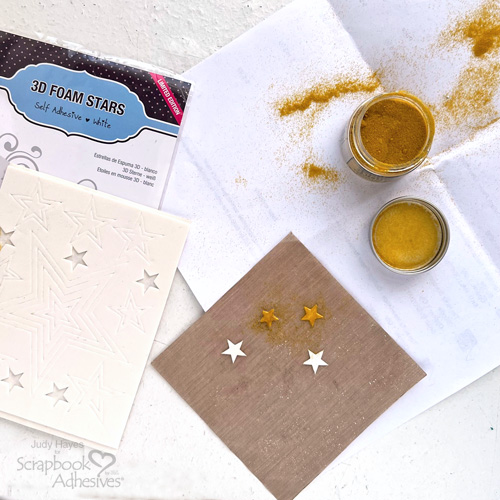
Let’s make embellishments! Remove the small star from 3D Foam Stars and place on non stick craft sheet. Remove the liner, cover with Distress Glaze (press down the powder to secure it into the adhesive), and tap off the excess.
Melt the powder with a heating tool. Although heat resistant, if too much heat is used the small star will curl and at times, shrink. While the star is still warm, cover it with another coat of glaze, remove excess and heat. Repeat this step with six small stars and one medium star. Allow to cool before moving each star.
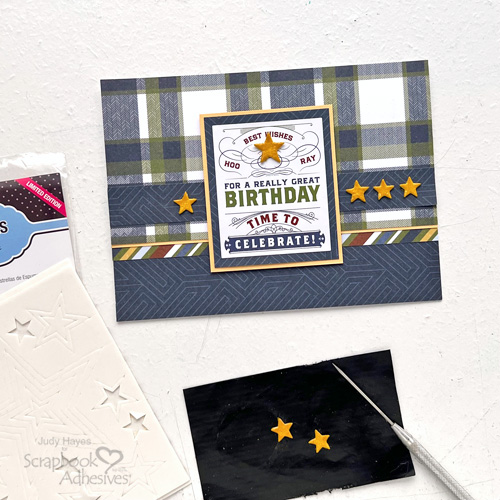
For the medium glazed star, use a needle tool or tweezer to pick it up and place it over the star on the matted sticker sentiment. Continue to place small stars on the navy border with three on each side. Done!
Thanks for stopping by!
Judy Hayes
Creative Time: 25 mins
Skill Level: Intermediate
Materials Needed:
Scrapbook Adhesives by 3L®
Thin 3D Foam Squares White Mix
E-Z Dots® Permanent Refillable Dispenser
Other: Papers and Element Stickers: Photo Play (Birthday Bash: Looking Good, You’re a Classic, and Get your Party On); Embossing Glaze: Ranger Ink (Distress Glaze Fossilized Amber); White and Yellow Cardstock
Click Preferred Retailers List
Save to Pinterest!
Visit our Website and Blog!
Sign up for our Newsletter so you never miss a contest or giveaway!


