
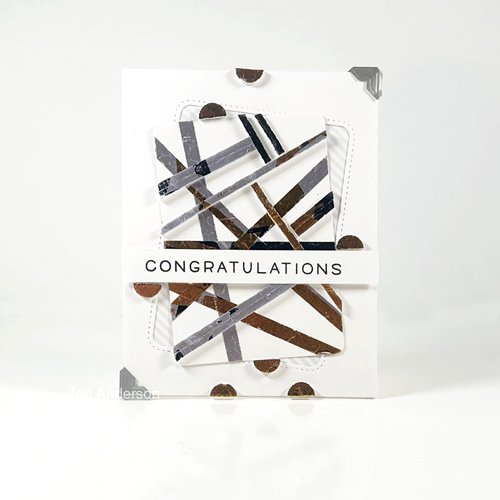
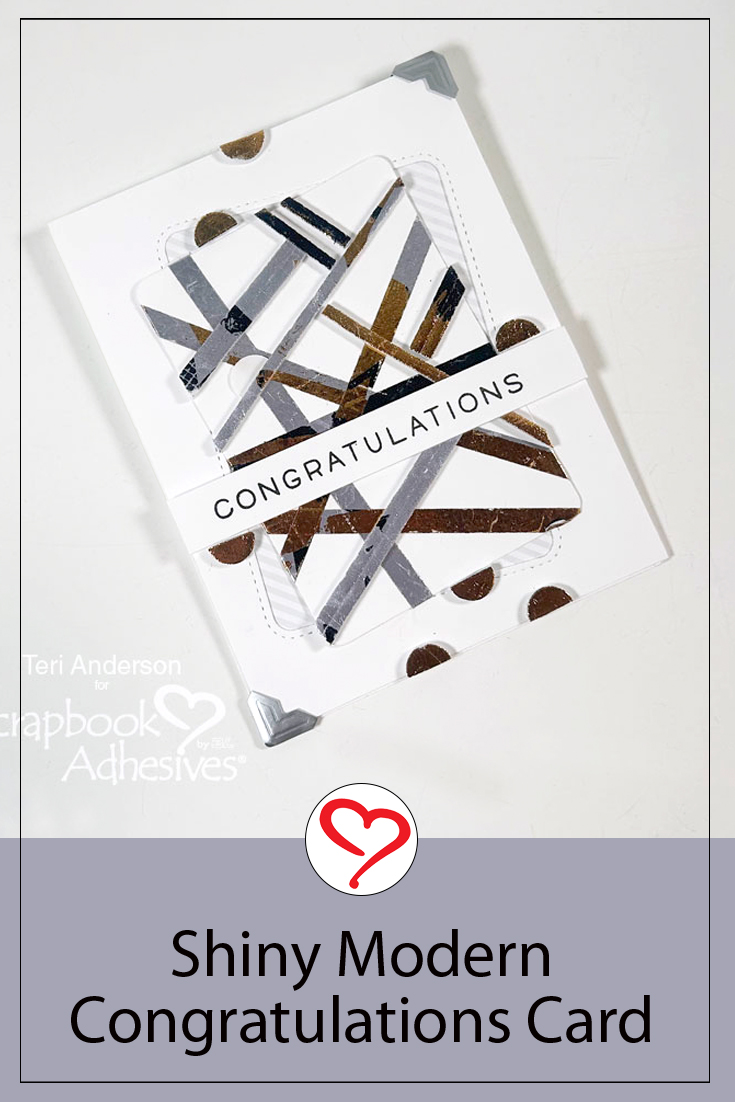
Hi, everyone! Looking to congratulate someone on a job well done? Teri here to show you how to put together a Shiny Modern Congratulations Card to celebrate a co-worker, graduate, or even a couple on their anniversary! It’s easy to make a card like this with Metallic Transfer Foil Sheets and 3D Foam Adhesive!
Create the Modern Congratulations Panel
On a white cardstock panel, crisscross two strips of Premium Double-Sided Adhesive 1/4in. to it. Apply foil to them by taking a piece of foil (color side facing you), rubbing to transfer the color, and peel off to reveal the color. Leave some of the adhesive exposed and add another foil color to it. Designer’s Tip: This is a great way to use any used foils…no waste!
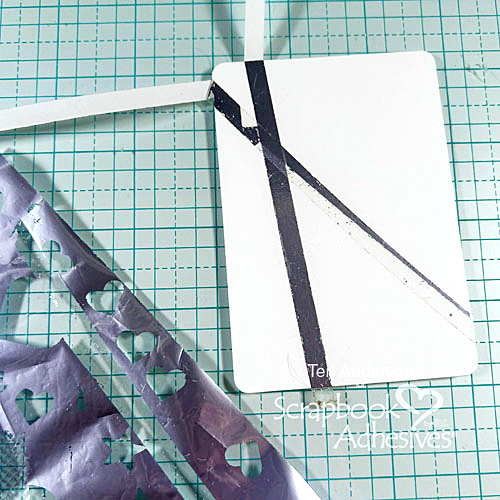
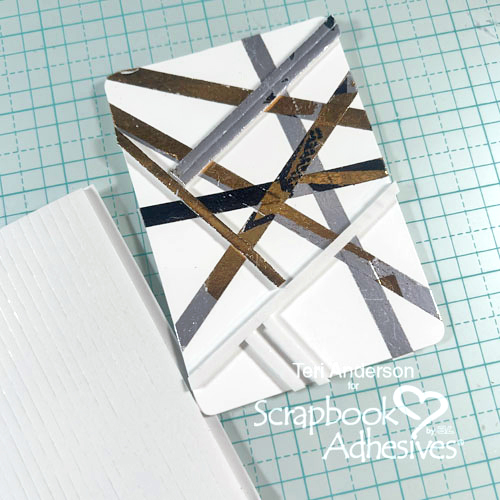
Add another strip of adhesive and repeat the foiling steps until you’ve covered the panel with lots of shiny foil! To kick things up a notch and add interest, use some 3D Foam Strips and cover them with foil, too!
Assemble the Card
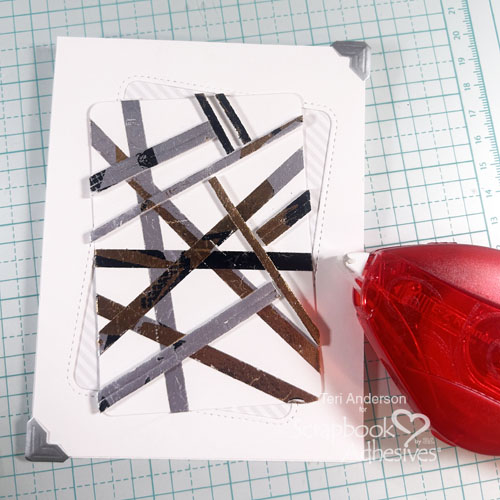
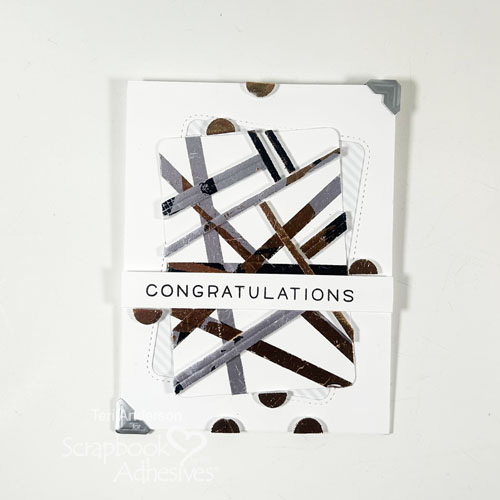
Cover a card base with patterned paper. Cut a rectangle out of a cardstock panel using a die or a paper trimmer. Set the rectangle aside for another project. Mount the frame onto your card with the E-Z Runner® Permanent Strips Refillable Dispenser.

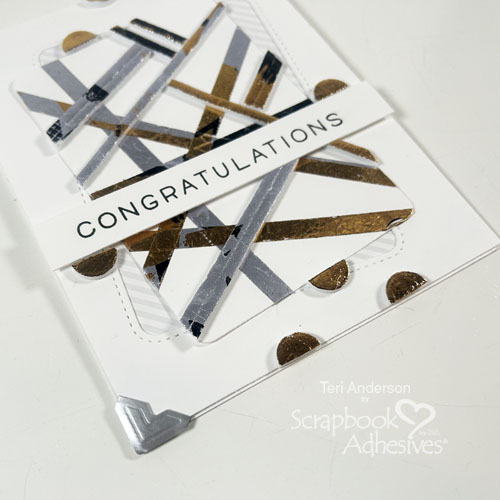
Add the foiled rectangle to the card. Before you adhere it down, add a couple of Creative Photo Corners Mix (I used the silver ones) to the frame.
Stamp a sentiment on a strip of cardstock. Mount it to your card with 3D Foam Strips.
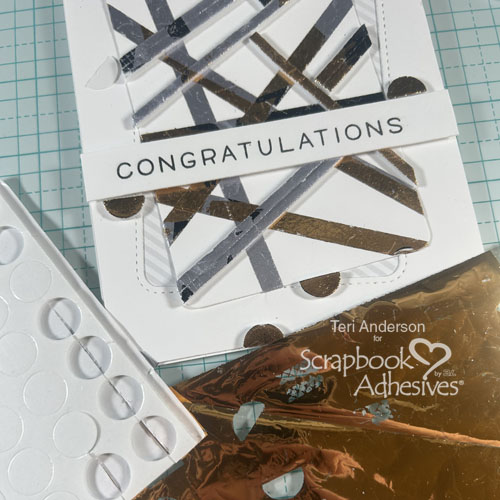
Cut some large 3D Foam Circles in half. Randomly add them to your card and foil them.
I hope you are inspired by today’s project to use Metallic Transfer Foil to make Shiny Modern Congratulations Cards of your own! Thanks so much for stopping by. See you next time.
Happy Creating!
Creative Time: 50 mins
Skill Level: Beginner
Materials Needed:
Scrapbook Adhesives by 3L®
E-Z Runner® Permanent Strips Refillable Dispenser
3D Foam Circles White Mix and 3D Foam Strips
Creative Photo Corners Mix Pack
Metallic Transfer Foil Sheets Nature Colors
HomeHobby™ by 3L
Premium Double-Sided Tape 1/4in.
Other: Patterned Paper and Craft Die: Sunny Studio (Subtle Grey Tones Paper Pack and Rounded Rectangle Die Set); Stamp Set: Lawn Fawn (Simply Sentiments); White Cardstock: Neenah; Black Ink Pad: Ranger Ink
Save to Pinterest!
Visit our Website and Blog!
Sign up for our Newsletter so you never miss a contest or giveaway!


