
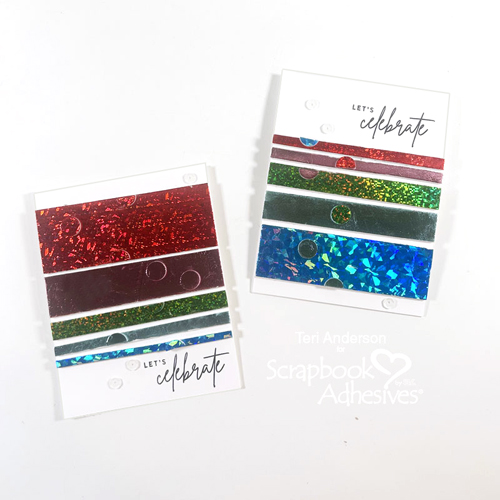
Hi, friends! Are you short on time to work on a birthday card or two? Teri here to show you how to make a couple of cards, Let’s Celebrate Cards, in minutes with Metallic Transfer Foil Sheets and 3D Foam Creative Sheets!
While this post focuses on making birthday cards, this design could easily be used to make cards for all kinds of occasions throughout the year! Just use a different sentiment. Let’s get started!
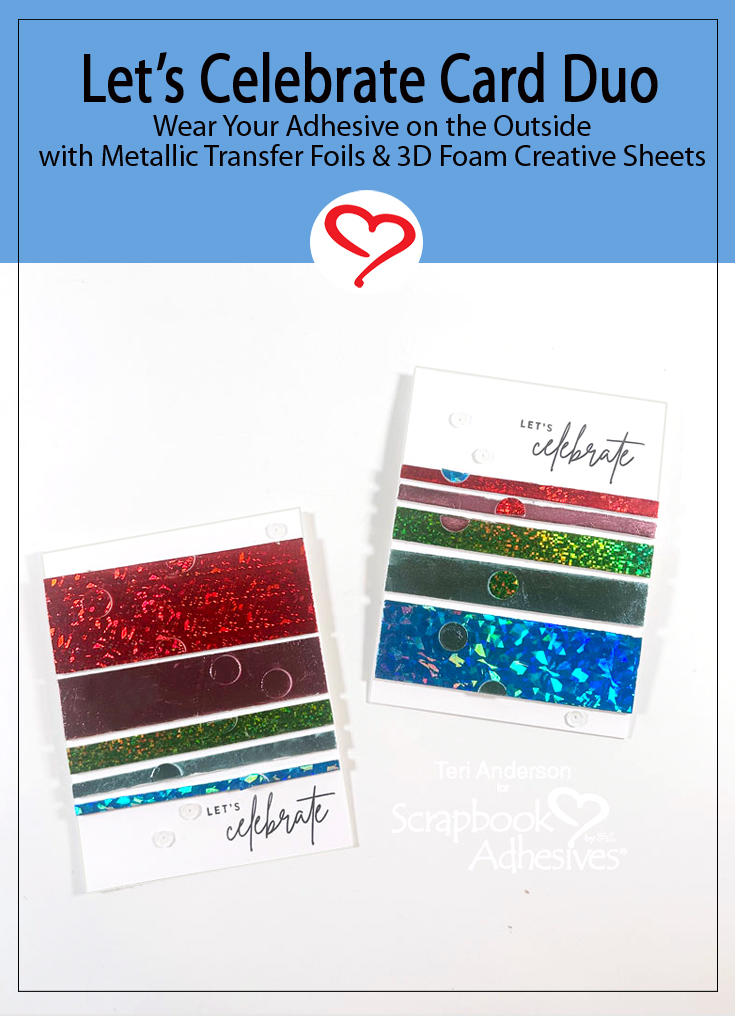
Let’s Celebrate Card Design
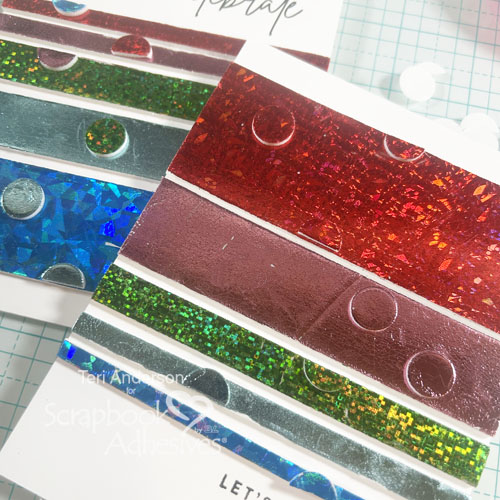
Start by taking a 3D Foam Sheet and cutting it into strips of different heights to adhere across a white cardstock panel. Designer’s Tip: Use a guillotine cutter to cut my strips for a deeper cut. A regular paper trimmer can achieve it, but you will need to cut the bottom liner with scissors to complete the cuts.
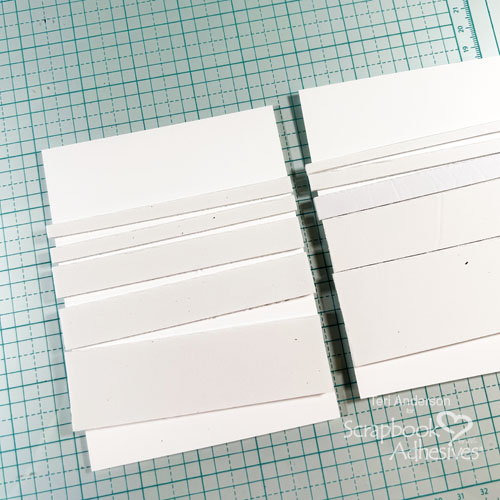
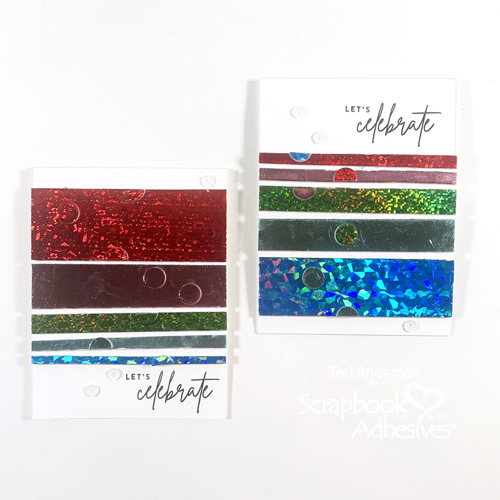
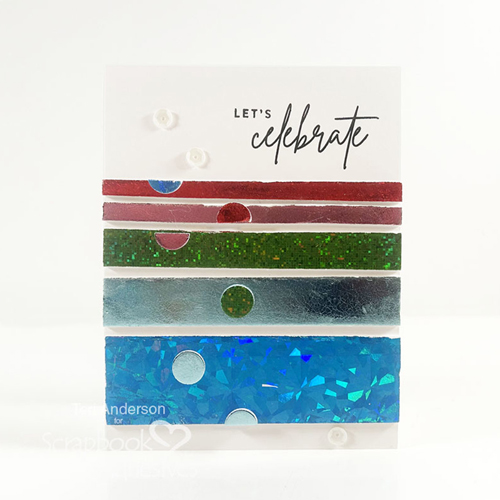
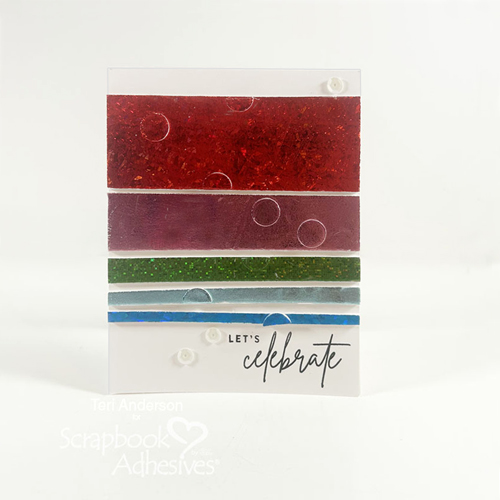
For the design, you can line up as many as you want or arrange them however you like.
Wear Your Adhesive on the Outside with the Foam Strips
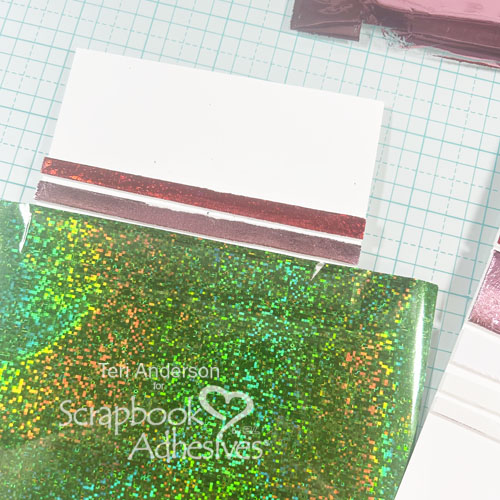
Remove the release paper from one strip. Place a piece of foil (color side facing you) from the Metallic Transfer Foil Sheets Celebrate Colors on the exposed adhesive. Rub the color into the strip and peel off the foil sheet to reveal the color. Remove the release paper from the strip below the first foiled strip, and repeat this foiling step until you’ve added foil to all the strips. Note I used a combination of the Metallic Transfer Foil Sheets Celebrate Colors and the Metallic Transfer Foil Sheets Pastel Colors on the cards.
Adhere the cardstock panel to a card using the E-Z Runner® Squares Refillable Dispenser. Stamp a sentiment onto the card as well.
Wear Your Adhesive on the Outside with the 3D Foam Circles
Take some 3D Foam Circles. Cut a few of them in half. Place the circles and half circles randomly onto your foiled strip. Apply foil onto your circles and half circles. For a more subtle look, use the same color of foil you used on your strips. Change it up by using different colors.
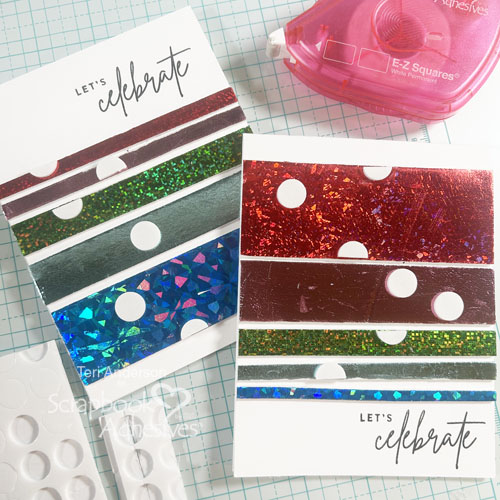
Complete your cards by adding small embellishments with Adhesive Dots Micro. Sequins and gems are always good for this!
I hope you’ve enjoyed today’s Let’s Celebrate Cards’ tutorial and are inspired to make a few quick cards of your own!
Happy Creating!
Creative Time: 30 mins
Skill Level: Beginner
Materials Needed:
Scrapbook Adhesives by 3L®
E-Z Runner® Squares Refillable Dispenser
3D Foam Creative Sheets Medium White and 3D Foam Circles White Mix
Metallic Transfer Foil Sheets Celebrate Colors and Metallic Transfer Foil Sheets Pastel Colors
Other: Stamp Set: Concord & 9th (Puppy Paw-ty Stamp Set by Kristina Werner); Ink Pad: Ranger Ink (Black); Cardstock: Neenah; Sequins: Cartwright’s
Save to Pinterest!
Visit our Website and Blog!
Sign up for our Newsletter so you never miss a contest or giveaway!


