
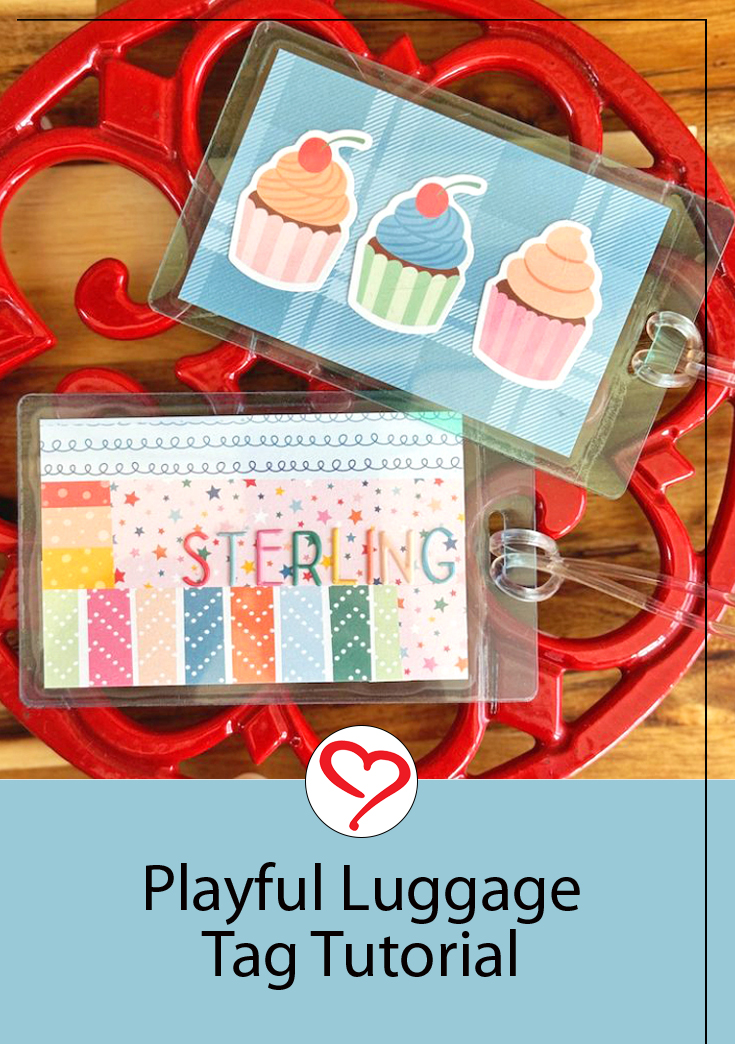
Hi, this is Jingle here today sharing a super simple and useful project! We are making Playful Luggage Tags to dress up a backpack, luggage, and more. Another bonus…it’s a great way to find your pack or luggage right away!
Playful Luggage Tag Ideas
These tags come together so quickly! A perfect accent for a kid’s backpack, your luggage…even as a gift tag on a basket or bottle of wine! Just customize your materials for the recipient!
Gather Up Your Tags
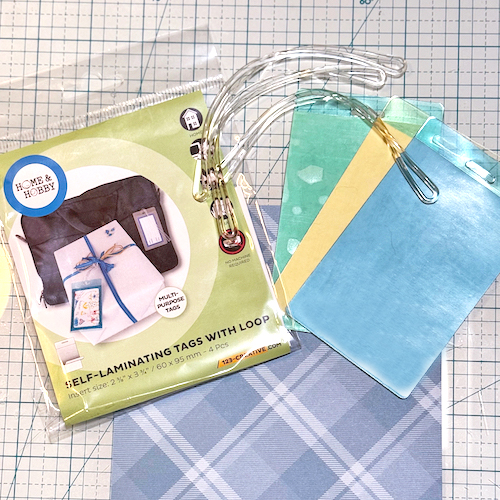
To begin, you are going to want to pull out the Self-Laminating Tags with Loops. These come with 4 different colors in the pack, so you can customize based on your favorite colors! There is a pink one, too, but my own kiddo stole that one before I took the photo. Naturally. You will also need some patterned papers of your choice, some stickers or die cuts, and alphabet stickers or dies.
Embellish The Tags
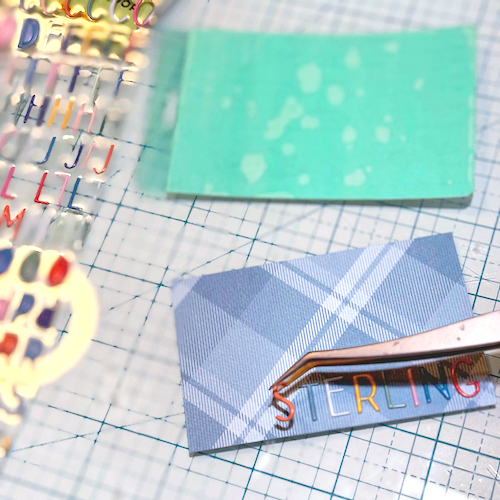
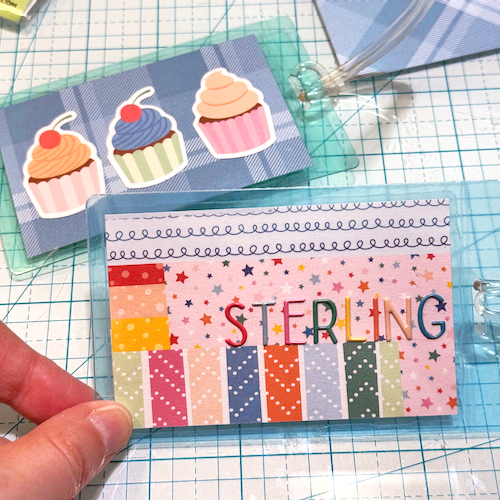
Begin by cutting the patterned paper to size. The package for the Self-Laminating Tags with Loops tells you the exact dimensions to use, which is super nice! After trimming, you can add your name using alphabet stickers or die cut letters. I use tweezers for placement as I find it easier to see where I am placing the letters that way.
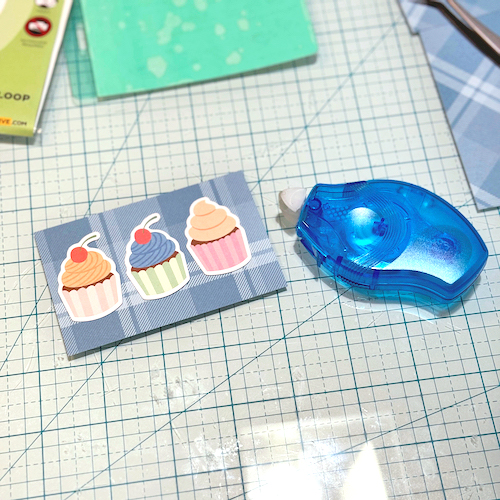
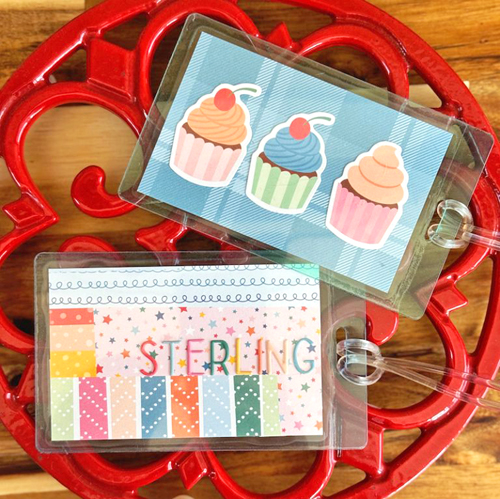
For this one, I kept the one side simple with the name and a single ice cream die cut and then added three cute cupcake die cuts using the E-Z Runner® Petite Permanent Dots Refillable Dispenser. That little guy is perfect for small projects like this one! I use plenty of adhesive so I am sure they will stay secure.
Assemble
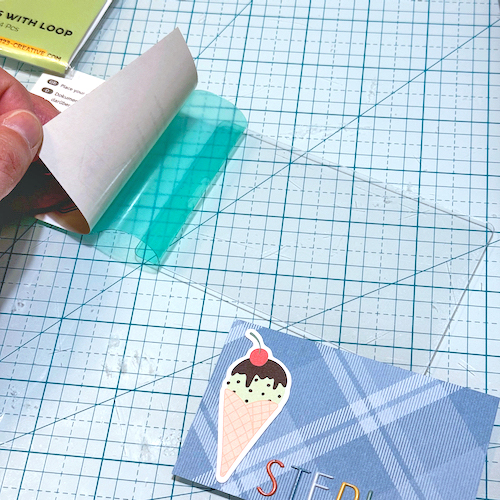
The next step is to add the insert into the Self-Laminating Tags with Loops! These are nice and sticky, so you will gently peel away the colorful side, carefully place your insert where you want it to be and then gently lay the sticky, colorful layer over the insert to seal it into the tag. Only the colorful side has the adhesive so you do have some wiggle room to move your insert into the perfect spot.

Finally, you simply add the clear plastic loop to the tag to finish it off! If this is for a gift, you could replace the loop with a ribbon or something different. But if this is for a backpack or luggage, these nice strong loops are really fantastic! I love the high quality of the tag pieces.
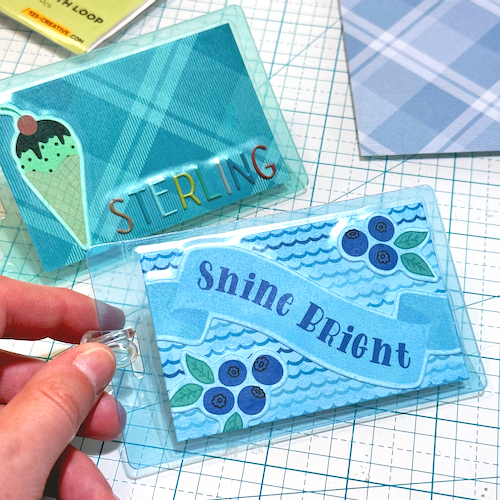
Remember that the colorful side of the tag will go over one side of your insert, providing a neat color overlay look. These were so fun, I made another one straight away.
I do hope you give these fun Self-Laminating Tags with Loops a try! This is a super kid friendly project, too. My five-year-old created one right alongside me to give to his Daddy.

Thanks for stopping by!
Jennifer Ingle (aka Jingle)
Creative Time: 15 mins
Skill Level: Beginner
Materials Needed:
Scrapbook Adhesives by 3L®
E-Z Runner® Petite Permanent Dots Refillable Dispenser
HomeHobby™ by 3L
Self-Laminating Tags with Loops
Other: Papers, Stickers + Ephemera: LDRS Creative (Favorite Things Collection), and Lawn Fawn (Plaid Patterned Paper)
Click Preferred Retailers List
Save to Pinterest!
Visit our Website and Blog!
Sign up for our Newsletter so you never miss a contest or giveaway!


