
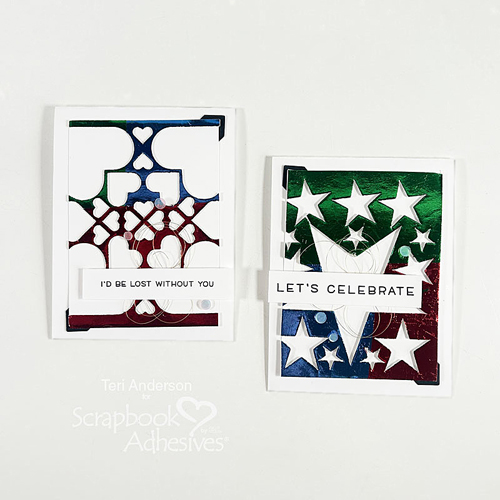
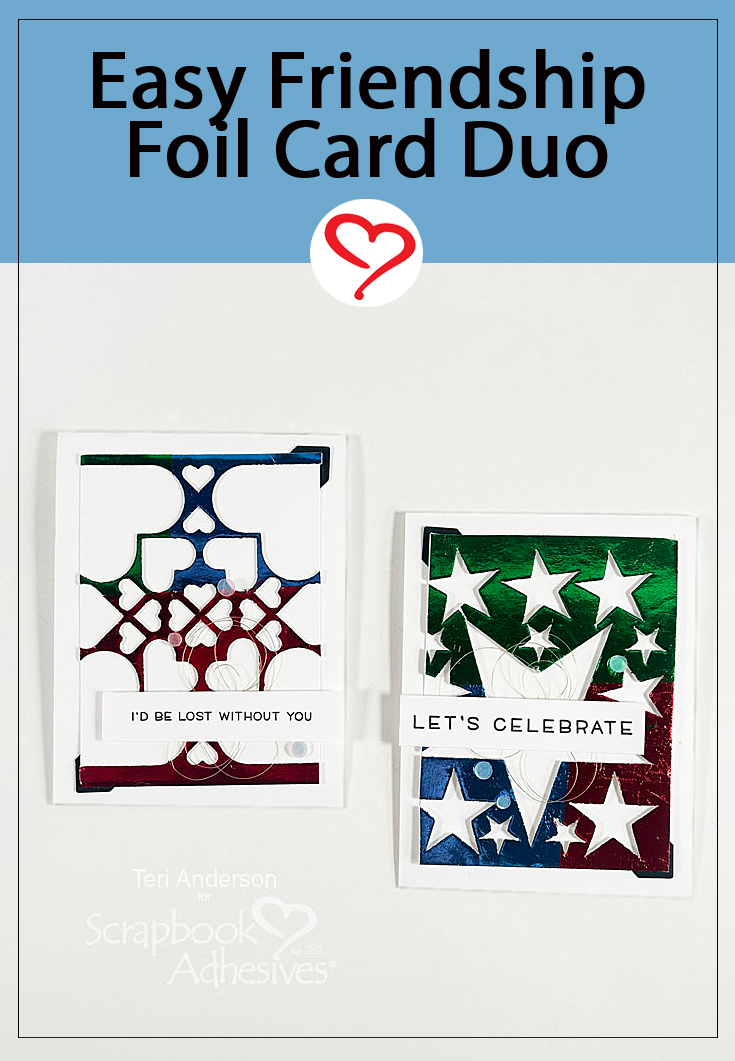
Hi, friends! Do you like to make cards with a lot of glitz? Teri here to show a fun and easy way to make cards in a snap with Metallic Transfer Foil (I used the ones from the 3D Creative Embellishment Kit with Foil) and some of the 3D Foam Shapes (using 3D Foam Hearts and 3D Foam Stars)! Let’s share my process with this Easy Friendship Foil Card Duo!
Prep the Card Panel
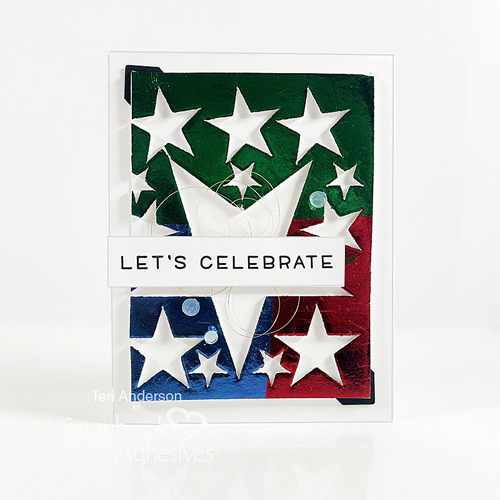
You’ll need the leftover negative piece from a sheet of 3D Foam Stars and 3D Foam Hearts. Note that not all 3D Foam Shapes have negative pieces. We’ll be creating a foiled background panel with it.
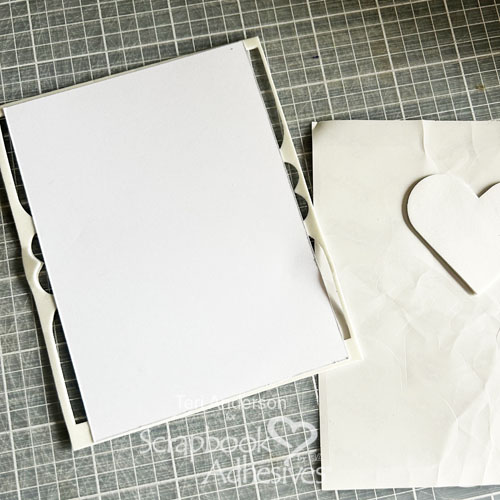
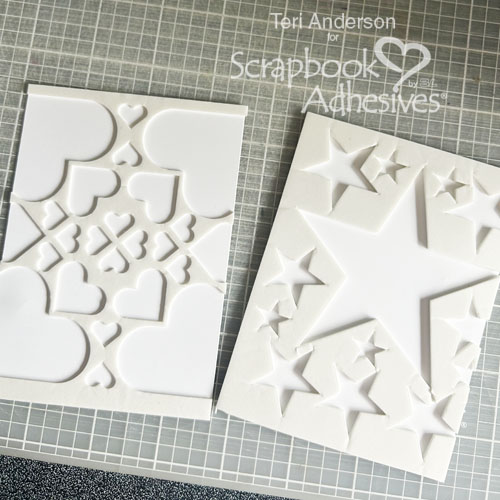
Remove the back liner of the negative foam sheet and place it on a piece of white cardstock. Trim the foam to fit the panel.
Accent with Creative Photo Corners
To make the panel stand out and create a unique accent, place a Creative Photo Corner Black under two opposite corners as pictured. I recommend placing a little adhesive (like the Adhesive Dots Small) on the back of the panel and adding the corners to it. Just let a little bit of the corners show. Then adhere the panel to a card base with the E-Z Squares® Dispenser.

Wear Your Adhesive on the Outside with 3D Foam Shapes
I decided to apply a trio of foil colors (red, blue, and green) from the 3D Creative Embellishment Kit with Foil. It’s easiest to start with one color and switch to another color, rather than applying all colors of foil at once.
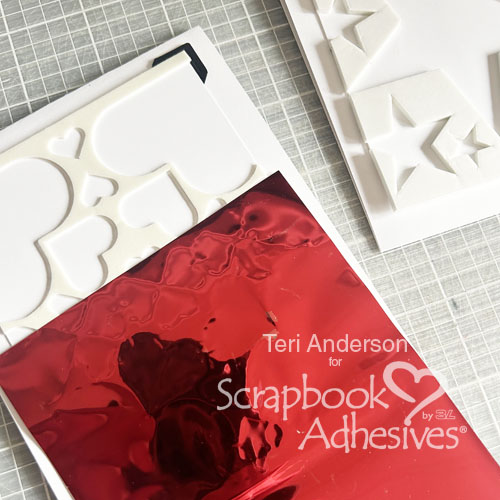
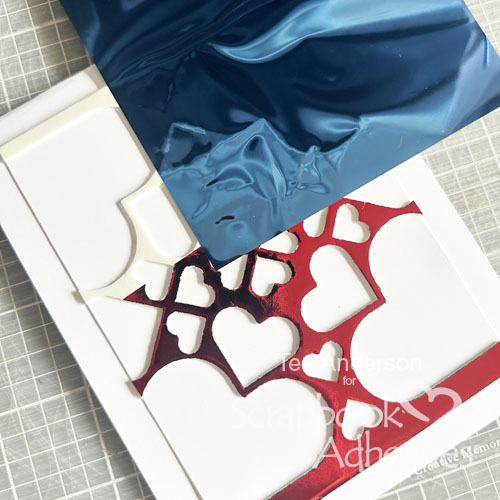
Simply remove the top release paper from your negative sheet…just tear off a section that you want to foil. Place the foil (color side facing you) over the exposed adhesive, gently rub to transfer the color, and peel off to reveal the foil. Reapply foil in missed areas. Repeat the foiling steps on the rest of the panel.
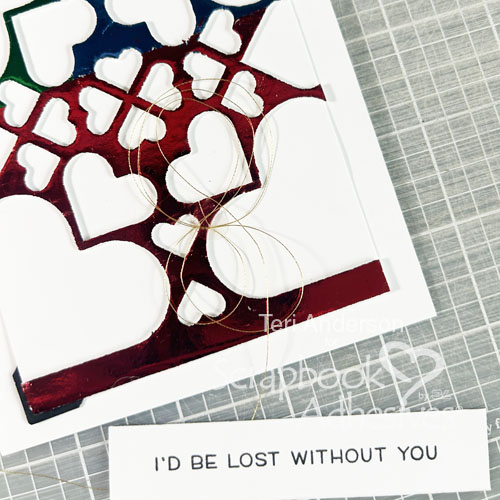
Make a Sentiment
Stamp a sentiment on a strip of cardstock. Using the sentiment strip as a guide, hold it to your card and determine placement. Set it aside. Set an Adhesive Dot Small on the panel, bunch up a piece of metallic gold thread, and place it on top of the adhesive dot.
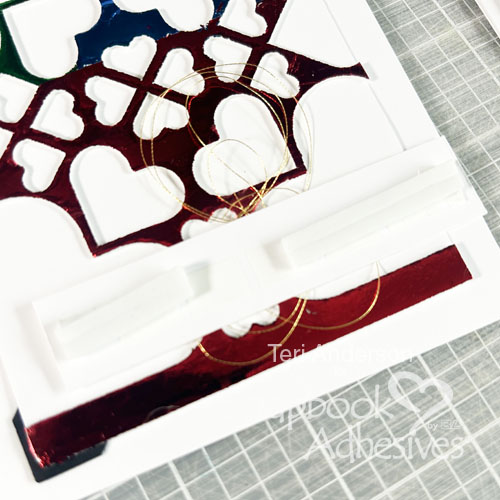
Add 3D Foam Strips on the back of the sentiment strip and set it on the card. But make sure to stack foam strips based on where there are openings in your foiled panel.
Add Sequins
Complete your card by adding a few gems or sequins to it with Adhesive Dots Small. If the dots are a bit too big, roll them up with your fingers to decrease in size – it might give it a little pop.
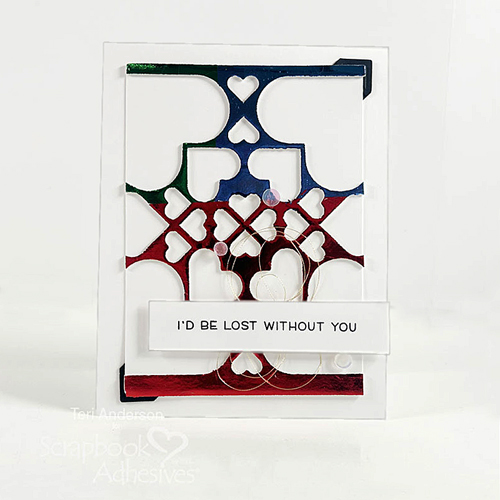
I hope you enjoyed today’s Easy Friendship Foil Card Duo tutorial! This is a quick technique, but it is also a great way to use any negative pieces of 3D Foam Sheets you have on hand.
Happy Creating!
Creative Time: 30 minutes
Skill Level: Beginner
Materials needed:
Scrapbook Adhesives by 3L®:
3D Foam Strips, 3D Foam Hearts, 3D Foam Stars and 3D Creative Embellishment Kit with Foil
Other: Cardstock: Neenah; Stamps: Lawn Fawn (Simply Celebrate, Car Critters); Ranger Ink; Black Ink Pad; Ranger; Sequins: Simon Says Stamp; Metallic Thread; Kreinik
Save to Pinterest!
Visit our Website and Blog!
Sign up for our Newsletter so you never miss a contest or giveaway!


