
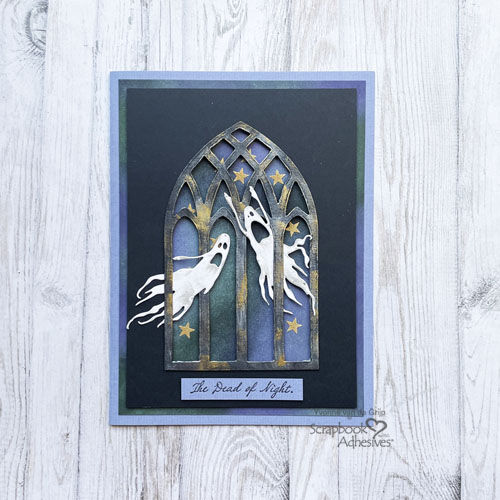
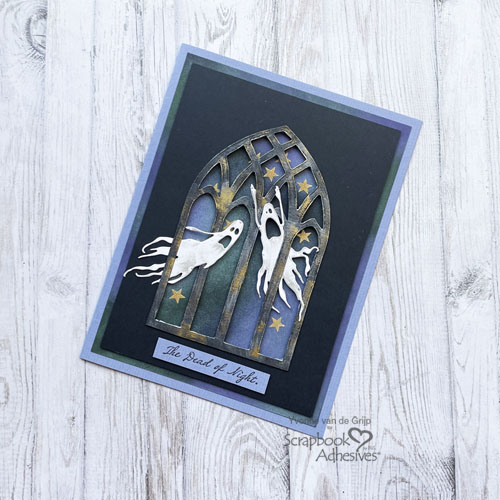
Hi everyone, Yvonne here! With Halloween coming up in just two weeks it’s time to get creepy crafting. With that in mind I made this Spooky Halloween Card.
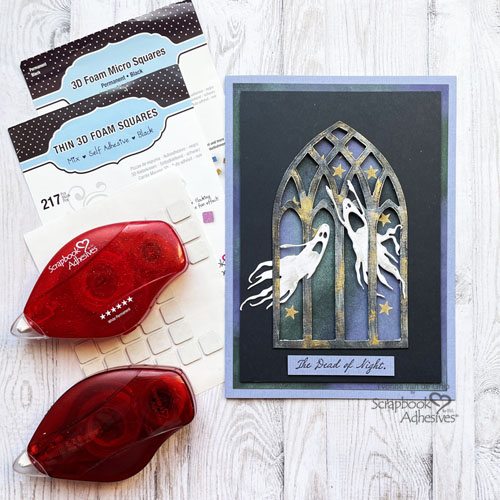
The card is all about layering and I would love to share how I made my card.
Window and Frame
First I die-cut a window from a large piece of black cardstock. Then used the leftover frame to create a top card layer for my Spooky Halloween Card by trimming it to a rectangular size. The window itself I colored using silver and gold wax to give it a metallic look.
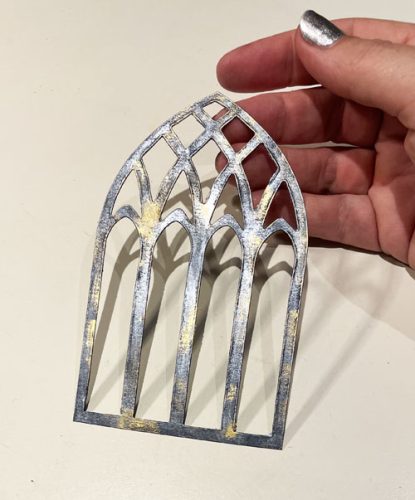
Simply rub some wax by using your finger to rub.
Middle Card Panel
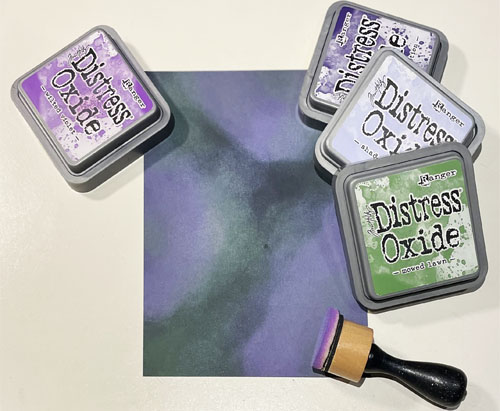
For the middle card panel of the Spooky Halloween Card, I used black cardstock which I trimmed to a size slighty larger than the top frame card panel. Then I used purple and green chalky ink pads and an ink blending tool to create a spooky sky effect.
Card Base
First adhere the black top frame card panel onto the inked card panel using Thin 3D Foam Squares Black Mix.
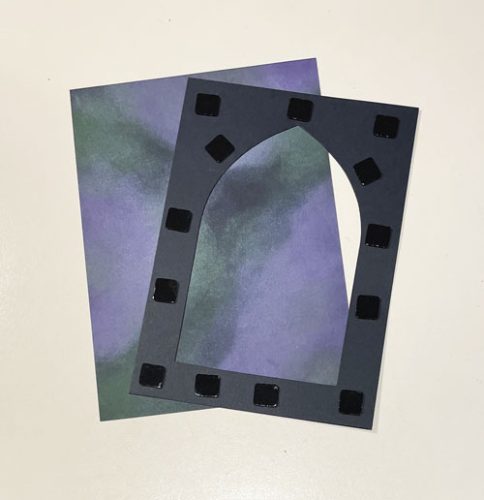
Then adhere onto a lilac card base using the E-Z Runner® Permanent Strips Refillable Dispenser. This is the card base for the Spooky Halloween Card.
Wear Your Adhesive on the Outside
To create a starry sky I used a technique called Wear Your Adhesive on the Outside. First adhere some starts from the E-Z Runner® Stars Refillable Dispenser into the inked frame. I like to use tweezers for precize adhering of the stars.
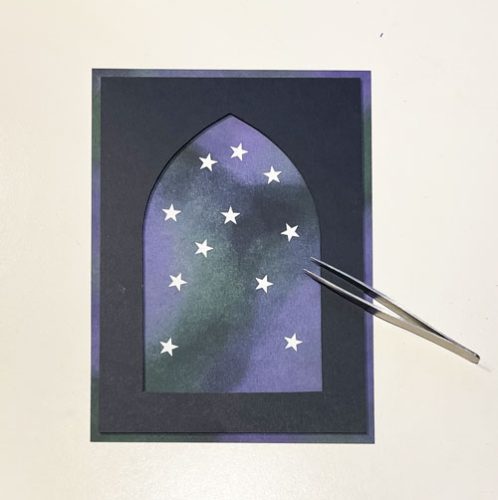
Then sprinkle fine gold glitter upon the stars and rub the glitter. Then tap off the excess glitter. Next adhere the die-cut and metallic waxed window into the frame using 3D Foam Squares Micro Black.

These extra tiny 3D foam squares are perfect for detailed adhering. Since 3D foam squares a slighty thicker than the Thin 3D Foam Squares Black Mix it will create an extra, subtile uplifting of the window on the Spooky Halloween Card.
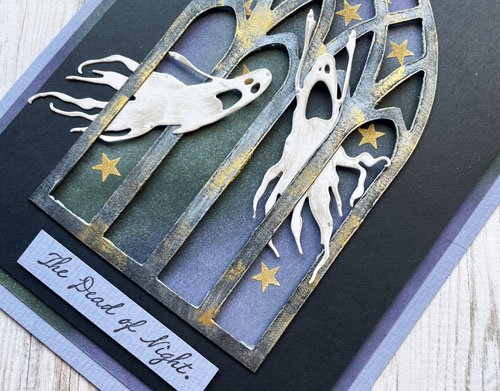
Spooky Details
First die-cut some spooky figures from white cardstock. Then ink them with grey inkt o alter them. Next adhere the ghosts into the window frame using 3D Foam Squares Micro Black as your adhesive. I tucked the ghosts half under the frame so it looks like they fly through the glass. For a finishing touch I stamped a sentiment onto a piece of lilac cardstock using a black ink pad. Then cut it to a banner and adhered it onto the card using Thin 3D Foam Squares Black Mix.
And voilá, your Spooky Halloween Card is ready! I hope you enjoyed this tutorial and wish you happy Halloween crafting.
Creative Time: 45 minutes
Skill Level: Intermediate
Materials needed:
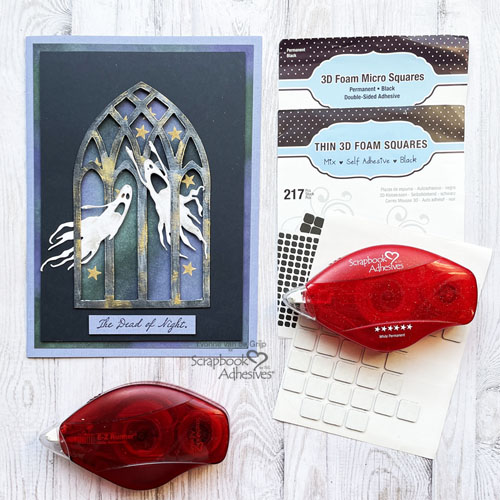
Scrapbook Adhesives by 3L®:
E-Z Runner® Permanent Strips Refillable Dispenser
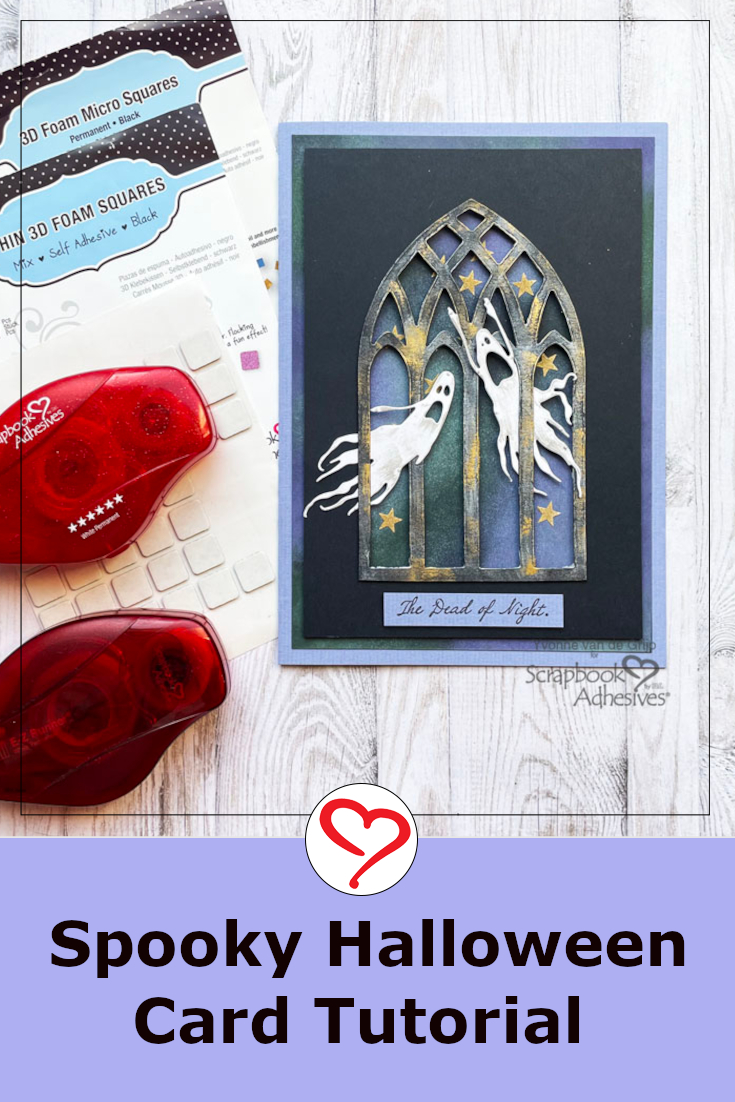
Thin 3D Foam Squares Black Mix
E-Z Runner® Stars Refillable Dispenser
Other: Craft Dies: Sizzix® (Frightful Things Thinlits™ by Tim Holtz® and Cathedral Window Bigz™); Die-Cutting and Embossing Machine: Spellbinders Paper Arts®(Platinum 6 Machine); Stamp: Stampers Anonymous (Framed Frights Stamps by Tim Holtz®); Gold Glitter; Ink: Ranger Ink (Archival Ink in Jet Black, Distress Oxide in Wilted Violet, Villainous Potion, Shaded Lilac, and Mowed Lawn); Gold and Gun Metal Wax; Black and Lilac Cardstock; Ink Blending Tool; Paper Trimmer; Scissors; Tweezers
Save to Pinterest!
Visit our Website and Blog!
Sign up for our Newsletter so you never miss a contest or giveaway!


