
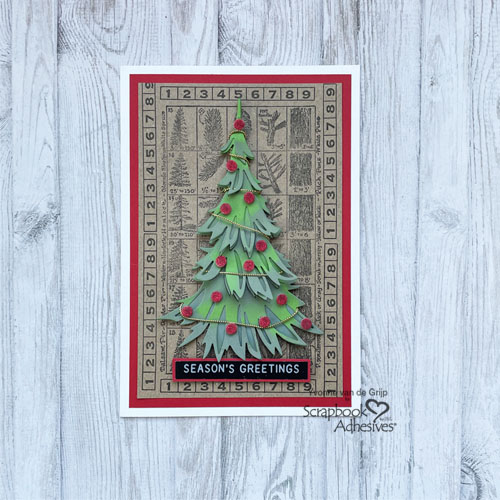
Hi everyone, Yvonne here with a traditional looking Dimensional Christmas Tree Card. This card is all about layering and making the Christmas tree more realistic.
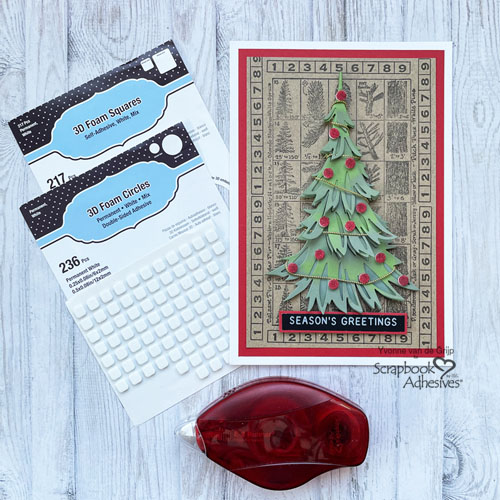
I know it might look complicated to create, but I can assure you it isn’t at all. I also added a technique called Wear Your Adhesive on the Outside to customize my embellishment with adhesives…can you guess which one? Curious? Well…let’s get crafty!
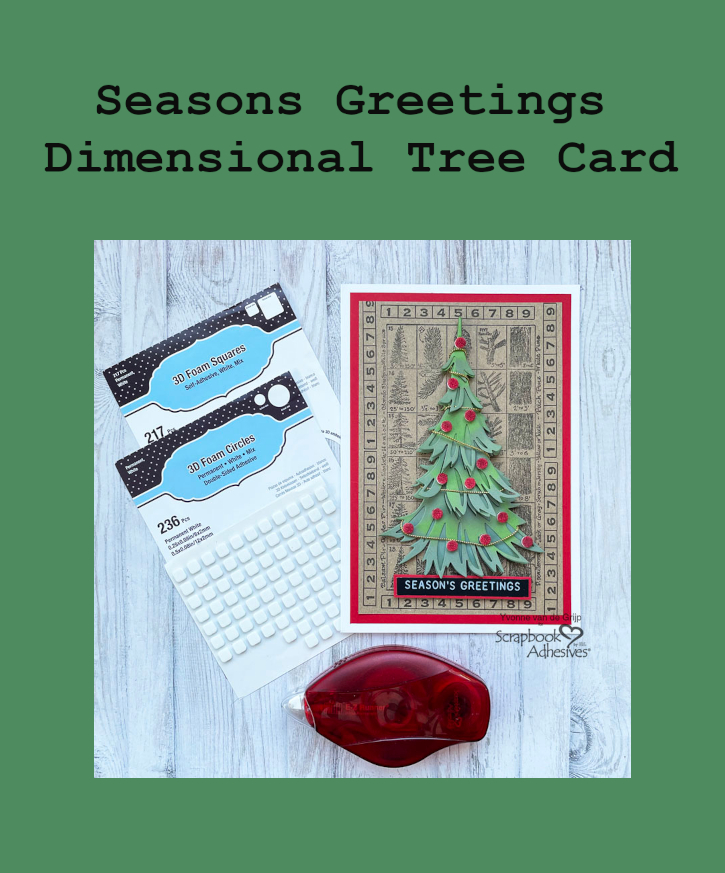
Dimensional Christmas Tree Panel
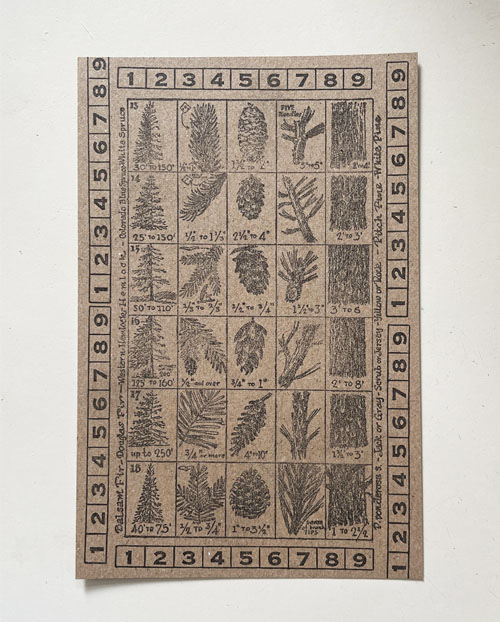
Trim a piece of kraft cardstock to a rectangular size panel. Designer’s Tip: For interest, I cut the panel slightly larger than the background stamp so I can add a ruler stamp design all around the background stamp. In other words, create a background you like by adding another design 🙂 Stamp both the pine background and ruler design with black ink for consistency.
Assemble the Panels and Card Base
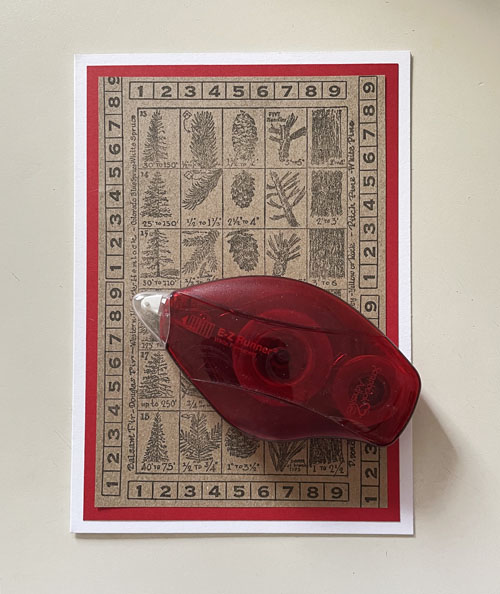
To create the card base of the Dimensional Christmas Tree Card, I matted the stamped card panel to a red panel for a pop of color before adhering to a white card base using the E-Z Runner® Permanent Strips Refillable Dispenser.
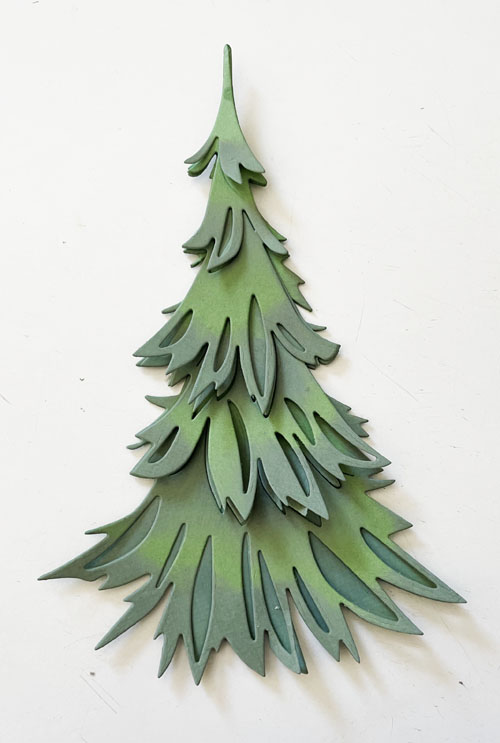
Build the Christmas Tree
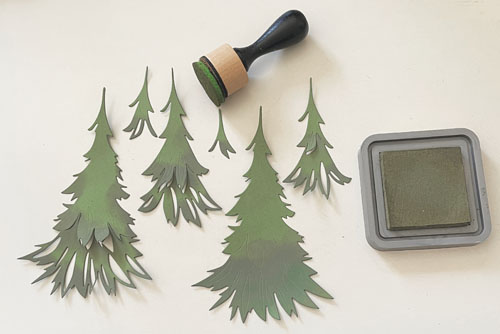
Die-cut the tree layers from green cardstock and ink the edges with a slightly different shade of green. For dimension, curl the lower parts of the tree layers and secure onto the card front with the E-Z Runner® Petite Permanent Dots Refillable Dispenser.
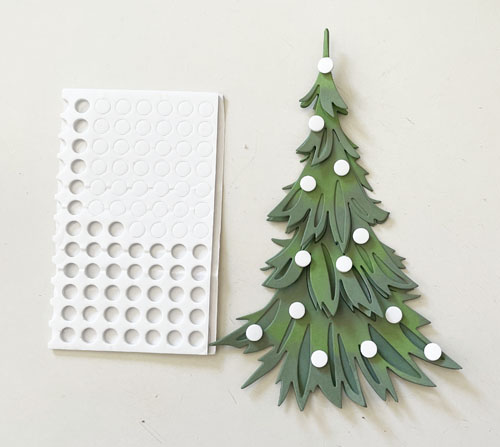
Wear Your Adhesive on the Outside with 3D Foam Circles + Glitter
To create the ornaments, I will use the Wear Your Adhesive on the Outside technique using some 3D Foam Circles White Mix and red glitter. This technique brings the adhesive from under the layers to the front as customized embellishments 🙂 And it’s simple! Once the ornaments are placed on the tree, remove the top liner, cover with glitter and press into the foam to secure. Tap off the excess and done!
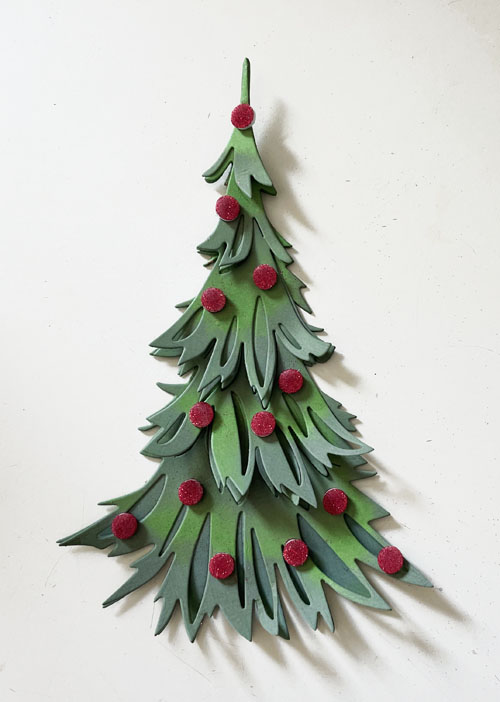
To finish trimming the tree, I wrapped some gold twine around the tree and adhered the ends using 3D Foam Squares White Mix. Then added more to be back of the tree and centered it to the card front.
Add the Sentiment
For the sentiment, I used a sticker that I matted on a red cardstock strip and placed it at the bottom of the tree using 3D Foam Squares White Mix.

And voilá, the Dimensional Christmas Tree Card is finished! It wasn’t that complicated at all, was it? Wishing you happy holiday crafting!


Creative Time: 45 minutes
Skill Level: Intermediate, Advanced
Materials needed:
Scrapbook Adhesives by 3L®:
E-Z Runner® Petite Permanent Dots Refillable Dispenser
E-Z Runner® Permanent Strips Refillable Dispenser
Other: Stamps: Stampers Anonymous (Winter Woodlands Stamp by Tim Holtz®); Craft Dies: Sizzix® (Trim a Tree Colorize® Thinlits™ by Tim Holtz®); Die-Cutting and Embossing Machine: Spellbinders Paper Arts® (Platinum 6 Machine); Ink: Ranger Ink (Archival ink in Jet Black and Distress Oxide in Forest Moss); Sentiment Sticker: idea-lology® (Label Stickers – Christmas by Tim Holtz®); Gold Twine; Red Glitter; White, Red and Kraft, Green Cardstock; Paper Trimmer; Scissors
Save to Pinterest!
Visit our Website and Blog!
Sign up for our Newsletter so you never miss a contest or giveaway!


By Sandra Stewart December 20, 2025 - 1:13 pm
While I know many tree dies would be usable for this lovely card, it would be nice if you included the information on what die set you used for the tree.
By Margie Admin December 22, 2025 - 9:07 am
Hi, Sandra. Please refer to the supplies list where it is listed…Craft Dies: Sizzix® (Trim a Tree Colorize® Thinlits™ by Tim Holtz®). We hope that helps answers your question. Thanks for stopping by and reading our post 🙂
By Edna Burgess December 21, 2025 - 5:51 pm
I have all the glue and foam squares required. I was hoping to find out how to get the die to cut out the tree. Can you help me with that? Hope so. Thanks.
Edna Burgess
By Margie Admin December 22, 2025 - 9:08 am
Hi, Edna. Thanks for the question. Please refer to the supplies list where it is listed…Craft Dies: Sizzix® (Trim a Tree Colorize® Thinlits™ by Tim Holtz®). We hope that helps answers your question. Thanks for reading our post 🙂