
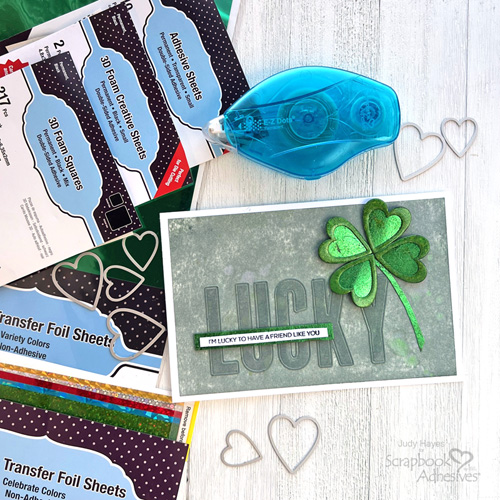
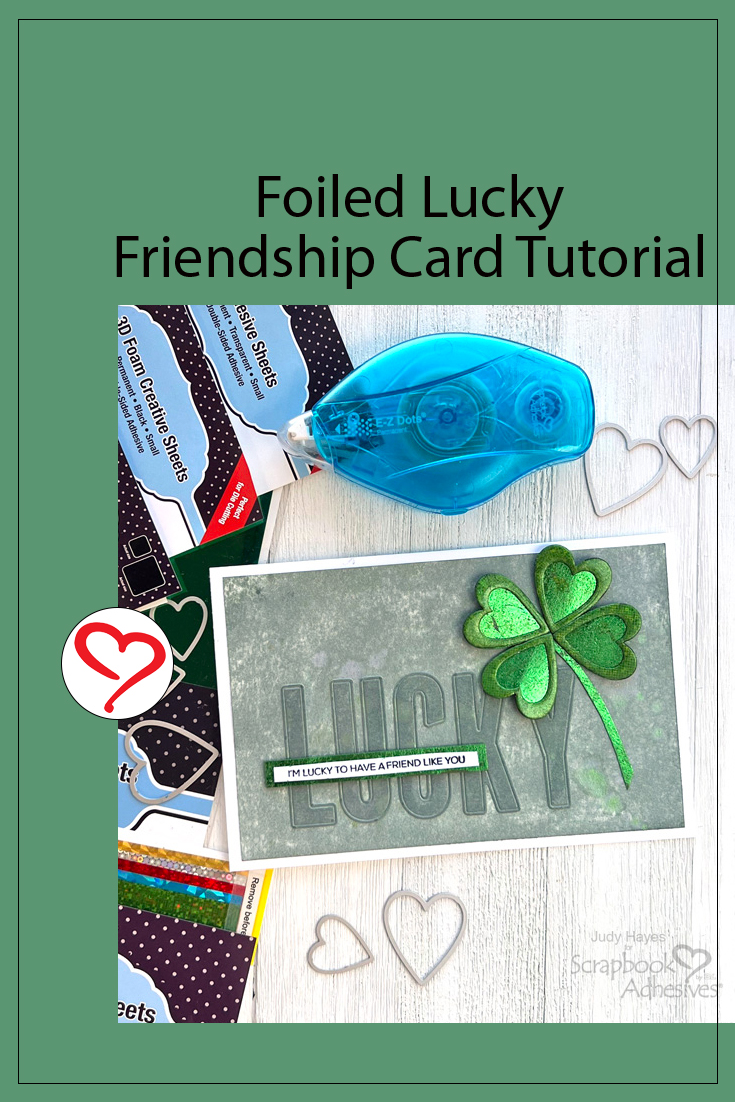
Hi, Judy here today! It’s almost St Patrick’s Day which inspired me to make this Lucky Friendship Card featuring a shiny shamrock. I used Adhesive Sheets, 3D Foam Creative Sheets and Metallic Transfer Foil to make hearts for the shamrock. Scroll down to read all the details.

Lucky Friendship Card Base and Layers
For the card base, cut a piece of 8.25 x 6.5-inch white cardstock, score and fold to form a 4.25 x 6.5-inch card. From another piece of white cardstock, cut it to a 4 x 6.25 inch rectangle and a 3 x 6 inch rectangle. Then cut a piece of 3 x 4-inch green cardstock.
Ink and Distress Cardstock Pieces
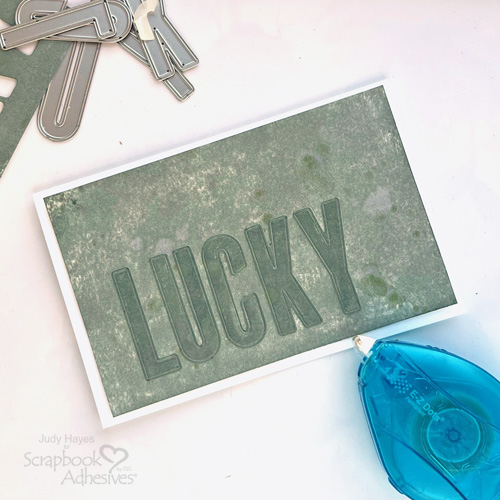
Use Distress Ink Oxide Iced Spruce ink pad for a direct-to-paper application to color both white cardstock pieces. Apply more ink to the smaller piece to make it darker. Mist both pieces with water. Then spritz each piece with Distress Spritz Mowed Lawn. Allow to dry
Die-Cut Letters
Apply a sheet of Adhesive Sheets 4 x 6in. to the back of the small inked paper and burnish to adhere well. From that piece, use a die-cutting machine and alphabet dies to cut letters for “LUCKY”
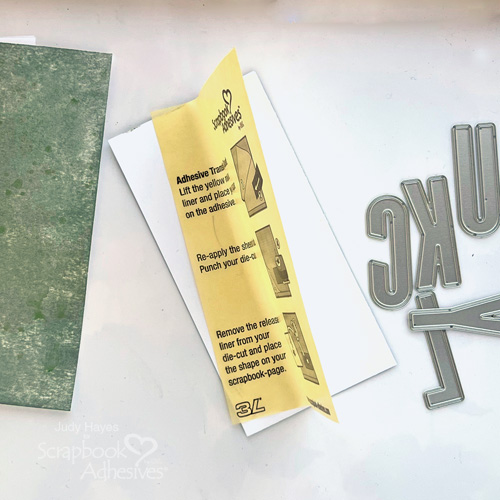
Attaching the LUCKY Letters
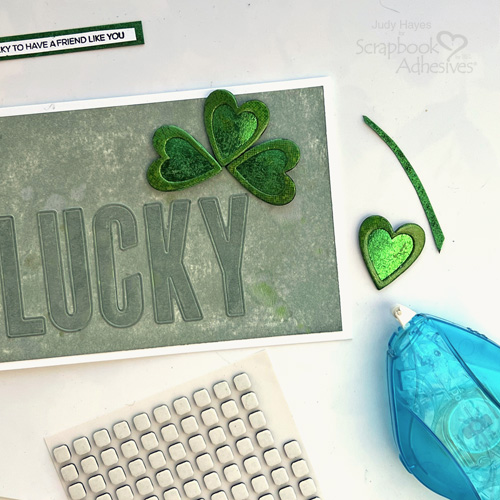
Carefully remove die-cut letters from dies, peel liners and fasten to large piece of inked paper. Use ruler to align letters about .375 inches from bottom and .75 inches from left edge. Press firmly in place. Designer’s Tip: Use a heat gun to heat letters to help adhesive be more sticky after being pressed through die cutting machine. Apply adhesive to back of panel with E-Z Dots® Permanent Refillable Dispenser and fasten to card front.

Make Shamrock Pieces
Cut 3 x 4 inches piece of Adhesive Sheets 4 x 6in. and apply to green cardstock. If cardstock has texture, fasten to that side. Smooth side with Adhesive Sheet applied will be front.
Use heart dies and die cutting machine to cut 4 hearts (approx.. 1.125 x 1 inches). Also cut strip .375 x 3.5 inches and stem for shamrock. Remember side with adhesive is front.
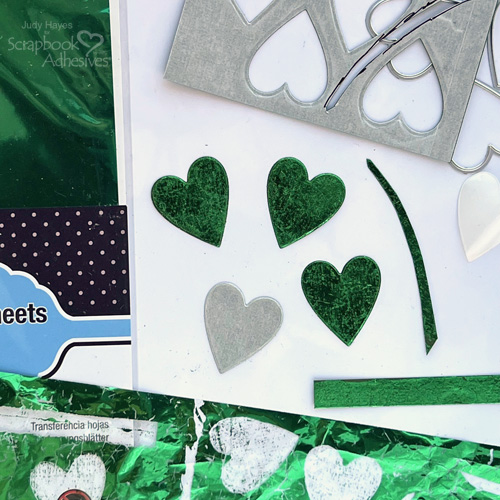
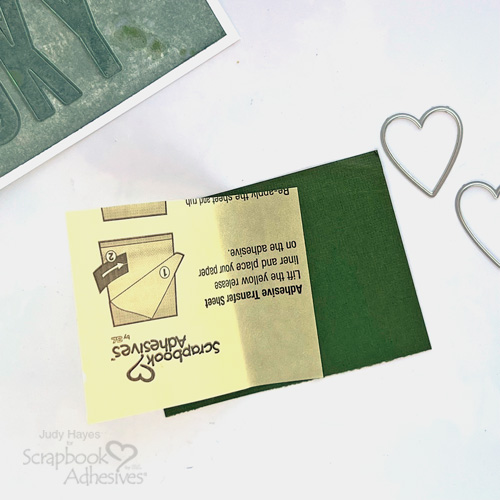
Peel liner from a heart, place face down on back side of green foil from Metallic Transfer Foil Sheets Variety Colors, turn over and press foil to transfer and then peel away. Repeat for each heart, stem and strip. (Designer Tip: I found it easiest to place heart face down on back of foil but you may lay heart on work surface, peel liner and press foil on it)
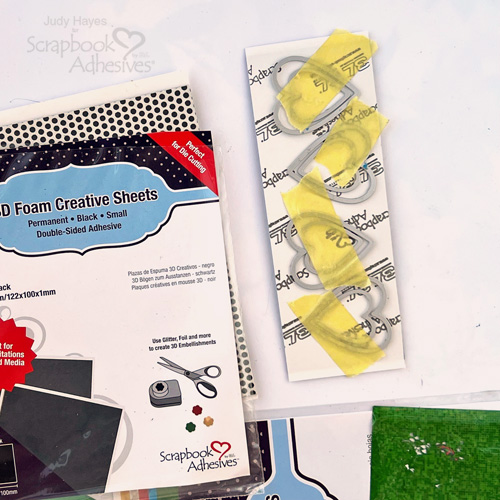
Cut a 2 x 6 inches piece of 3D Foam Creative Sheets Small Black. On the paper side of the 3D Foam Creative Sheet, align larger heart with smaller one inside, tape in place and repeat for 4 hearts. Run through the die-cutting machine to cut. Carefully remove hearts from 3D Foam Creative Sheet, and remove dies. Set aside smaller hearts for another project.
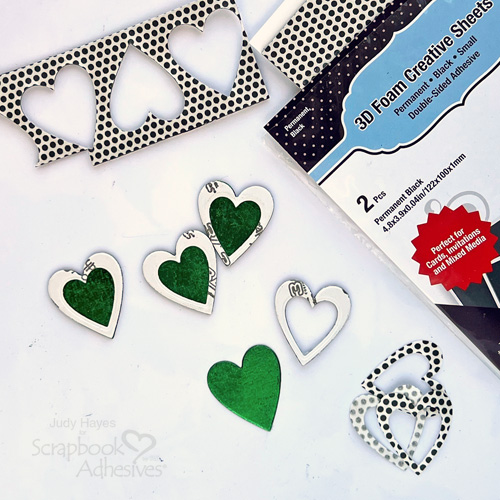
Carefully peel shiny liner from open heart, align on foil covered heart and press in place. Repeat for all hearts.
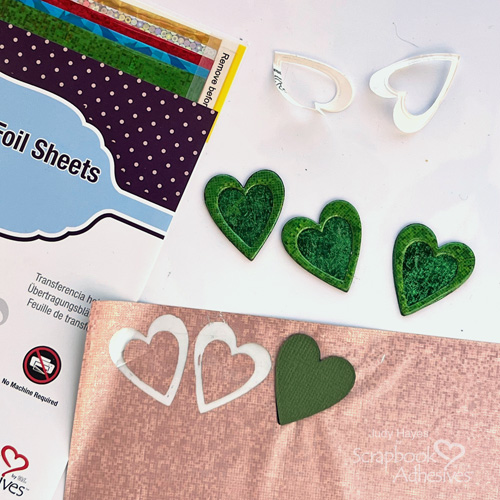
Peel liner from open heart and place on back of green foil from Metallic Transfer Foil Sheets Celebrate Colors. Turn over and press the foil to the heart and peel away. Repeat for all hearts.
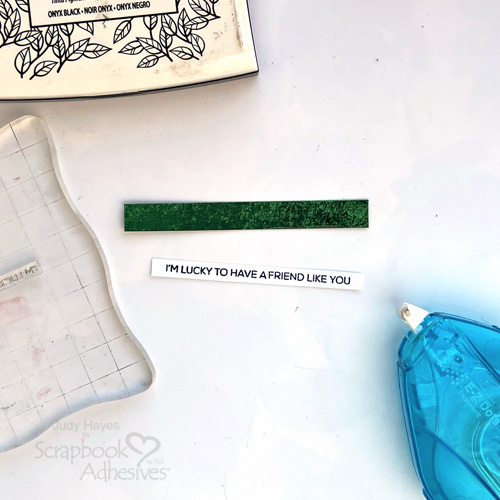
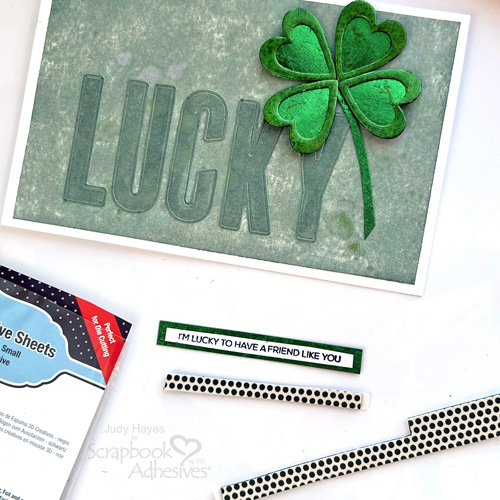
Stamp the Verse
Stamp verse on white cardstock with black ink and trim to narrow strip about 2.875 inches long. Place face down on scrap paper and apply adhesive to back with E-Z Dots® Permanent Refillable Dispenser. Fasten on foiled strip. Designer’s Tip: This verse stamp had word “crafty” in it which I omitted by cutting the verse apart.
Assemble Shamrock
Slightly bend each heart so sides curl back. Place small square from 3D Foam Squares Black Mix near top on back of each heart. Arrange on card. Use E-Z Dots® Permanent Refillable Dispenser to apply adhesive on the back of one heart point, remove liner, and press the heart in place on card. Repeat for each heart.
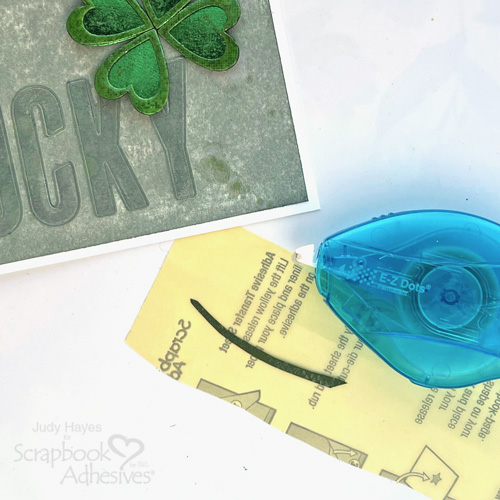
Place the stem face down on a scrap paper, apply adhesive with the E-Z Dots® Permanent Refillable Dispenser on the stem and press it in place on the card.
Finishing Touches
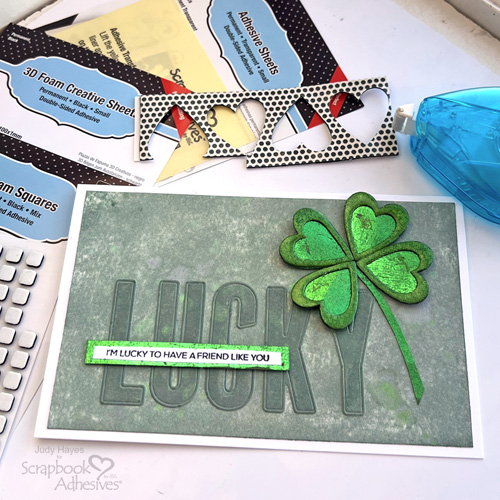
Cut narrow strip of 3D Foam Creative Sheets Small Black and fasten to back of verse strip. Peel liner and attach the verse to the card front across the letters.
Now this sweet Lucky Friendship Card is ready to send! I hope you try making accents similar to mine with the 3D Foam Creative Sheets Small Black and dies in your stash!
Thanks for visiting!
Judy Hayes
Creative Time: 45 mins
Skill Level: Advanced
Materials Needed:
Scrapbook Adhesives by 3L®
E-Z Dots® Permanent Refillable Dispenser
3D Foam Creative Sheets Small Black
Metallic Transfer Foil Sheets Variety Colors, Metallic Transfer Foil Sheets Celebrate Colors
Other: Stamp: Altenew (Crafty Friend); Ink: Ranger Ink (Distress Oxide Iced Spruce, Distress Spritz Mowed Lawn); Ink: Tsukineko (Versafine Onyx Black); Craft Dies: Sizzix (Tim Holtz Stacked Tiles Hearts, Alphanumeric Bulletin); Green, White Cardstock
Click Preferred Retailers List
Save to Pinterest!
Visit our Website and Blog!
Sign up for our Newsletter so you never miss a contest or giveaway!


