
Since it’s the day before Easter, I thought I would share a QUICK & EASY 3D Foam Easter Shape Tag. So for those last minute folks (COUGHmeCOUGH), this is for you – LOL!
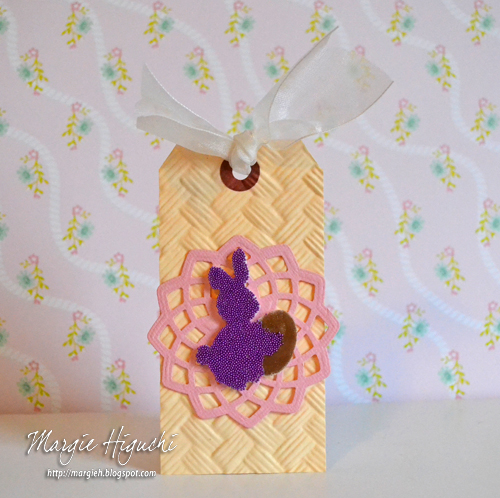
Did you know you can use many different kinds of mediums to apply ON TOP of your 3D Foam Shapes? Mediums such as glitter, foil, pigment powder, flock and more. Today I wanted to try Pigment Powder in Brown (for chocolate eggs = YUM!) and purple micro beads.
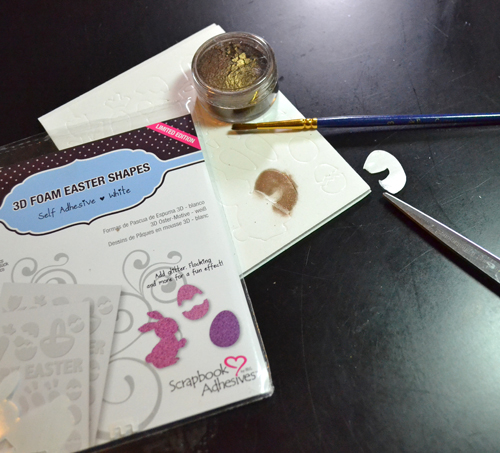
I was impressed with how the micro beads stuck on the bunny shape and love the texture it created.

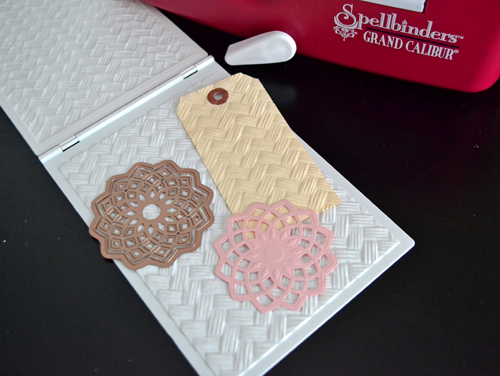
The tag also was textured using the Basket Weave Sculpted Embossing Folder. I cut/embossed Medallion Three die to frame the 3D Easter Foam Bunny Shape.
To finish off, I tied a knot with Organza Ribbon and it’s ready to go!
Supplies:
Scrapbook Adhesives by 3L®: E-Z Runner® Permanent Strips Refillable, 3D Foam Easter Shapes
Organza Ribbon, Pigment Powder
Die: Spellbinders® Creative Arts (E3D-004 Basket Weave Sculpted Embossing Folder, S2-017 Medallion Three and the Grand Calibur® Machine)
Cardstock: Core’dinations ColorCore Cardstock
Micro Beads: American Crafts (POP! Microbeads Lip Gloss)
Other: Tag
Thanks for stopping by! Have a safe and wonderful Easter!
MargieH