
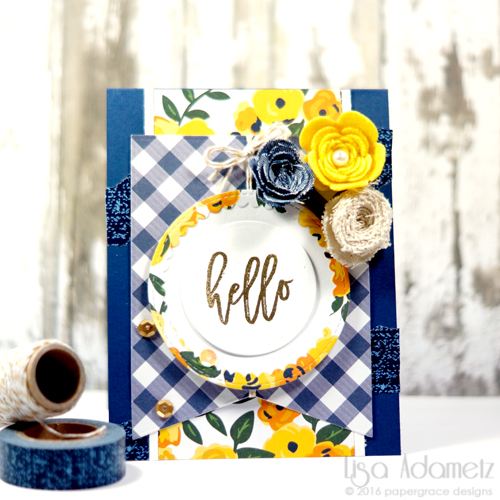
Hi there, my crafty friends! It’s Lisa on the blog today to share a floral hello card that I made using Scrapbook Adhesives by 3L® products and a few others, too.
Since I’m known to be wordy (yes, it’s true — shocking, I know) I decided against a tutorial and to just break down the process. I thought it would be much easier. It’s not a difficult card to make. Just a lot of steps and products. Which is GOOOOOD!! 😉 (Well, the products anyway.)
- Stamp and emboss the sentiment using Versamark ink and a gold embossing powder. Heat set. Die-cut using a circle die.
- Die-cut scallop circle from yellow floral patterned paper (this creates an open “ring”)
- Die-cut another circle to fit behind the patterned paper using white cardstock. Adhere the patterned paper in place using E-Z Runner® Micro Refillable Dispenser. Now adhere the smaller circle on top using 3D Foam Squares – Black, Regular. (Set this piece aside.)
- Using the Pennant Set , die cut a rolled flower out of the canvas and a rolled rose out of the denim. I also chose to create another rolled rose out of felt. Secure the ends using DODZ Adhesive Dots 3D. Set the flowers aside.
- Using a fish-tail banner die, use that to make a beautiful fish-tail banner out of blue gingham patterned paper.
- Cut a strip out of the yellow patterned paper to fit the center of the card.
- And now? Assembly. Adhere the yellow patterned paper using E-Z Runner® Ultra Refillable Dispenser onto a navy card base.
- Cut and adhere two tiny strips of white cardstock to fit either side of the yellow patterned paper with the E-Z Runner® Micro Refillable Dispenser.
- Attach 4 random strips of the Tissue Tape in Denim along the sides of the card.
- Wrap the fish-tail banner in a doubled length of the Twine in Natural and tie in a small bow at the top. Adhere to card front using E-Z Runner® Ultra Refillable Dispenser.
- Secure additional 3D Foam Squares – Black, Regular on to the circle piece that was previously set aside and adhere onto the card front.
- Now, to secure the flowers I used the Art Medium. Since the flowers are fabric/felt they can occasionally be tricky to hold onto cards. I find that using an art medium is really the best thing to use. Just paint a nice blob on the back and hold it in place for a few seconds, allow it to dry. Those flowers will not go anywhere. Yay! (I also used the Art Medium to hold my little pearl for the center of the felt flower.)
- The last thing that I did was secure a few sequins to the card using the Dodz Adhesive Dots Mini.
See? Like I said, lots of steps but, a very simple card to make! Especially if you have the right adhesives! 😉
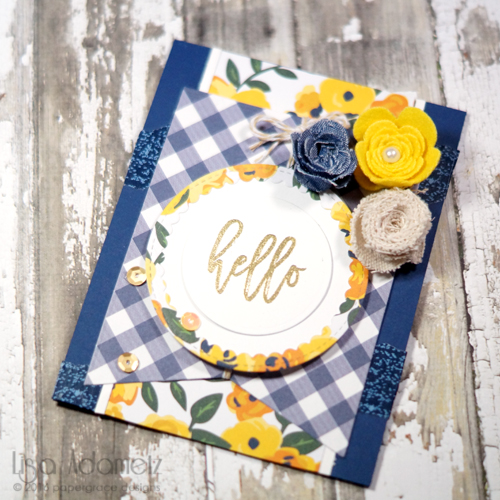
Here’s a couple of other views for you!

I hope that you enjoy the card today and break out your adhesives to use in new ways, too.
SUPPLIES
Scrapbook Adhesives by 3L®:
3D Foam Squares Black, Regular
Dodz Adhesive Dots – 3D
Dodz Adhesive Dots – Mini
E-Z Runner® Ultra Refillable Dispenser
E-Z Runner® Micro Refillable Dispenser
Twine
Tissue Tape Denim and Flower
Art Medium
Pennant Set
Stamp: Right At Home
Die: My Favorite Things Die-Namics
Die: Maya Road
Die: Pretty Pink Posh
Die: Avery Elle
Embossing Powder: Wow!
Patterned Paper: Pebble/Jane Hadfield
Cardstock: Neenah
Embellishments: 28 Lilac Lane
Ink: Tsukineko

Visit our Website and Blog!
Sign up for our Newsletter so you never miss a contest or giveaway!


By ~amy~ August 11, 2016 - 7:17 am
How fabulous! I adore all your details including those awesome blooms!