
Hey there crafty friends! Today I have a super cute Keepsake Envelope Mini Book tutorial to share. These little envelopes are not JUST perfect for tucking away those important keepsakes in your albums, they can have a whole other life like this sweet little Keepsake Envelope Mini Book.

Keepsake Envelope Mini Book Tutorial:
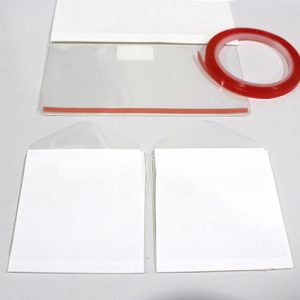
Take 2 of the 2 x 4 in. Keepsake Envelopes, and adhere to the 3.5 x 4 in. envelope using 1/8″ Extreme Double Sided Tape.
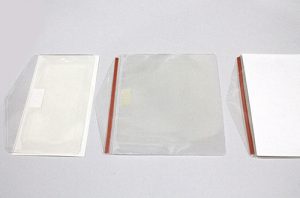
Add the two 2 x 2 in. Keepsake Envelopes to the 2 x 4 in. envelope, again using 1/8″ Extreme Double Sided Tape.
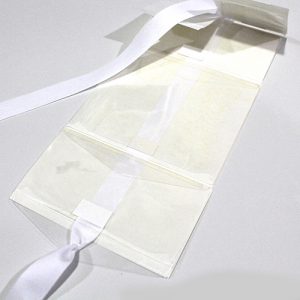
Using a 1/8″ hand punch, I punched a hole in the flap of the 2 x 4 in. envelope. Run the ribbon through the hole and adhere to the back of that 2 x 4 in. envelope and the 3.5 x 4 in. envelope.
Start covering all of the sections from and back of the mini book using my E-Z Runner® Ultra Refillable Dispenser.
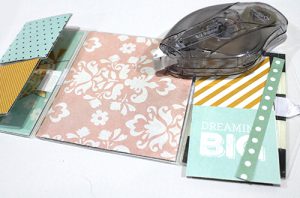
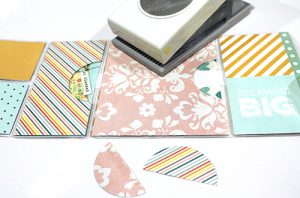
Using a large circle punch, cut out pieces of the 2 middle envelope opening flaps. This creates pockets that you can easily slide things into.
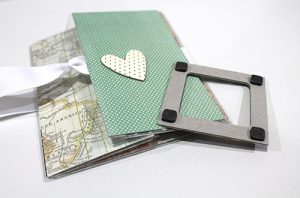
I used 1/4″ 3D Foam Squares to add the mini frame to the front cover and Micro Adhesive Dots to add other chipboard embellishments.
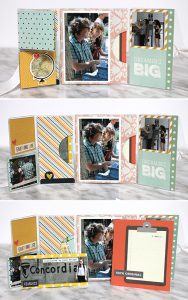
Add your photos, embellishments and tuck away any other keepsakes.
Thanks so much for stopping by!
Tracy
Scrapbook Adhesives by 3L® Used:
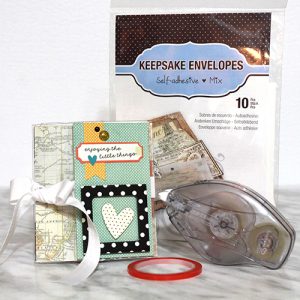
Keepsake Envelopes Mix
3D Foam Squares Black Small Size
Adhesive Dots- Micro
E-Z Runner® Ultra Refillable Dispenser
Extreme Double-Sided Tape 1/8in
Others:
Simple Stories- I Am Collection, Cardstock (white, coral), White Ribbon, Circle Punches (1/8″, 1.75″)
![]()
Don’t forget we have a design team call going on! Are you interested?
Please click: 2018 Design Team Call Post.
By Kirsty Vittetoe January 22, 2018 - 12:44 am
So lovely!
By Terri Burson January 23, 2018 - 2:57 pm
What a great idea! Love it!