
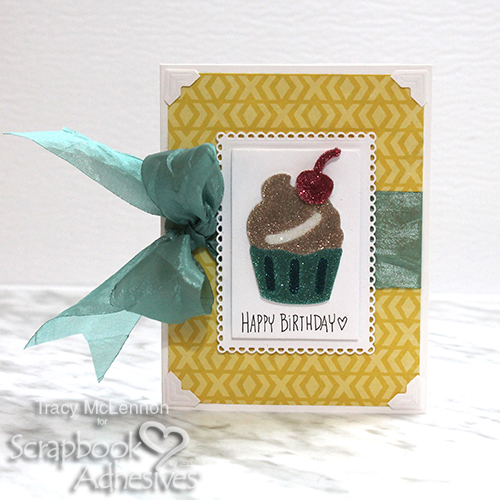
Welcome back crafty friends! Tracy here, and today I have a sweet and simple birthday card to share that packs a punch. This card started with the super cute 3D Foam Cupcakes. They were ALL the inspiration I needed, so many possibilities. Here are all of the details:
Making a Sweet Card
To start I adhered the 3D Foam Cupcake, and all of it’s inner bits to the piece of white cardstock I was using on my card. It’s easiest to cut the card layers before doing anything else.
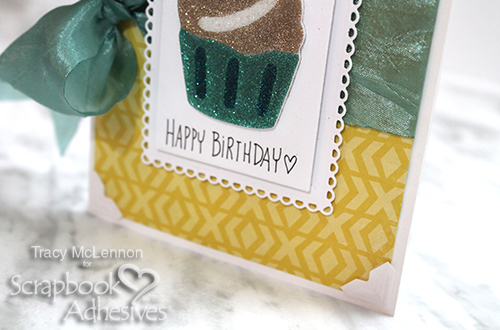
The first glitter I added was the highlight in the frosting of the cupcake. Simply peel just that section away, then add the plain white glitter.
Next I used a craft knife to cut the edge of the frosting, and removed the remainder of the frosting section and added the taupe glitter.
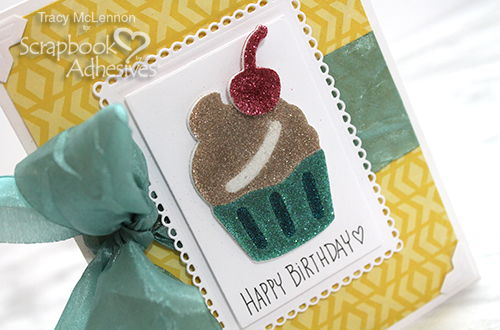
After the frosting, then I removed the inner cupcake wrapper sections. I used a darker teal glitter for this, and then after removing the remaining protective covering, add the light teal glitter.
Add pink/red glitter to the cherry separately and adhere to the card with the help of 3D Foam Squares White Mix in small (1/4″).
Add the white cardstock with the cupcake to the next layer using 3D Foam Squares. I added Creative Photo Corners White and ribbon to the yellow patterned layer of my card and adhered it to the base using the E-Z Runner® Ultra Strong Refillable Dispenser.
Finally I added the matted cupcake to the card using Crafty Foam Tape.
Creative Time: 20 mins/Beginner Level
Materials Needed:
Scrapbook Adhesives by 3L®:
E-Z Runner® Ultra Strong Refillable Dispenser
3D Foam Cupcakes
Creative Photo Corners White
3D Foam Squares White Mix
Crafty Foam Tape in White
Other:
White Cardstock, Craft Knife, Ribbon, Heartfelt Creations Dies, Echo Park Paper- Summer Fun Collection
Thanks so much for stopping by!
Tracy
By Beverly Jordan May 21, 2018 - 9:31 am
Love the glitter cupcake!