
Hello Crafters! For today’s project, I will share how to make a really cute dimensional box card! The die set that I am using comes with all the elements to construct this card plus a fun flamingo die set to embellish 🙂
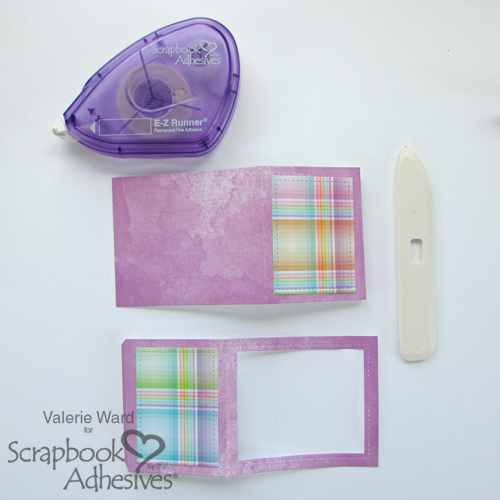
Step 1 – Box Side Panels
Die-cut two of the main pieces (side panels). With one of the die cuts, die-cut a rectangle from the set to create your window (this will be the front of your card). You will also die-cut the two smaller side panels with plaid patterned papers.
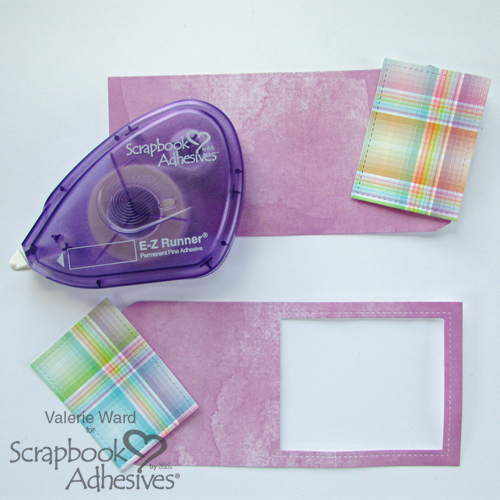
Using the E-Z Runner adhesive, adhere the smaller side panels onto the larger pieces as shown in the image. Afterward, make crisp creases using the bone folders to all the scored lines.
Step 2 – Assembly
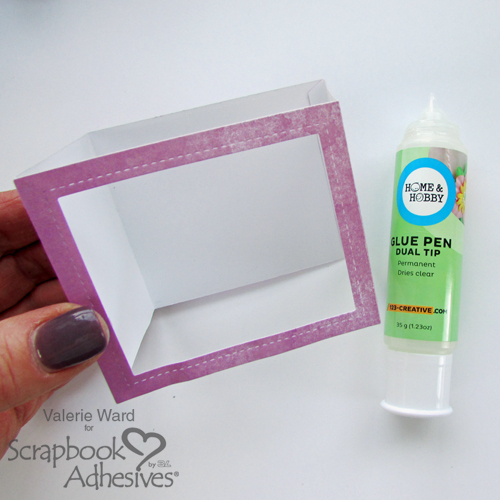
Now we’re going to assemble the box using the Dual Tip Glue Pen.
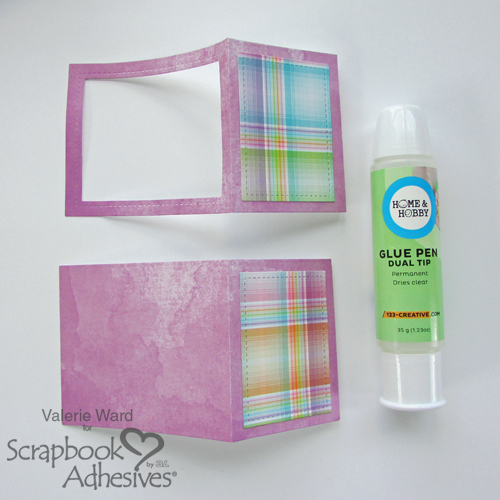
Apply a thin line of clear glue onto the side flaps. I love that there are two tip options with this Dual Tip Glue Pen. The other tip is a 1/2 inch wide brush for larger applications.
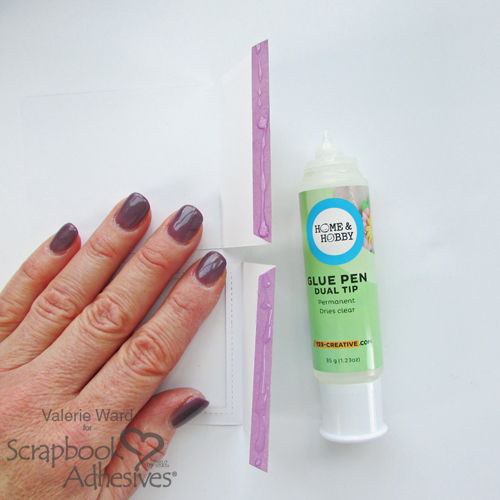
Next, fold up the panels and attach the flaps by folding the ends together to create one box shape.
Step 3 – Making Inside Back Panel
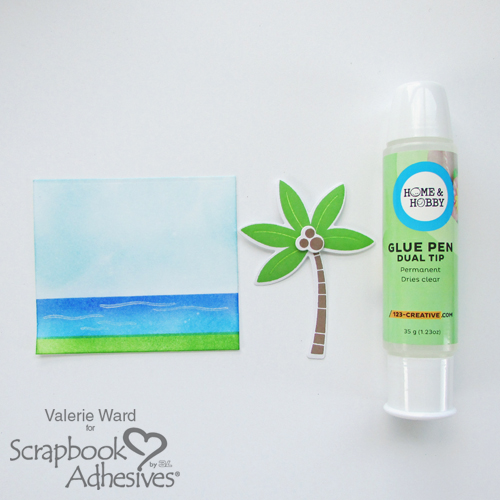
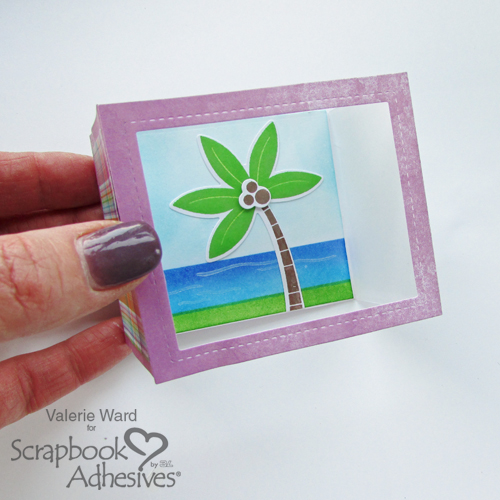
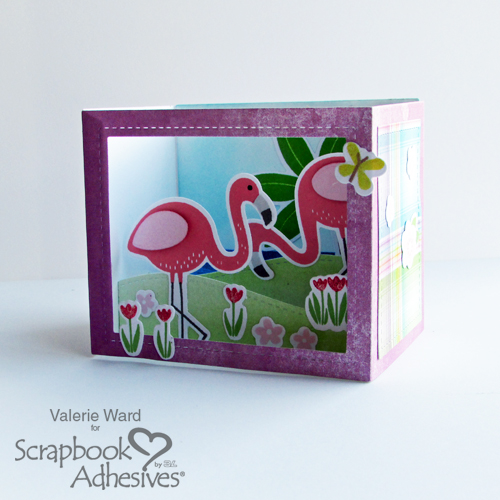
Trim approximately 3.25 x 2.75″ piece of paper (same size as the inside back panel of the card) and create a scene of your choice (mine was the ocean). I had a palm tree die cut made from that fun flamingo die set and adhered it with the Dual Tip Glue Pen onto the scene. Finally, glue the scene onto the inside back panel.
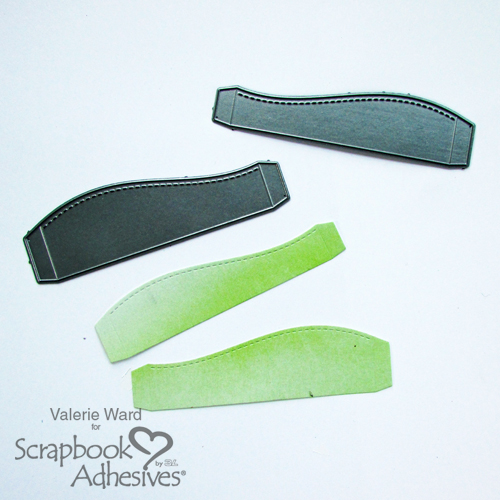
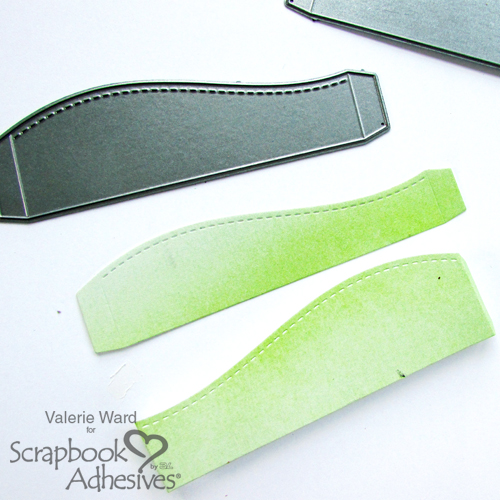
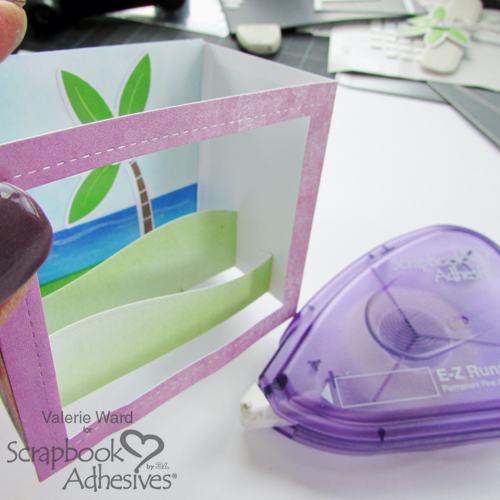
Step 4 – Layered Grass Hills inside the Box
Let’s bring this card to life! Die-cut both the hill shape dies provided in the card die set with white cardstock and color them with markers.
Taking a bone folder, fold the end flaps toward the back and away from you.
Apply E-Z Runner® Permanent Fine to the flaps and attach them to the inside to build your scene.
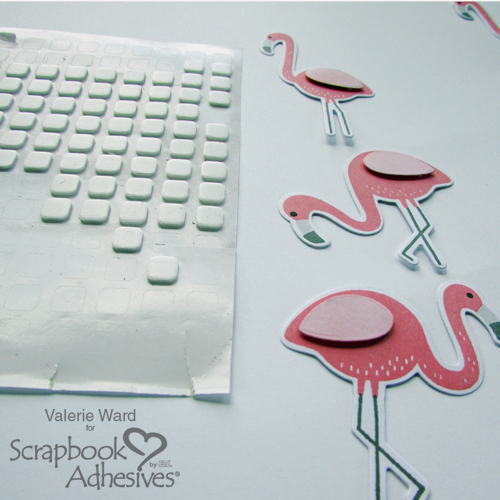
Step 5 – Dimensional Flamingos
What a fun addition of flamingos to the card! I gave their wings dimension using 3D Foam Squares Small White. Perfect!
Step 6 – Elements on the Outside
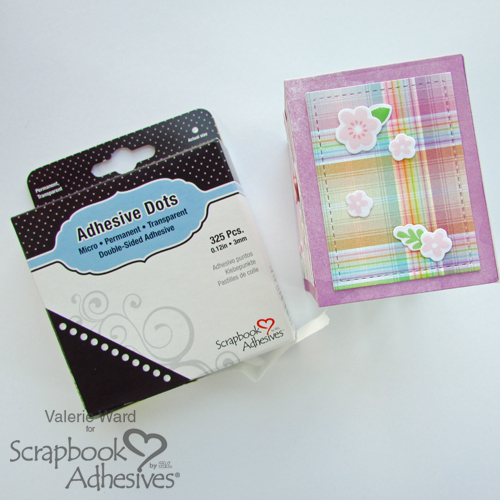
With my Adhesive Dots Micro, I attached the flowers to the side panels. Adding a little spring to my card 🙂
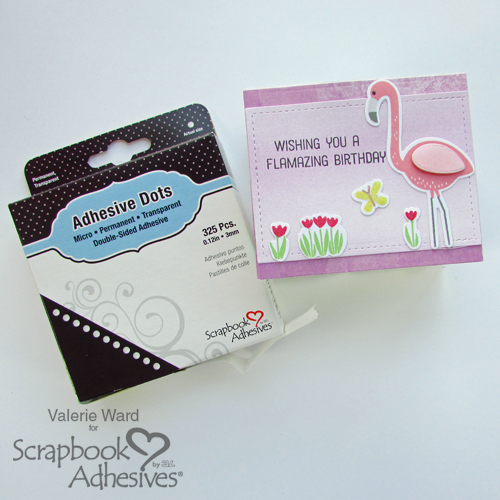
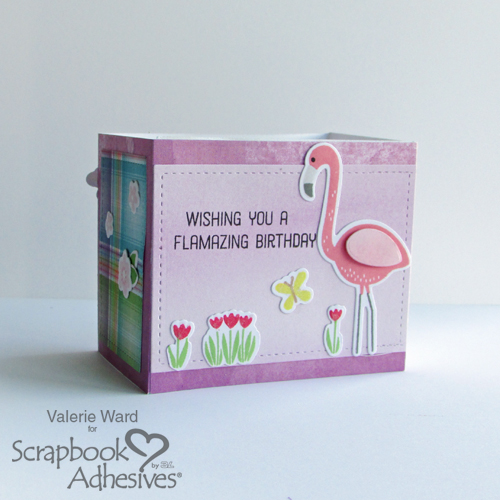
On the back side of the card, I decided to create a spring scene by stamping a sentiment and attaching elements with my Adhesive Dots Micro.
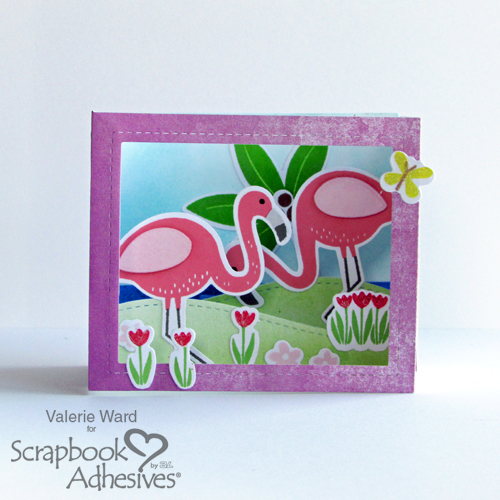
The Completed Card
Love that the card folds up completely flat so it can be out into a standard A2 sized envelope!
Here is the front view:
The view from the top:
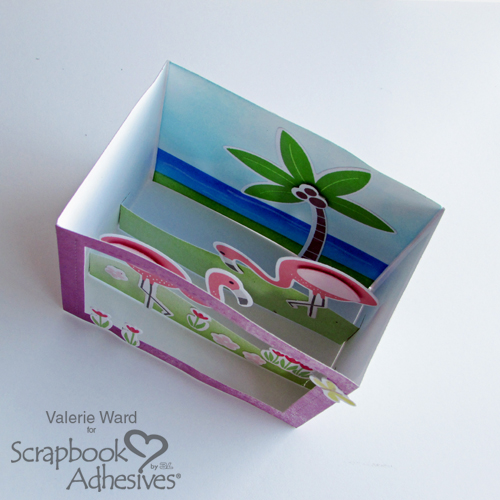
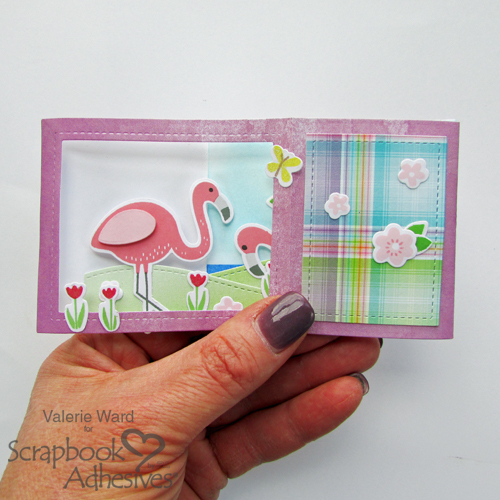
As you move the card around, it’s fun to see the different elements inside!
Then an element of surprise as you discover the sentiment and another scene on the back!
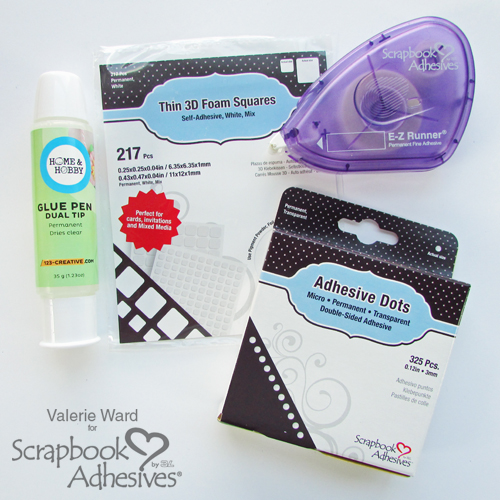
These are the Scrapbook Adhesives by 3L® products I used for this project. Note that I have the Thin 3D Foam Squares pictured. If you wanted less bulk, these would be a perfect solution! They are half the thickness than our 3D Foam Squares!
Thank you for stopping by; I hope you enjoyed this tutorial. Have a wonderful day and Happy Crafting!
Creative Time: 50 mins/Beginner-Intermediate Level
Materials Needed:
Scrapbook Adhesives by 3L®:
E-Z Runner® Permanent Fine
3D Foam Squares Small White
Adhesive Dots Micro
HomeHobby by 3L®:
Dual Tip Glue Pen
Other:
3D Box Die Set, Flamingo Die Set, Patterned paper, Markers