
Hi everyone! Do you like cute and funny cards? Yvonne here today sharing a birthday card featuring Crafty Foam Tape White and Adhesive Dots.
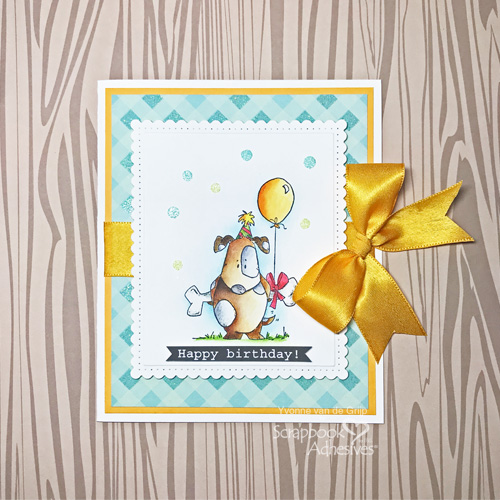
I love cute stamps and being a dog lover I chose a doggy stamp for today’s birthday card. And with happy and bright colors added…well…who would not get a big smile on their face receiving this card? Let me show you how to make the card. So….are you ready?
Making the Card Base
First, mount a piece of patterned cardstock onto yellow cardstock using the E-Z Runner® Grand Refillable Dispenser.
To adhere the ribbon, run the E-Z Runner® Grand Refillable Dispenser onto its back.
After wrapping the ribbon around the layered panel, fold the ends to the back of the panel and then adhere the panel to a white card base.
Now stamp the cute dog image onto cardstock and color the image. (Because I chose watercolors for coloring I used watercolor cardstock).
After coloring, die-cut and emboss the image.
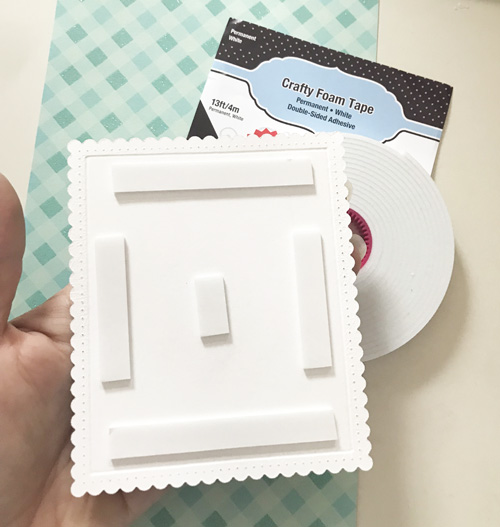
To create an extra dimensional layered panel on the card, adhere some Crafty Foam Tape White to the back of the die-cut. Then remove the line and adhere to the card base.
Embellishing the Card
First I printed a happy birthday banner and cut it to the right size using a paper trimmer and scissors so it will fit the card best.
Then to adhere the sentiment right under the stamped image. For this you best use some Crafty Foam Tape White (which you cut into small stripes so it will not be sticking out from under the birthday sentiment).

Now adhere some Adhesive Dots Micro and Adhesive Dots Mini onto the card. (I put them around the head of the dog so they look like bubbles). Next, you remove the liner from some of the Adhesive Dots and then sprinkle some blue glitter upon and gently rub over the Adhesive Dots. As a result, the glitter will stick better to the Adhesive Dots.
Next, you remove the liner from the other Adhesive Dots and sprinkle some green glitter upon. Work color by color because this way your glitter colors will not get mixed up on your card and as a result, you will get clean (single color) glittered Dots.
Finally, finish the card by adding a satin bow which I adhered using Adhesive Dots.
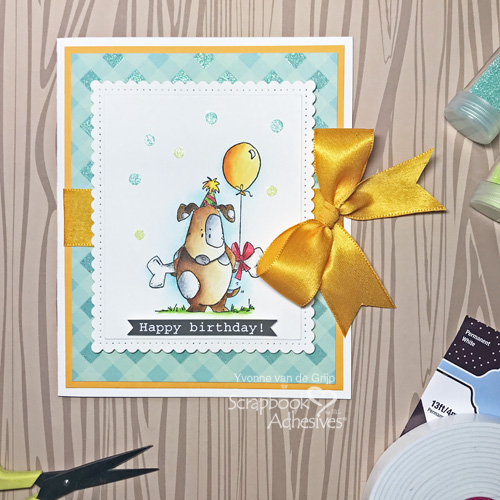
And voila…. now your cute doggy birthday card is ready so you can give it to someone special!
Creative Time: 90 minutes (with coloring time)
Creative Skill: Intermediate
Materials Needed:
Scrapbook Adhesives by 3L®:
E-Z Runner® Grand Refillable Dispenser
Crafty Foam Tape White
Adhesive Dots Micro
Adhesive Dots Mini
Other Supplies:
Edged Dies: Spellbinders® Paper Arts (Fancy Edged Rectangles), Cardstock (Watercolor, White, yellow, patterned), Whipper Snapper Designs (stamp Birthday Surprise), Ribbon, glitter, Paper Trimmer, Scissors
Visit our Website and Blog!
Sign up for our Newsletter so you never miss a contest or giveaway!


